100 miles on White Rim Road
After four days, and three nights of winding along the edge of towering canyon walls, camping in complete silence, and watching the sun rise over some of the most remote landscapes we have ever experienced, we quickly understood why the White Rim Road 4×4 drive is considered one of the most iconic overlanding routes in the United States.
This 100 mile backcountry road loops through Canyonlands National Park and takes you deep below the Island in the Sky mesa onto a rugged route filled with dramatic overlooks, remote campsites, and views of the Colorado and Green Rivers.
In this guide, we share our exact 4 day White Rim Road itinerary from late April 2026, including permits, campsites, road conditions, packing tips, and everything we wish we knew before going.
Table of Contents
White Rim Road Permits & Campsites
White Rim Road requires permits for both overnight and day use trips.
If you plan to camp along White Rim Road, you will need an overnight permit. During the spring and fall seasons, permits can book up quickly and often sell out months in advance. We booked our spring 2026 campsites nearly six months before our trip.
Day use permits are also required for all vehicles, motorcycles, and bicycles driving White Rim Road in a single day. If you are completing the drive as an overnight trip, you do not need an additional day use permit.
Before permits opened, we studied maps of the route and reviewed all of the campground options so we could create multiple campsite plans depending on availability. Our goal was to spread out the driving enough to fully enjoy the experience without feeling rushed each day. We used the chart below from Canyonlands NPS to help plan, aiming for about 3-4 hours of driving each day.
All backcountry overnight permits become available on a seasonal basis, four months before the start of the season on Recreation.gov.
- Spring permits (March 10 – June 9) open November 10.
- Summer permits (June 10 – September 9) open February 10.
- Fall permits (September 10 – December 9) open May 10.
- Winter permits (December 10 – March 9) open August 10.
Which Direction Should You Drive White Rim Road?
White Rim Road can be driven either clockwise or counterclockwise. We chose to drive clockwise starting at Shafer Trail and ending at Mineral Bottom Road. The main reason we chose this route is because we wanted to go down Shafer trail. We had seen the road and switchbacks from the top multiple times and dreamed of going down and camping. Additionally, the Green River can swell in spring (usually mid to late May) due to snow melt from the mountains. White Rim Road can become impassible shortly after Hardscrabble Bottom when the sand turns to a dangerous mud because of the overflowing river. Because we booked in early November before winter snow, we weren’t sure what the river would do in the spring; and if we had to turn around after Hardscrabble, we wanted to at least experience most of the road.
However, the 2025-2026 winter snowpack in the Rocky Mountains was one of the worst ever and the Green River did not swell during our trip, and we’re pretty sure it didn’t later in May. Overall, route choice often comes down to personal comfort level, road conditions, campsite availability, and where you are able to secure permits.
White Rim Road Weather and Packing
There is a lot to consider when preparing for time on White Rim Road. The long road and spaced out campsites are at different elevations; and each location can have different weather influence because of factors like nearby canyons, rivers, cliff edges, sun exposure, etc. We used weather.gov to get the most accurate weather prediction before our trip. In remote areas like this the weather forecast can change a lot in the build up. We found that the final 2-3 days leading up to our trip were the most accurate prediction. Each campsite below has a link to their specific weather forecast.
Additionally, we selected to go at the end of April because historically the day time temperatures are very nice with cool evenings and rain is less frequent. However, this time of year can be windy as seasons shift during the spring. The open spaces and minimal trees leave you quite exposed to wind along with cliff edges and canyon wall that are often windy locations.
We packed clothes for cold nights and mornings, sunny and warm days, and we made sure to be prepared for unexpected changes like rain.


Vehicle Prep and Gear for White Rim Road
Without rain, White Rim Road is very dusty! We knew this prior to our trip and wanted to make sure our gear stayed protected. Our truck bed is not dust or waterproof but we do keep most of our sensitive gear like camp kitchen and sleeping goods in Roam Adventure Co Rugged Cases that are dust and waterproof. Additionally, we use a protective case around our Dometic CFX electric cooler; although not dustproof, it helps protect from dust build up. For this trip we tried to keep our clothes bags in our backseat, but we still used our Patagonia Black Hole duffel bags to protect from dust and water.
Our top concern was ensuring we had enough drinking water. We brought four Dometic GO Hydration Water Jugs, each holding about 11 liters/2.9 gallons of water. In addition to fuel concerns we address below, we were sure to bring recovery gear for ourselves or others along the road.
White Rim Road is 100 miles long if you do the full loop; it’s about 23 miles from the closest gas station to the start of Shafer Trail; and overall, it’s about 145 or more miles from the gas station and back. Our Tacoma with its setup averages about 225 miles of fuel range on a full tank gas, on paved roads. However, fully loaded with gear and water, low tire pressure, consistently slow driving speeds, and steep hill climbs we knew our average MPG would be much less and overall our range would be much lower. With that in mind we brought about 8 gallons of gas in two Rotopax 4-gallon fuel packs.
Originally we planned to mount our fuel packs on the roof, but decided that was unwise because they would need to be consistently aspirated due to temperature changes with sun exposure, cold nights, and pressure swings with elevations changes. We ended up using only 4 gallons out of precaution. We probably could have made it to the gas station at the bottom of the mesa, but we didn’t want to risk it.
Leave No Trace on White Rim Road
Before starting White Rim Road, it is important to remember that Canyonlands is an extremely remote and fragile desert environment. One of the most important Leave No Trace principles in the area is “Don’t Bust the Crust.” This refers to avoiding the dark, crunchy cryptobiotic soil found throughout the desert that helps prevent erosion and supports plant life in an environment where resources are already limited.
A single footprint can damage growth that took decades to form, which is why staying on designated roads, trails, and durable surfaces is so important in the desert.
We also packed WAG bags, carried extra water, and made sure to leave campsites cleaner than we found them. With no services once you leave the pavement, preparation and respecting the landscape are both incredibly important.
Day 1: Shafer Trail Start
We drove from Phoenix to Moab the day before starting White Rim Road and stayed in an Airbnb to help break up the drive. The next morning, we woke up early, filled our RotopaX with extra fuel, aired down our tires, and officially started the trip around 9:00am.
We chose to drive clockwise beginning with the Shafer Trail switchbacks. Descending Shafer felt much less intimidating than we expected. Watching the road weave down through the canyon was a pretty incredible way to start the trip.
The Shafer Trail is one of the most iconic roads in Canyonlands National Park, descending roughly 1,500 feet from the Island in the Sky mesa to the canyon floor below. According to the National Park Service, the route has served many purposes over the years, from a pathway used by Native Americans to access resources on the mesa top to a road used by sheep herders and later uranium mining trucks.
Today, the Shafer switchbacks are a challenging unpaved backcountry road that many travelers use to access White Rim Road below. The steep descent winds roughly 5 miles down the canyon walls before eventually reaching the canyon floor.


White Rim Road
At the bottom of the Shafer switchbacks, the route eventually connects with White Rim Road. From here, permits are required for both overnight trips and day use travel along the White Rim.
If you do not have a White Rim permit, you can still descend Shafer Trail and continue out toward Moab using Potash Road instead of continuing deeper into Canyonlands.
Before our trip, we downloaded offline maps on OnX Offroad since there is little to no service once you leave the pavement. We’ve been using OnX for years for hiking, camping, and off road trips and highly recommend downloading maps ahead of time for White Rim Road.
If you want to try it yourself, you can use our code AZHIKE20 for 20% off.


Shafer Trail to Gooseberry
From the Shafer to Potash Junction, we officially began our journey along White Rim Road toward our first reserved campsite, Gooseberry B. On our first day covered roughly 28 miles from the top at the start of Shafer Trail all the way to Gooseberry.
While Airport Campground comes earlier along the route, we chose Gooseberry B because it helped us better space out the remainder of the trip.
Along the drive, we stopped at Musselman Arch, one of the most iconic viewpoints on White Rim Road. The narrow rock arch stretches high above the canyon below and makes for a fun and quick stop early in the drive. From there, we continued past Airport Campground and made our way toward Gooseberry Campground for the night.


Musselman Arch to Gooseberry


Airport Campground


Gooseberry B Campsite
The Gooseberry campground has two campsites, A and B, one on each side of the road. Campsite B seemed to have more open space compared to A, so we’re happy that’s the one we picked. Beyond campsite A on the other side of the road was the white rim and epic views of the La Sal mountains in the distance. Behind us was the White Rim Overlook on the Island in the Sky Mesa. We could made out people’s figures on the rim above us.
Surprisingly, we had cell phone signal on Verizon Wireless; it was weak but at times the data was strong enough to use the internet and apps. The weather the day before was cold and rainy. There was still some residual cold front in the area and we had a windy evening and night. Overall, our night at Gooseberry was the coldest for us on the trip. Sleeping with earplugs that night was an amazing help! There are vault toilets here.
Weather forecast at Gooseberry via weather.gov


Day 2: White Crack and Murphy Hogback
Gooseberry to Candlestick
On our second day, we drove a little over 28 miles, including a short detour to White Crack.
Overall, this felt like our most exhausting driving day. Our average speed was only around 5.5 mph and the climb up Murphy Hogback was one of the biggest challenges of the trip. The road was steep, narrow, and rough with a cliff wall on one side and a steep drop off on the other.
Throughout the drive we stopped at overlooks we liked and were cautious when we couldn’t see the obstacles ahead. We decided to detour down White Crack Road over to the campsite and overlook. It was about 1.4 miles one way according to the National Park Service. The view was amazing and we could see into the Needles District of Canyonlands National Park. We also made lunch here!


White Crack, White Rim Road


Murphy Hogback
After White Crack we had the steep Murphy Hogback climb coming up next. On Murphy Hogback, our friend Jesse from Arizona Camper Van spotted us from below as we climbed the hill. He was able to warn us over walkie talkie about motorcyclists on their way down. We could not see them over the steepness of the road, but immediately hit our horn to alert them. The pulled to the side and we pulled our mirrors in and squeezed past them. The drive down wasn’t as challenging but was steeper than we were expecting.


Candlestick Campground
After a long day of driving, Candlestick Campground ended up being one of our favorite campsites of the trip. Across from camp was a short walk to an expansive overlook above the Green River where we sat quietly watching the sunset. This was the only campsite in this area, which was really nice because it was extremely peaceful. Like every campsite, there are vault toilets here. This site is quite exposed with no trees or natural walls to protect from wind and sun. There is no cell service here.
Weather forecast at Candlestick via weather.gov


Day 3: Hardscrabble Hill and Bottom
Candlestick to Hardscrabble Bottom
Distance wise, our drive to the Hardscrabble Bottom campground from Candlestick was the shortest, just 15 miles. However, ahead of us was the challenge we were most concerned about, Hardscrabble Hill. Based on our research this was going to be the greatest stress of our drive. Although a two-way road, it’s narrow with cliff edges and rock walls, the road quite steep in some sections with sand or large rocks, and many of the turns are blind.
We managed to get through the road without meeting any oncoming traffic. Once we to the top of the hill we came across a mountain biking tour. The guide let us know their support truck, a large F-250 dually was coming through and that we should pull over. Taking his advice we did pull over and wait, but there was plenty of space.
After the support truck passed it was downhill to Hardscrabble Bottom, right along the banks of the Green River.


Hardscrabble Bottom Campground
Hardscrabble Bottom is right along the Green River and you can see the campsite from top of Hardscrabble Road. In fact, at camp we could hear cars and bikes above and would look up to try and spot them. Although there were some bushes and trees along the river, our site at Hardscrabble Bottom B didn’t have any shade trees. But, we were closer to the river than campsite A with a short excursion down to a very small beach on the river bank.
We booked our campsite before we found out that the toilet at campsite B was out of service so for a vaulted toilet we had to walk a half mile down the road to use A. During our trip there were no campers at A so we didn’t have to worry too much about disturbing others.
Weather forecast for Hardscrabble via weather.gov


Day 4: Departure
Hardscrabble Bottom to Top of Mineral Bottom
This was our final day on White Rim Road and we needed to get back home To Phoenix in the same day. From our campsite back to pavement was about 24 miles. We were up early this morning, packed up, added some fuel to our tank, and made our way out. Although we had a long day of driving ahead of us, we still wanted to make sure we could stop at scenic views and the visitor center.
From Hardscrabble Bottom the road follows the Green River for a bit to Mineral Bottom road, and then it climbs switch backs to the top of the mesa. The road leaves the Canyonlands National Park boundary along the side of the river and enters into Bureau of Land Management (BLM) land. The rest of the drive is through BLM land and ends outside of the park. We aired up our tires at the end of the road before getting back on the asphalt. From the end of Mineral Bottom road back to the visitor center is about 9 miles.


Additional Links
Below are links to other posts on our website with curated gear recommendations and other ideas for things to do in Moab, Utah if you can’t do White Rim Road.

Women’s Summer Hiking Clothes (Trail-Tested Picks)
If you’re gearing up for warm weather hikes, this guide is golden! It highlights top women’s hiking clothes focused on comfort, durability, and sun protection.

The AZ Hikeaholics Top Gear Recommendations
Gear for the trail ranges from what’s in our pack to what’s on our back and feet. Here you’ll find what we trust and bring,

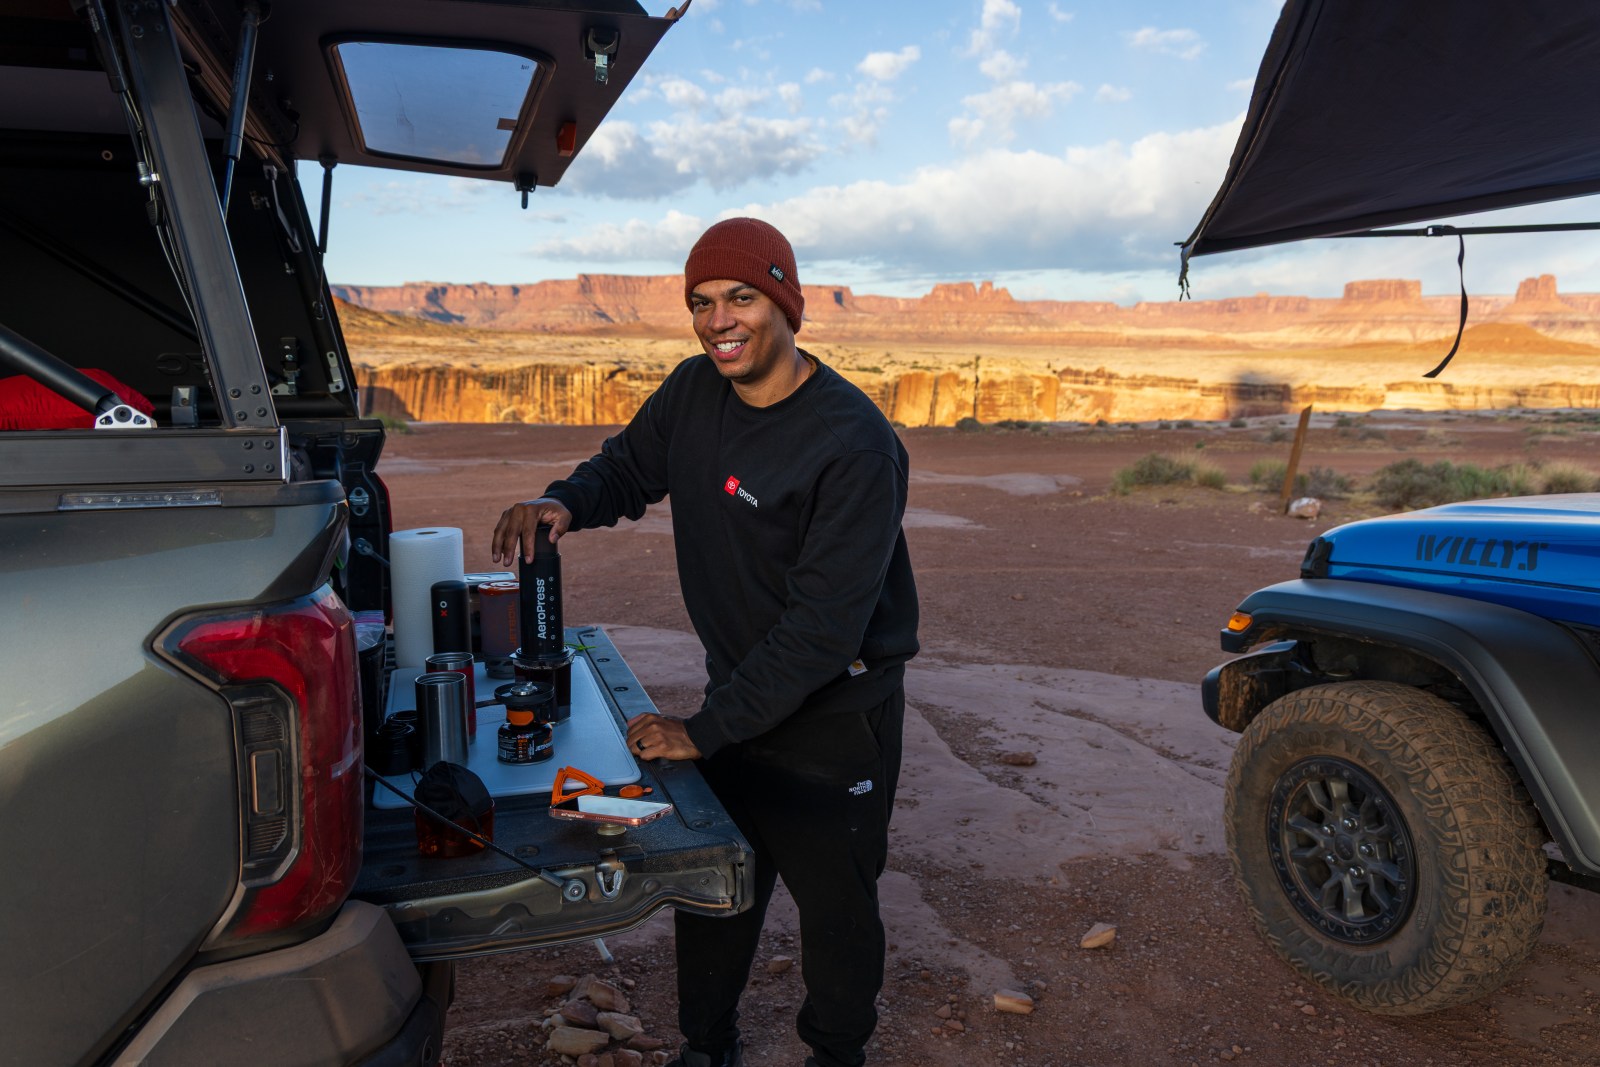
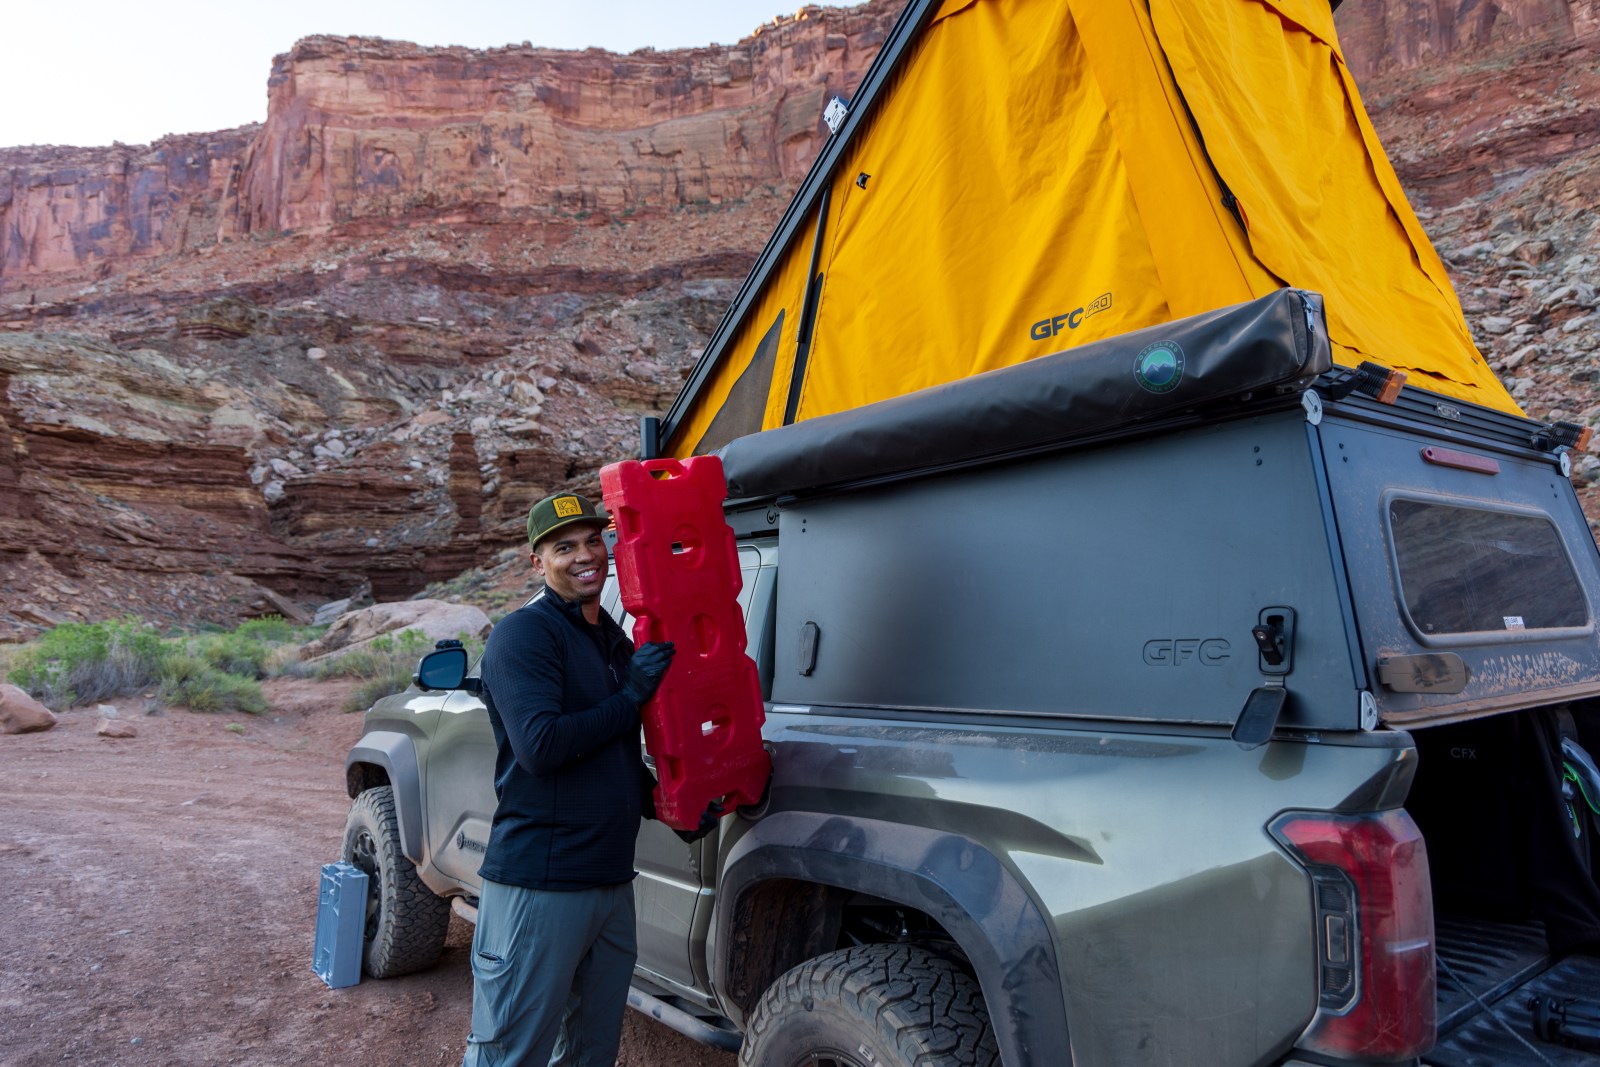
Camping Checklist: What to Bring and How to Get Started
The Ultimate Camping Checklist: Gear and Tips Planning a camping trip? This camping checklist covers all the essentials — from tents and sleeping bags to

3 Days in Moab, Utah: Arches & Canyonlands Itinerary
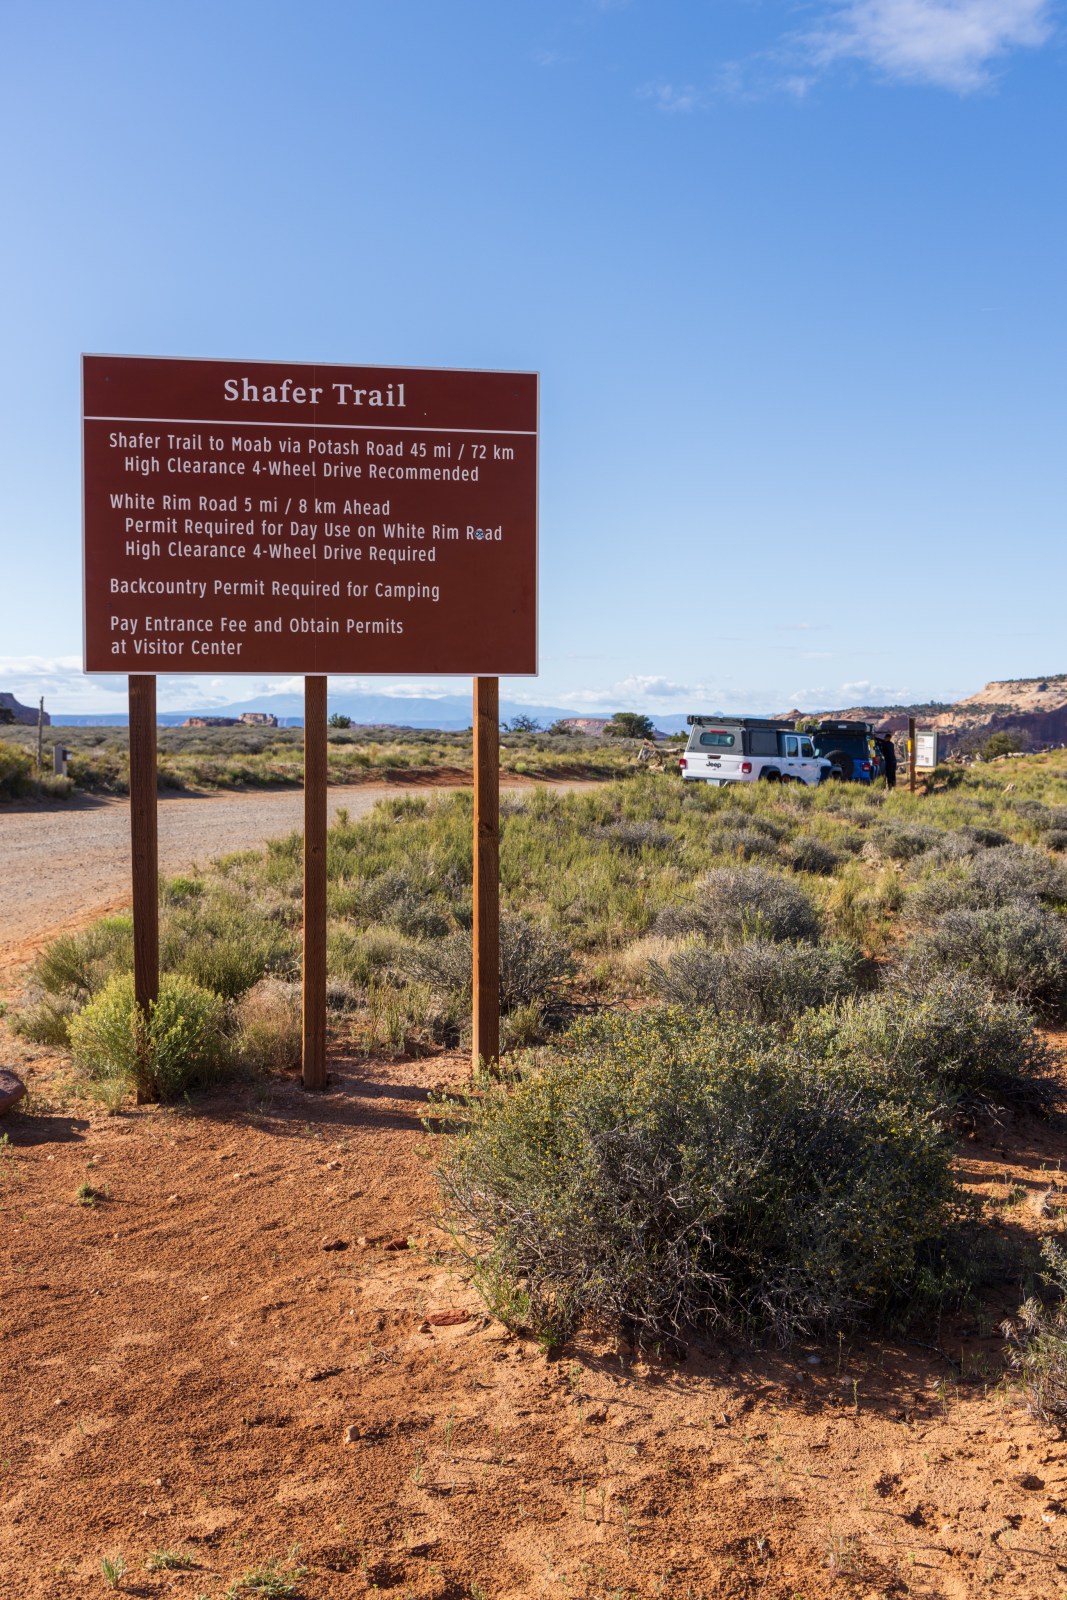
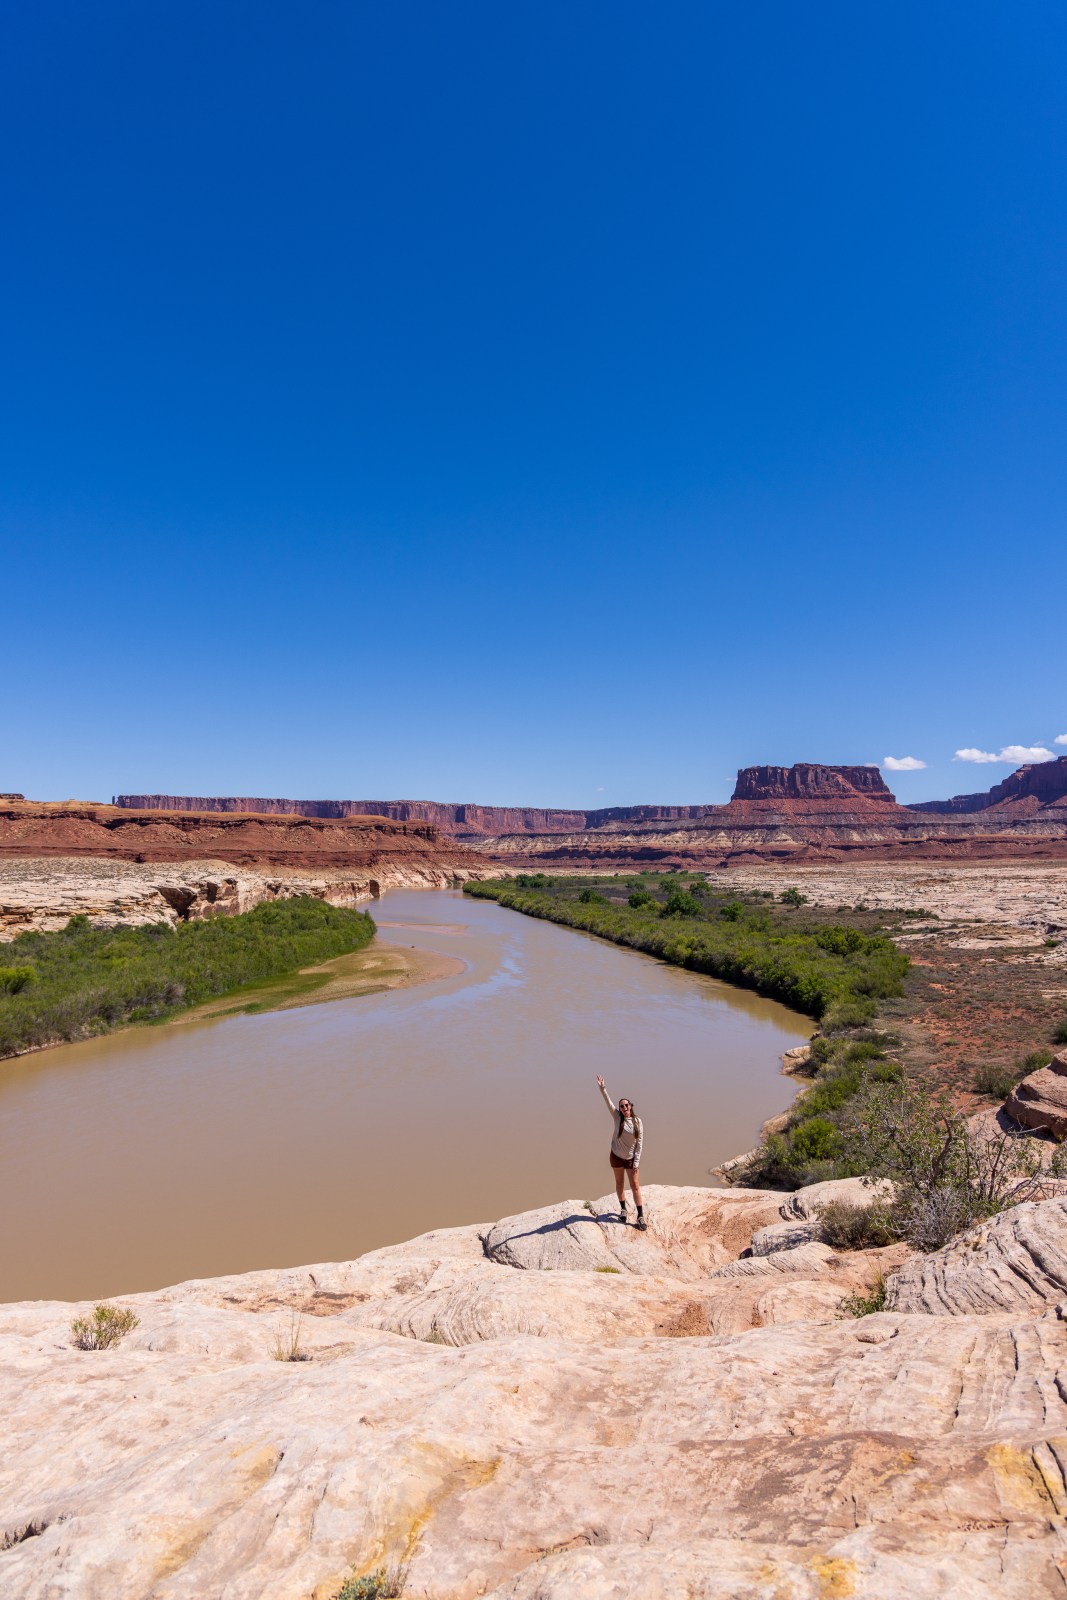
An adventure-packed, three-day itinerary for Moab, Utah. This trip explores Arches National Park and Canyonlands National Park seeing beautiful geological and human history. From the

Capitol Reef National: Multi Day Itinerary
In May 2022, we set out from Phoenix to explore Capitol Reef National Park in Utah, the last of the Mighty 5. The park’s geological

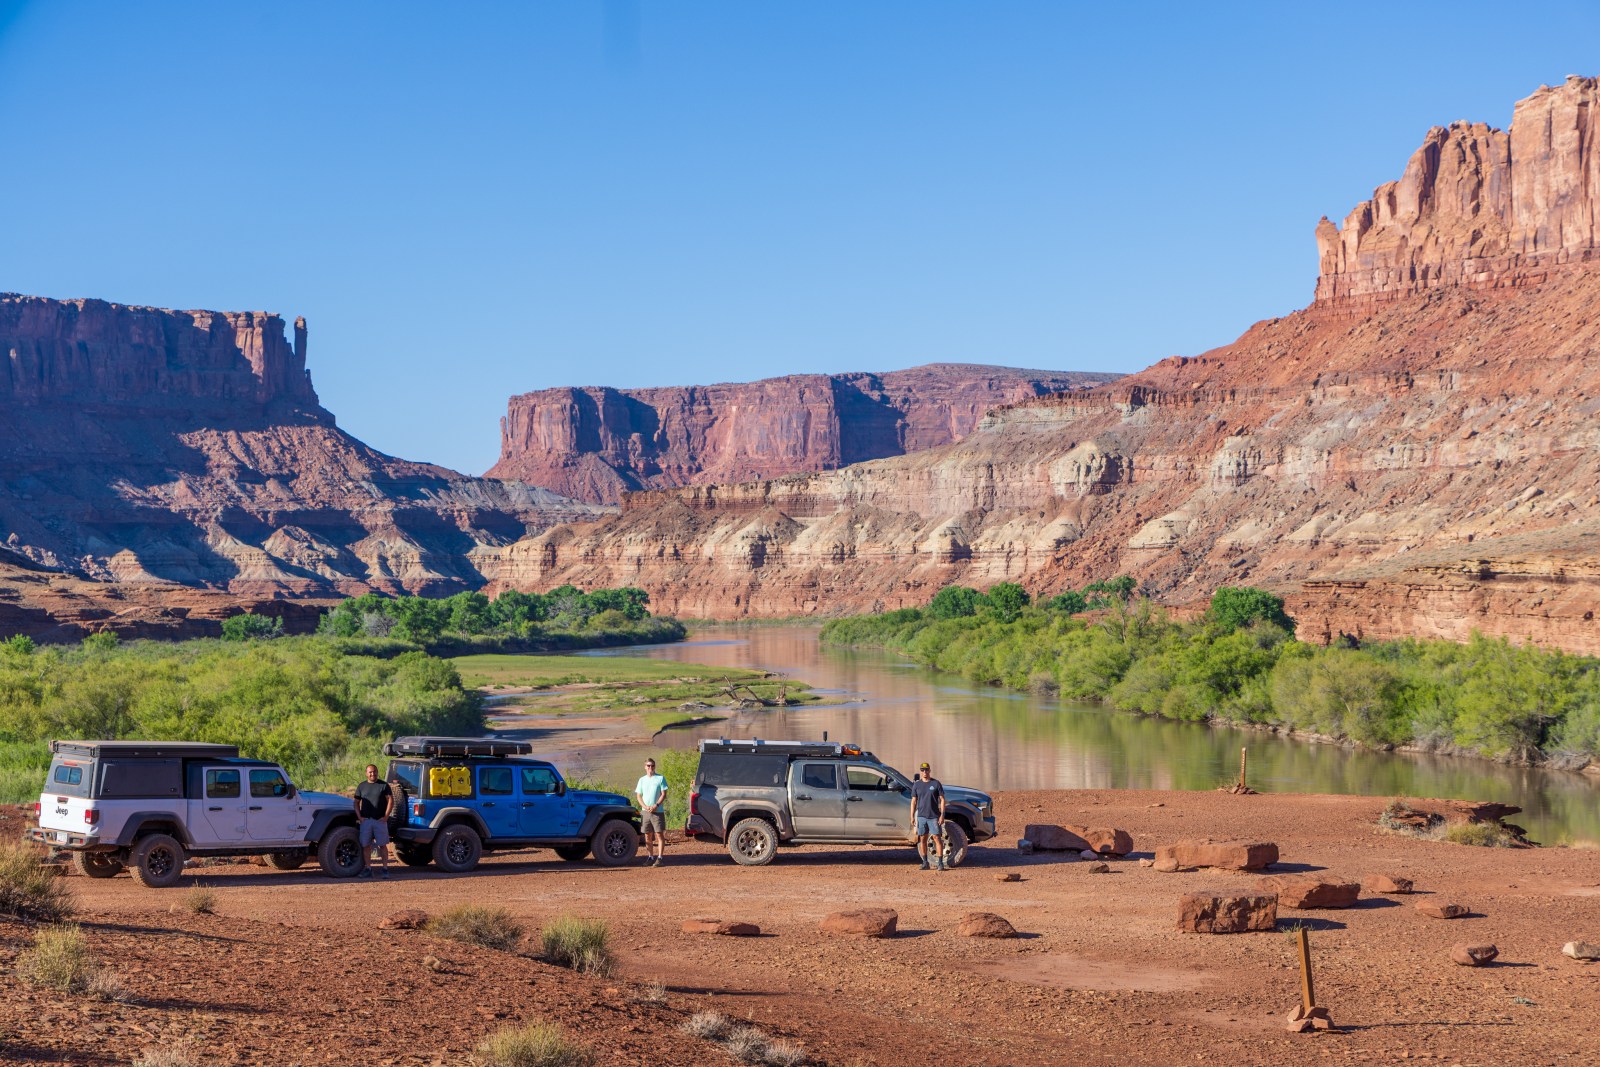
Extended Weekend in Moab, Utah
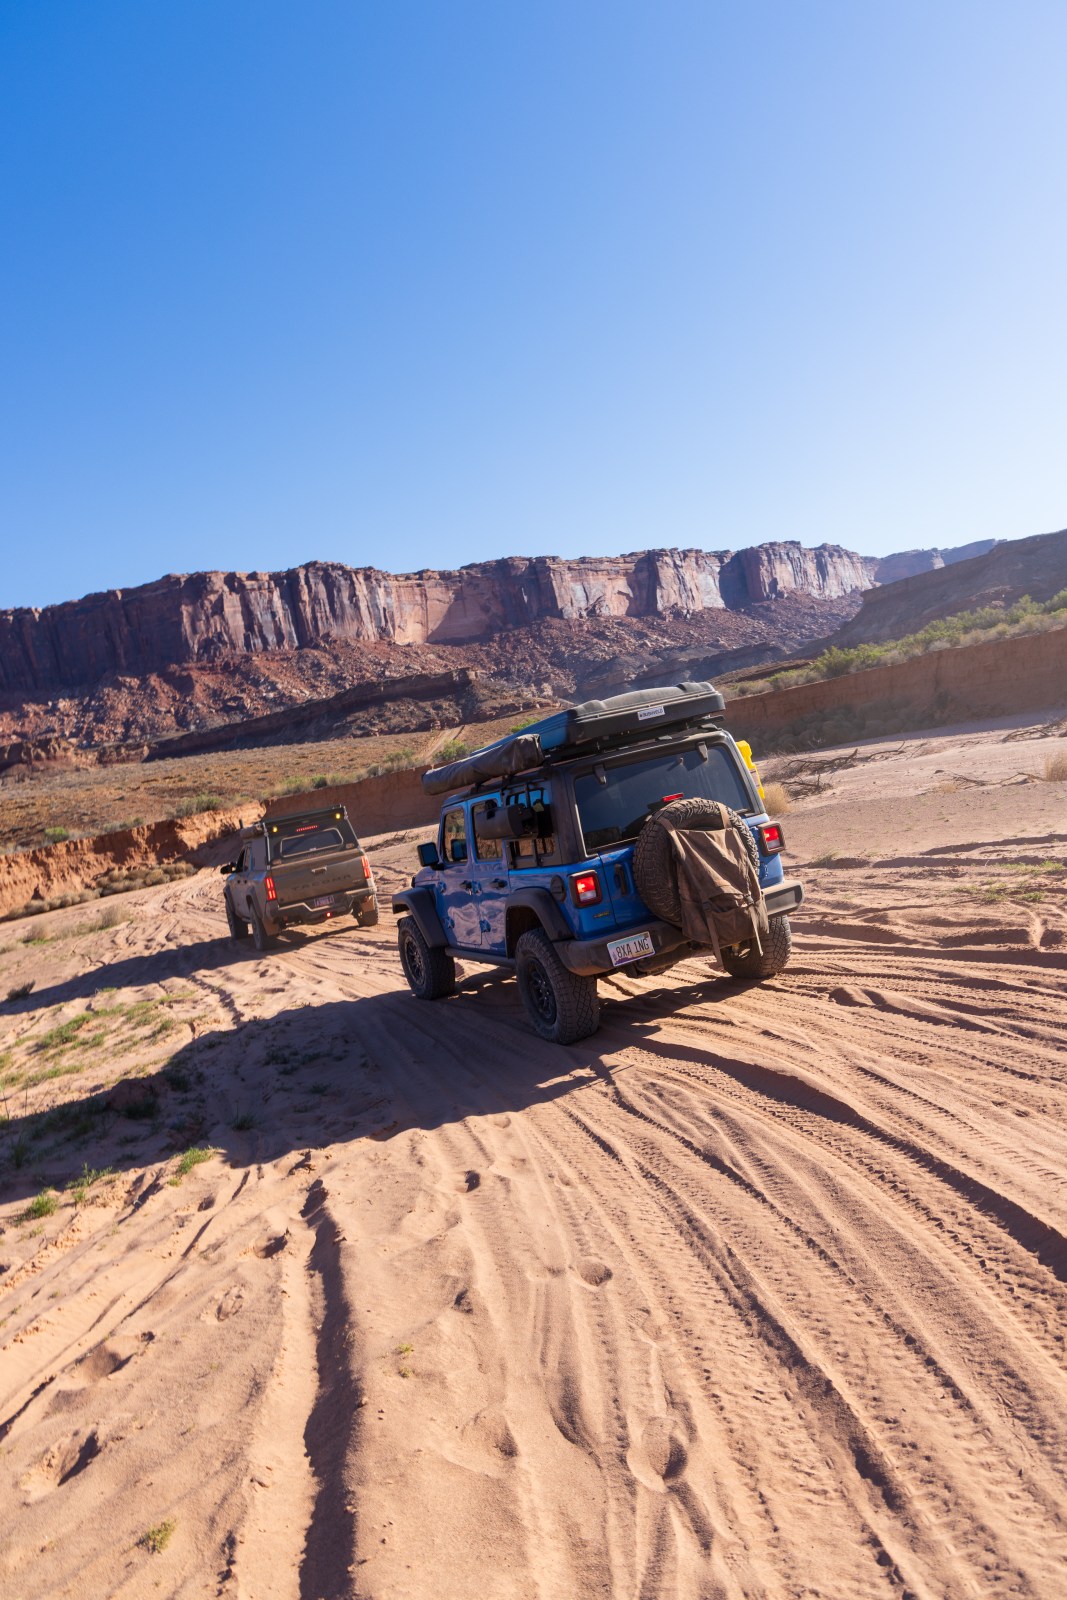
Canyonlands National Park, Arches National Park, Moab Summary We understand why people love Moab, UT. It’s a simple sentence for a sophisticated region of the
Thank you so much for reading our post and supporting us! Some links throughout the newsletter may contain affiliate links to gear we use. When you use our links you’re supporting us without any additional cost or fee to you 🙂