

What Is the Grand Canyon Rim to Rim Hike?
Last updated: March 2026
Before attempting the Grand Canyon Rim to Rim hike in a single day, there are several important factors, logistics, and trail details to consider. In this guide, we’ll walk you through how we planned our hike, what we packed, and key tips we learned along the way. While we don’t provide a specific training plan, we’ll share what kind of fitness and preparation to expect.
Please check with the parks website for updated trail information.
Important Update for 2026
The North Rim of the Grand Canyon is set to reopen for the 2026 season following significant impacts from the Dragon Bravo Fire. While access to the North Rim and the North Kaibab Trail is expected to resume, services and amenities are limited. The Grand Canyon Lodge and cabin lodging are not available, and some areas, including Bright Angel Point, remain closed. Trail conditions and services may continue to change, so it’s important to check current updates before planning your hike.
Alternative Options to Rim to Rim
While rim to rim hiking is expected to be possible again for the 2026 season, it may still be more limited than usual due to reduced services on the North Rim. If you’re unable to complete a full rim to rim hike, there are still plenty of incredible ways to experience the Grand Canyon.
Many hikers opt for a rim to river hike in one day from the South Rim, using either the South Kaibab Trail or Bright Angel Trail. Some choose to go down and back on the same trail, while others create a loop using both.
There are also other routes into the canyon, including the Hermit Trail, which connects to multiple backcountry camping areas. We backpacked to Hermit Creek in March 2025, and it was easily one of our favorite experiences. While it’s not recommended to hike all the way to the river and back to the rim in one day, camping below the rim is an incredible experience if you can plan for it.

Leave No Trace
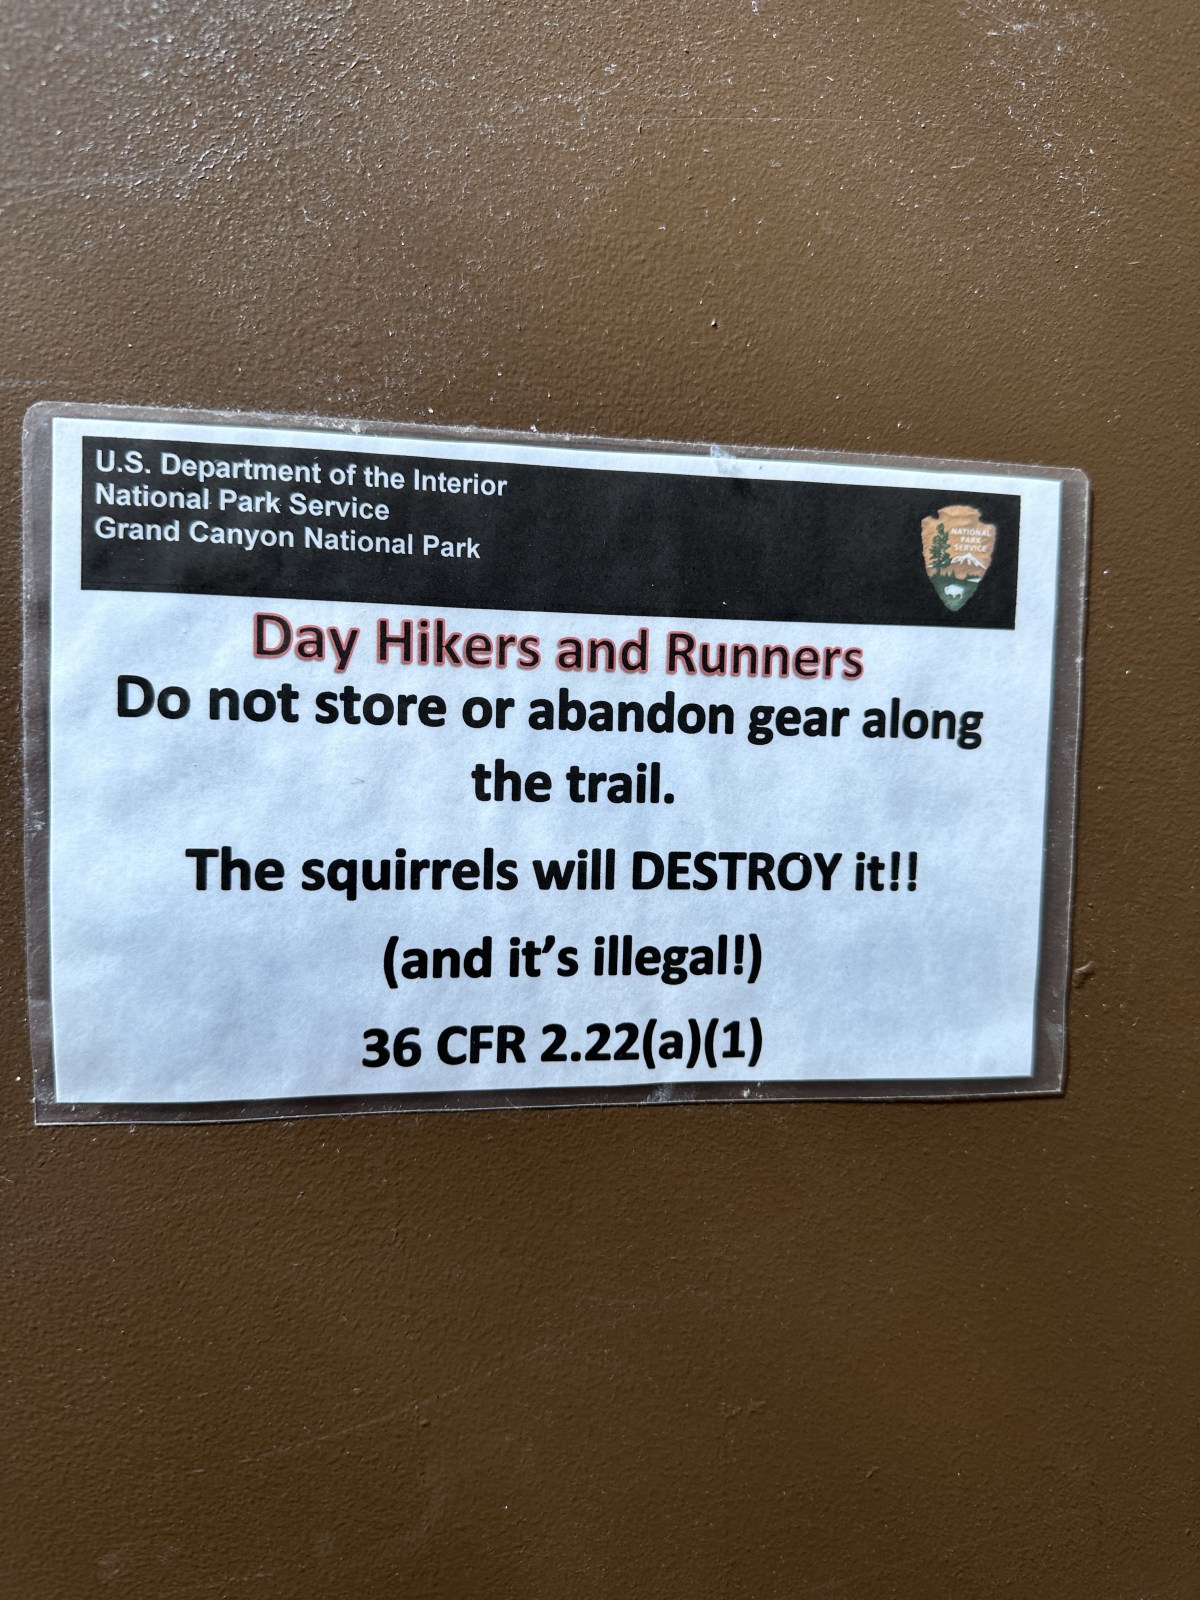
It’s important to remember to Leave No Trace while exploring the Grand Canyon. The more prepared you are the more likely you will be to Leave No Trace. Be sure to pack out all of your trash including food, tissues, etc. The squirrels in the grand canyon are no joke! If you leave your pack on the ground they will tear a hole in it to get to your food. Please remember to not feed the squirrels and don’t leave fruit peels and other food on the ground. This will motivate the squirrels to continue to be aggressive and get into people’s packs.
The Basics
Rim to Rim — also known as R2R — means hiking from one rim of the Grand Canyon to the other, typically from the North Rim to the South Rim (or vice versa). This is considered backcountry hiking, and it can be done as either a multi-day trip or a strenuous one-day challenge.
If you want to spend a night in the canyon, you’ll need a highly sought-after backcountry permit to camp at one of the designated campgrounds. Another option is staying at Phantom Ranch Lodge, though reservations are extremely limited and hard to get.
That said, many hikers choose to complete the Rim to Rim hike in a single day. No permit is required if you’re not camping or staying at Phantom Ranch, just solid preparation and a lot of determination. This blog post covers how we did exactly that.

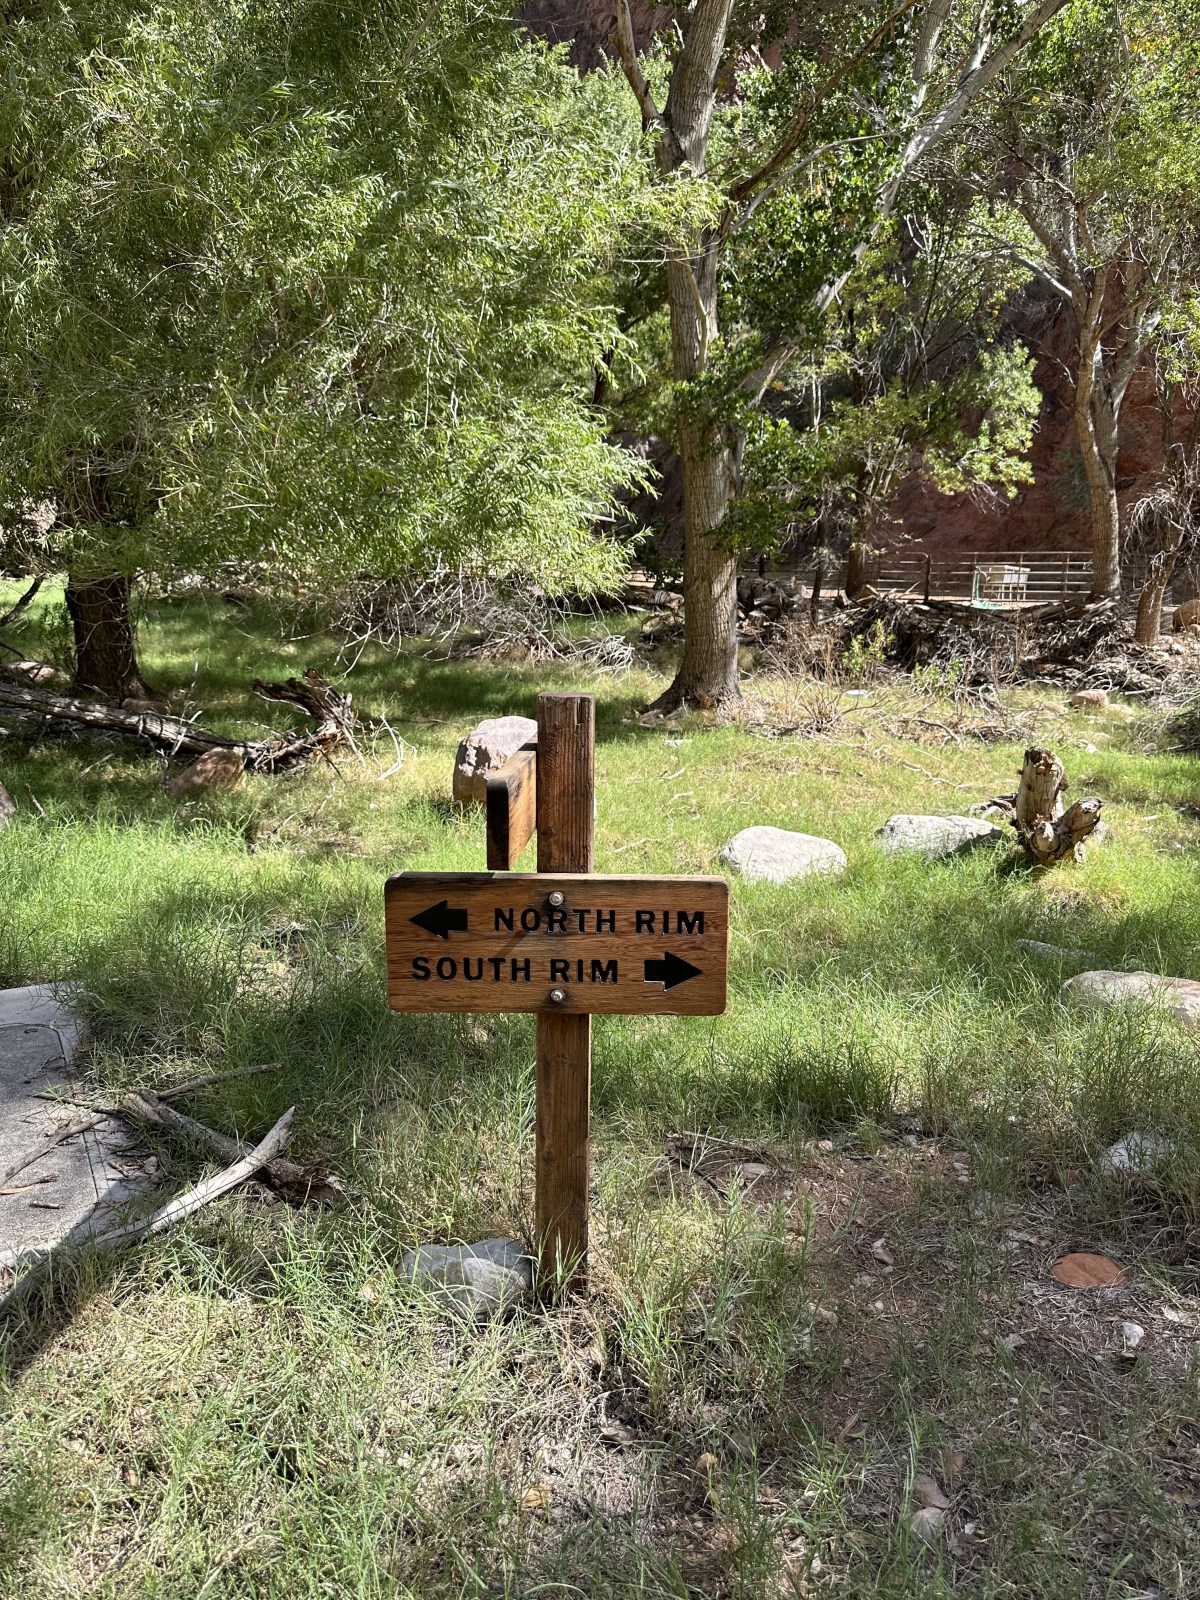
Now that you know what Rim to Rim is, you need to know that there are three different trails, one is required and you can pick from the other two. On the north half, North Kaibab Trail runs from the North Rim Lodge to Phantom Ranch. At Phantom Ranch you can choose from either Bright Angel Trail or South Kaibab Trail to cover the southern half of the canyon, both leading you to Grand Canyon Village on the South Rim. We hiked from North to South taking North Kaibab to Bright Angel – we’ll explain why later on!
Click on the image or here to get the full pamphlet to review, courtesy of the National Park Service
Essentials To Know:
Trail Distance
The Rim to Rim hike in Grand Canyon National Park ranges from about 20 to 24 miles, depending on which trails you take:
- South Kaibab + North Kaibab: ~20 miles
- North Kaibab + Bright Angel: ~24 miles
Water & Bathroom Access
There are restrooms and water spigots along the trail, but do not rely on them blindly. The Grand Canyon’s water lines are old and prone to failure. Temporary outages happen regularly, especially during the hotter months. Always:
- Check current water availability on the NPS website
- Carry backup water (or a filter)
- Don’t assume water will be available, especially below the Rim
Elevation & Physical Challenge
- The first half of the hike is all downhill, which puts stress on your knees and quads
- The second half is a serious climb — with over 5,000 feet of elevation gain (more than a mile straight up!)
- Expect to work your glutes, hamstrings, calves, and back — this is a full-body effort
North to South vs. South to North
- The North Rim starts around 8,000 ft elevation, while the South Rim is closer to 6,000 ft
- Most people choose to hike North to South for this reason — it finishes slightly lower and feels more manageable
Important Warnings
- Rangers strongly discourage doing Rim to Rim in a single day — not because it’s impossible, but because many hikers underestimate the physical toll or aren’t prepared
- If you need to be rescued, helicopter evacuations are extremely expensive
- Know your limits and train accordingly
Don’t Forget the Basics
- Hiking poles can make a huge difference, especially on the descent
- Make sure your footwear is broken in and fits properly
- Bring plenty of snacks for energy and more water than you think you’ll need
- Wear sun protection — there’s minimal shade for long stretches
When to Hike Rim to Rim
The best times to hike Rim to Rim in the Grand Canyon are mid-to-late May and early October. More specifically, the windows between May 15–31 and October 1–15 offer the most ideal conditions.
These timeframes align with the opening and closing of North Rim services. The North Rim typically opens on May 15, depending on weather, and closes October 16, unless snowfall causes an earlier shutdown. After December 1, the North Rim closes completely for winter.
The last two weeks of May are especially good for Rim to Rim hikes because the temperatures at the bottom of the canyon are still manageable, and North Rim facilities are open. Similarly, late September to early October is beautiful on the Kaibab Plateau, where the North Rim Lodge is located — fall colors are often peaking.
We did our Rim to Rim hike on October 6, 2022, and booked our lodging back in February 2022 to ensure availability.
Rim to Rim Transportation and Logistics
We knew from the start that we wanted to hike Rim to Rim in one day, and we chose to hike North Rim to South Rim because of the elevation difference — the South Rim sits about 2,000 feet lower, making it a slightly more manageable finish.
Since we were hiking together and only bringing one car, we needed to figure out transportation to the opposite rim. We decided we wanted to end our hike at our car, rather than finishing exhausted and needing to catch a shuttle back. With that in mind, we booked a ride with Trans-Canyon Shuttle from Grand Canyon Village (South Rim) to the North Rim Lodge the day before our hike, on October 5th. If you’re planning a similar trip, there are a few different options depending on availability and logistics. You can stay at the North Rim Campground, disperse camp outside the park, or stay near Jacob Lake where there is a campground and Inn. Keep in mind that lodging on the North Rim is currently limited, so it’s important to plan ahead and have backup options. Additionally, transportation to the trailhead will need to be arranged from these other locations.
Some hikers do it in reverse or plan to spend more time at the Grand Canyon before or after their hike, but this approach worked best for our timing and schedule.
Quick Recap of Our Logistics:
On October 5th, we drove from Phoenix, Arizona to Grand Canyon Village, parked our car at the Backcountry Office parking lot, then took a 4.5-hour shuttle with Trans-Canyon Shuttle to the North Rim Lodge. We stayed there overnight, and on October 6th, we hiked Rim to Rim, finishing at the South Rim — right where our car was parked.
Our advice for Rim to Rim 2026 and on, until the North Rim Lodge is rebuilt:
Stay somewhere within reasonable commuting distance to the North Kaibab Trailhead and drive there the morning of your hike. Hike across the canyon and stay the night at the South Rim. Then the next day take a shuttle back to your vehicle. Or, hike south to north and arrange for a vehicle to pick you up when you finish and either drive back to the south rim or stay somewhere near the north rim for the night.


On the Trail: Our Rim to Rim Hiking Experience
We used AllTrails+ (the paid version) to download our trail map before starting. Even though the Rim to Rim route is well maintained and easy to follow, we always download offline maps just in case. We also picked up a paper map from the Backcountry Office, which gave helpful details like water stop locations, restroom access, and distances between key waypoints along the trail.
Starting from the North Rim, we followed the North Kaibab Trail and connected to Bright Angel Trail to finish at the South Rim. Our decision to take Bright Angel over South Kaibab was based on convenience — it ends closer to Grand Canyon Village and offers water and restroom stops along the way.
Before our hike, we checked the trail status and saw that all water stops were on, except for the one closest to the top of Bright Angel Trail. Luckily, that station was turned on during our hike. Owen carried a 3-liter reservoir and Lauren carried a 2.5-liter reservoir. Our water refill points were Cottonwood, Phantom Ranch, and Havasupai Garden (formerly Indian Garden).
For long hikes like Rim to Rim, it’s important not to overdrink (yes, overhydration is a real risk) and not to carry more water weight than necessary. To stay fueled, we packed a mix of snacks and electrolytes, which helped maintain our energy throughout the hike.
Early Start: Beginning Our Rim to Rim Hike
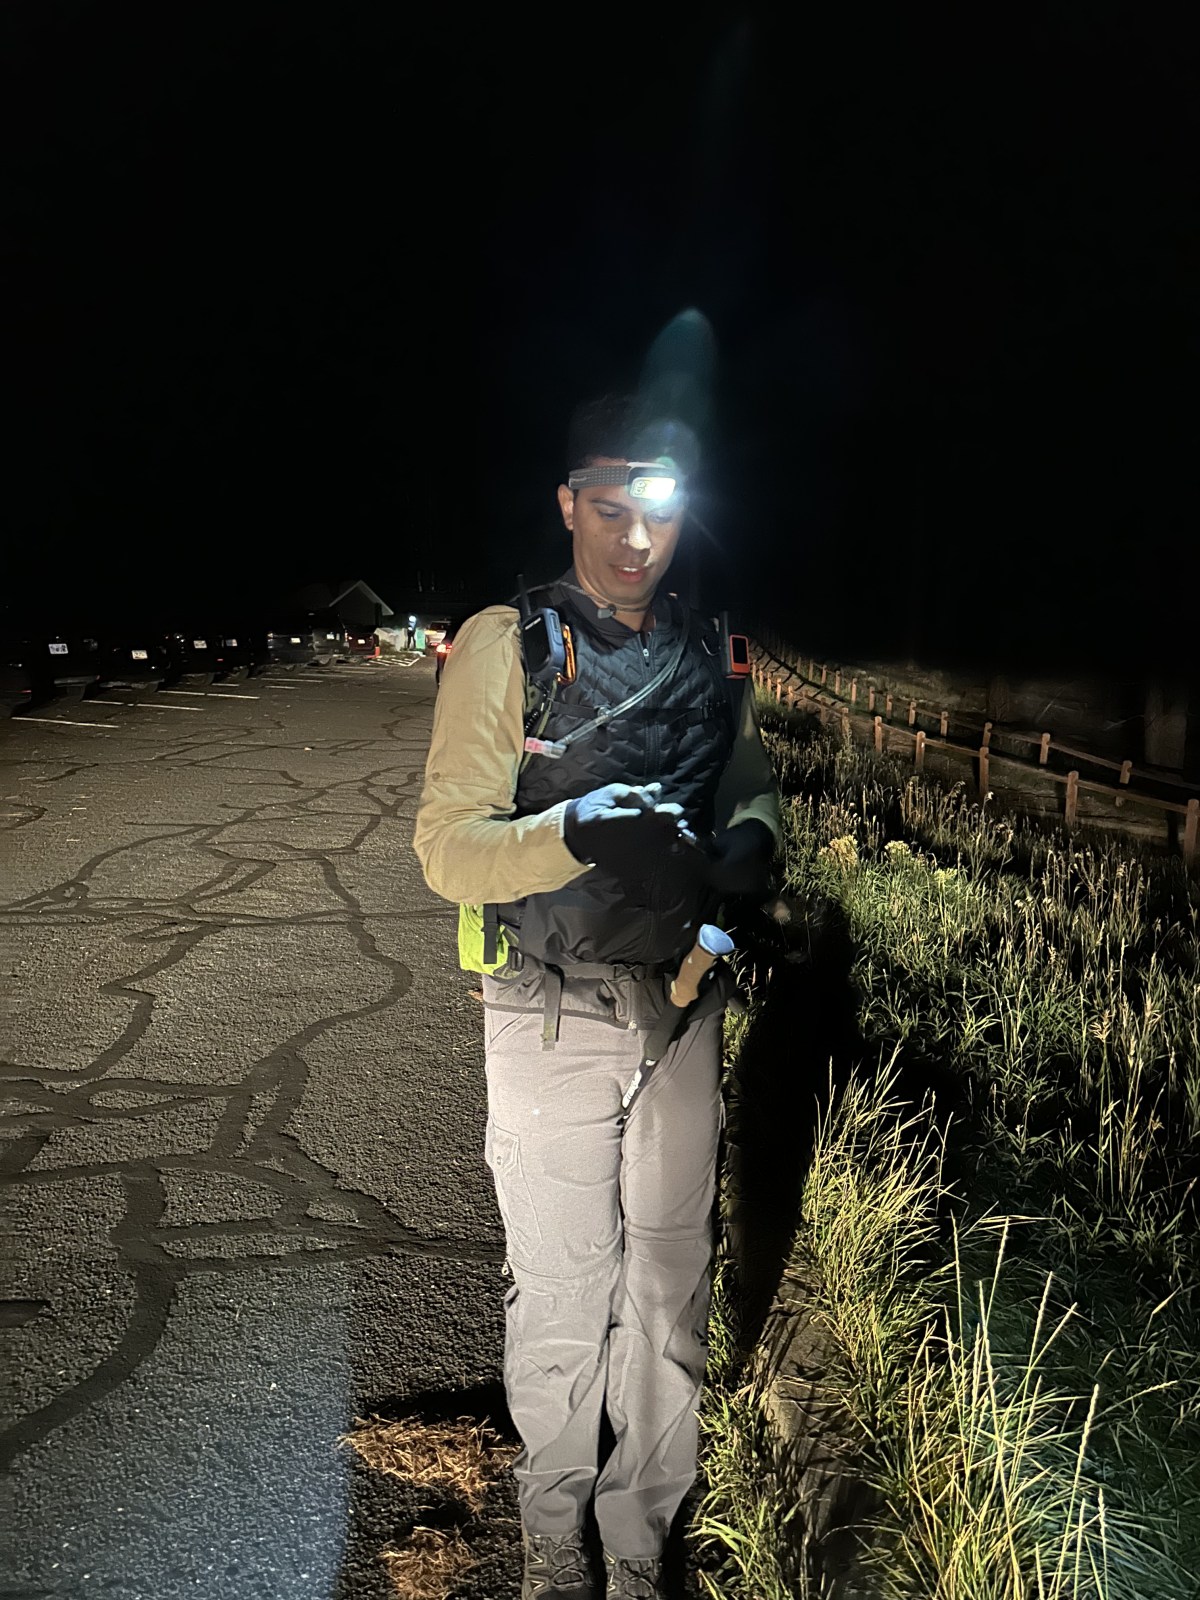
We began our Rim to Rim hike in the dark at 5:10 a.m., surrounded by a group of other hikers — most of us wearing headlamps and bundled up against the early morning chill. The North Kaibab Trailhead is about 2 miles from the North Rim Lodge, so we arranged a ride through our Trans-Canyon Shuttle drivers who were also staying overnight. The ride cost $20 per person and was well worth it to avoid walking the extra miles before such a long day.
Update: We’ve since learned that this is an official add-on service offered by Trans-Canyon Shuttle, though we’re not sure of the current price.
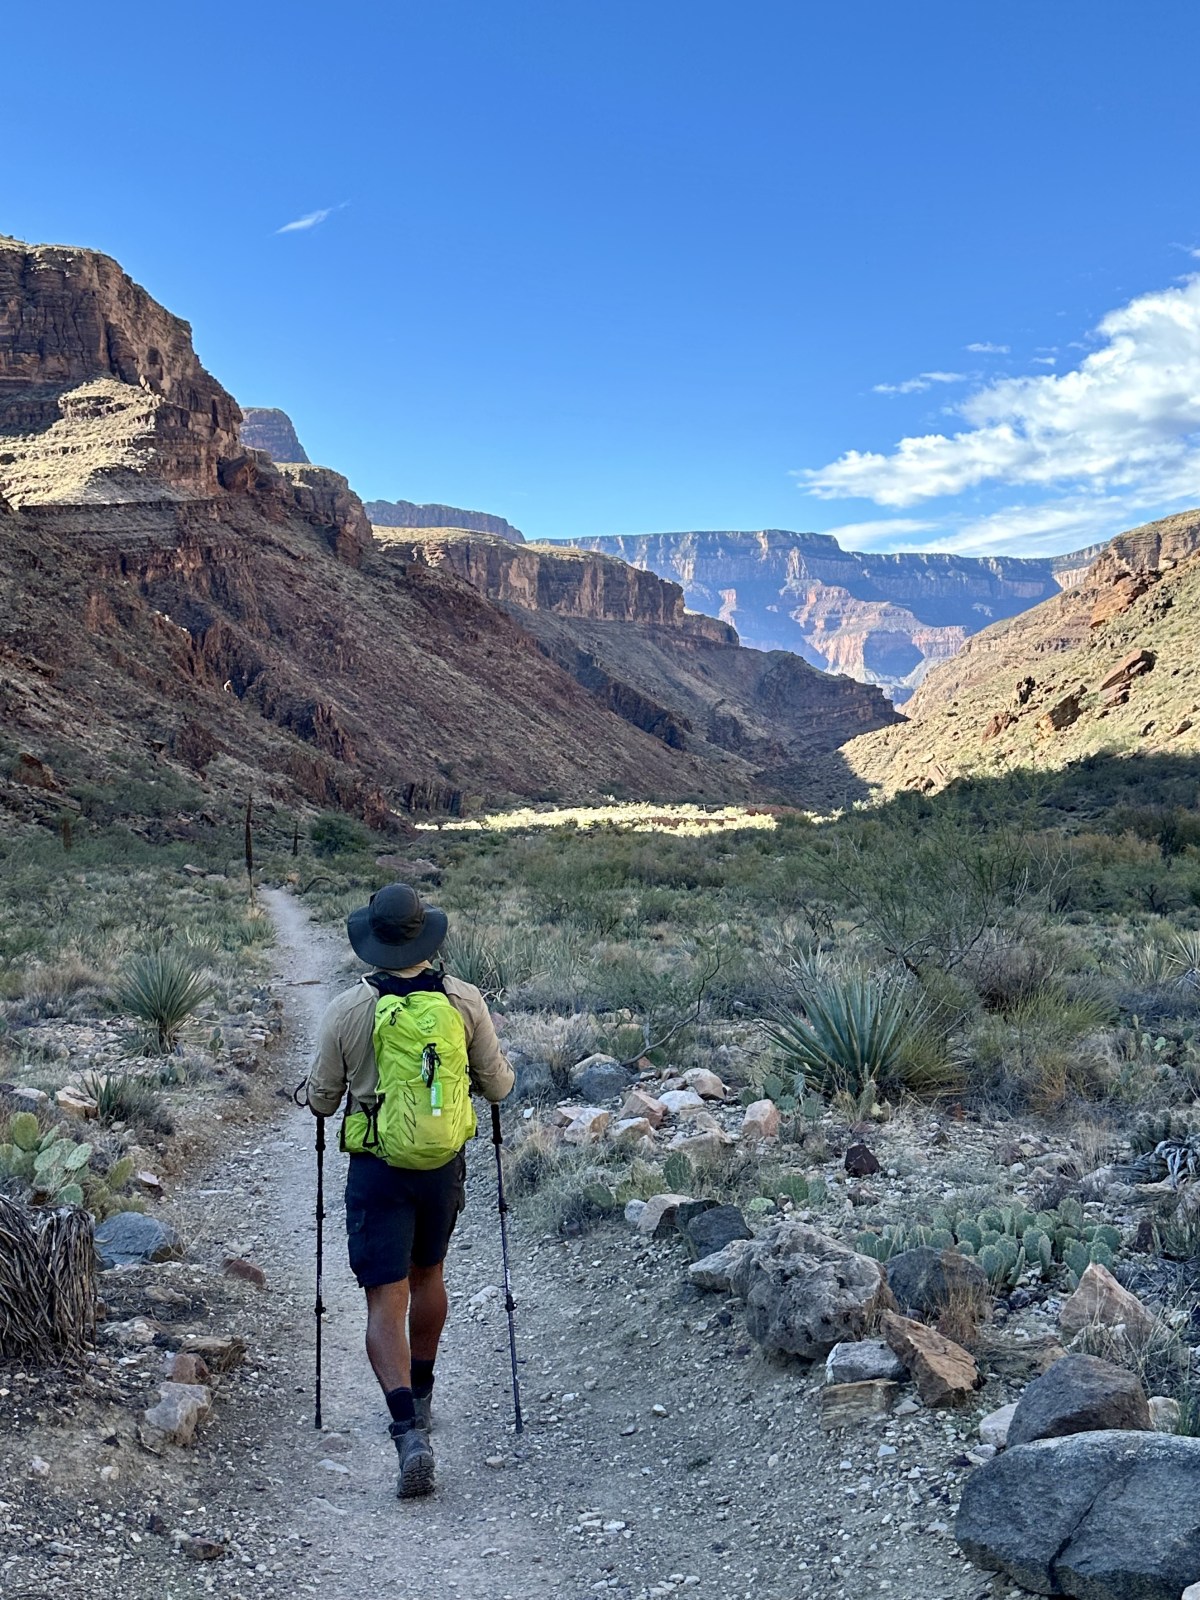
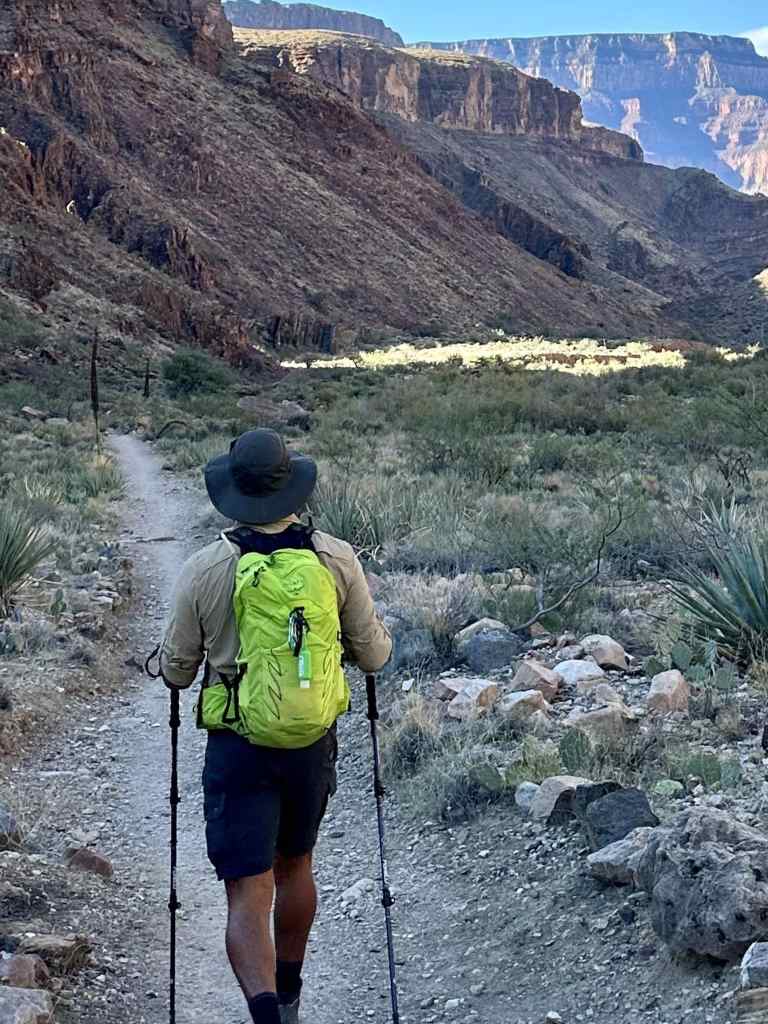
The first 12 miles of the hike are all downhill, and while it may sound easy, it wears on you gradually. We can’t emphasize enough how helpful hiking poles are — along with well-fitting, broken-in shoes. Poles help reduce the impact on your knees and maintain balance as you navigate endless downward steps.
We opted not to hike out to Ribbon Falls, even though it’s a popular side trip. For our first attempt, we didn’t want to add extra mileage, and we had heard the footbridge across Bright Angel Creek was washed out, making the trail harder to follow.

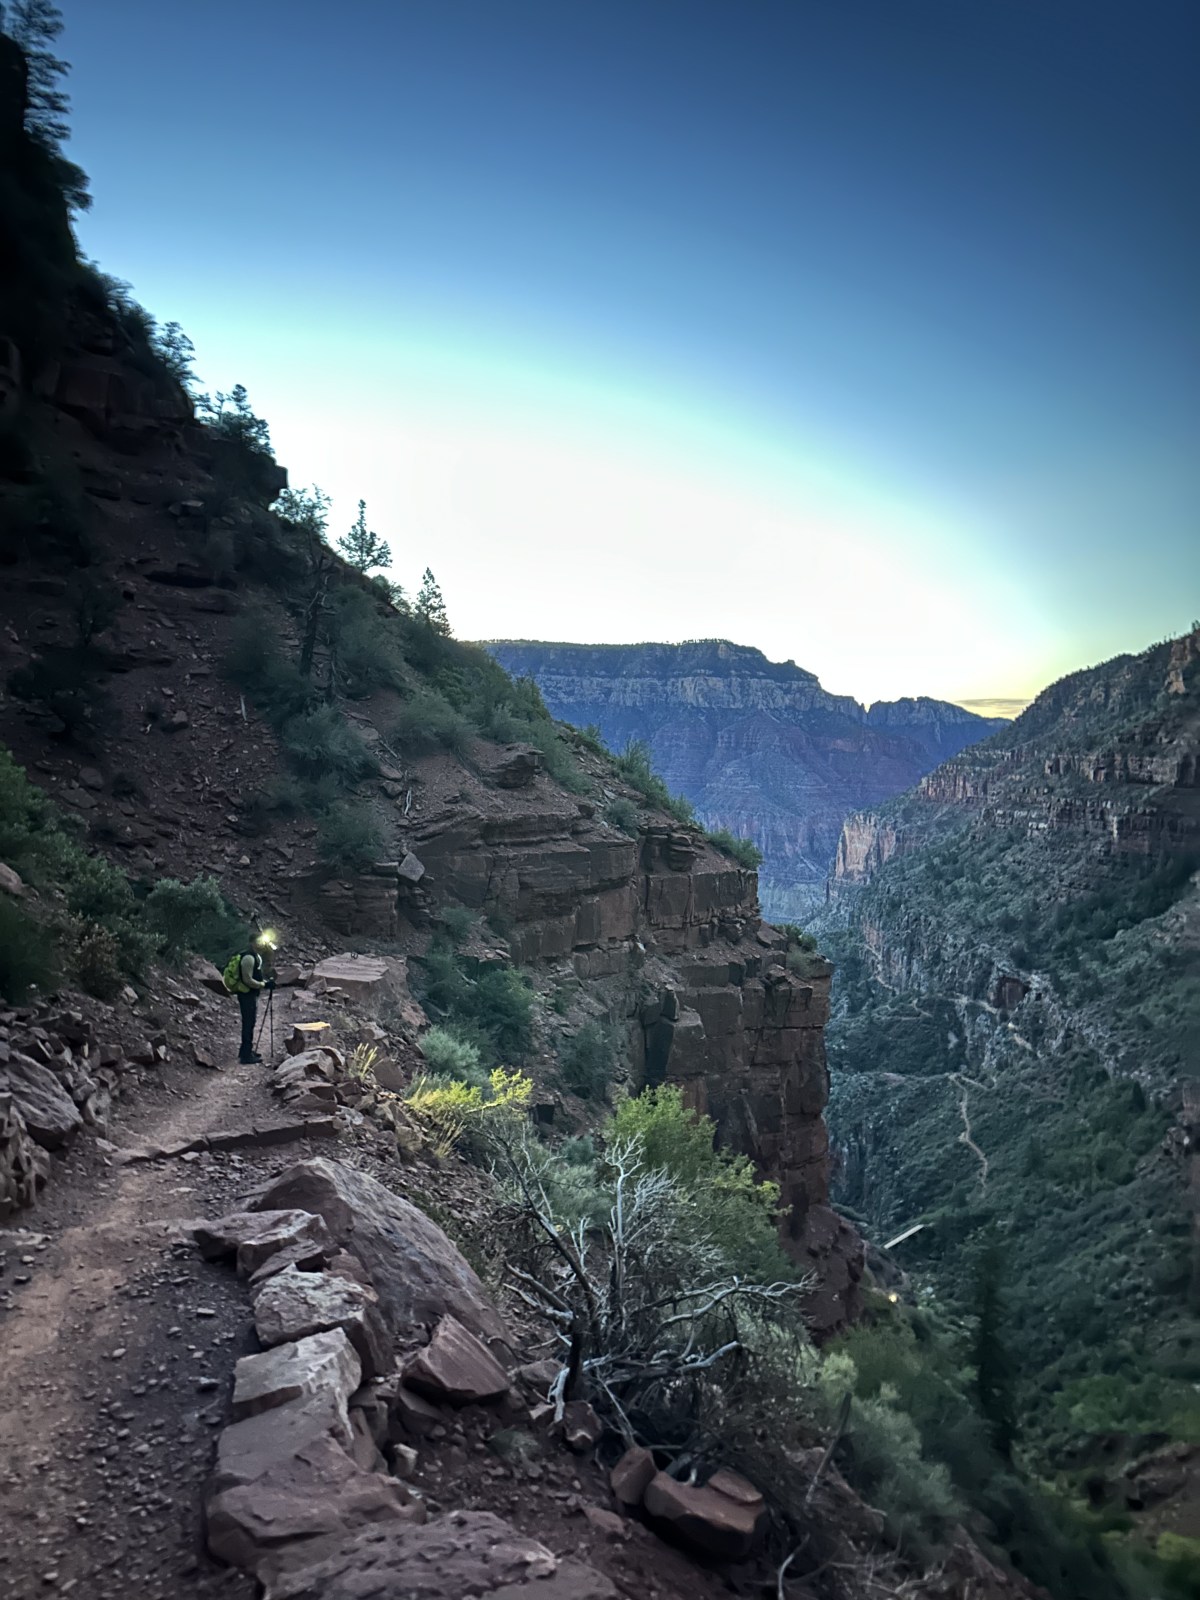


The Canyon Descent: Rim to Rim First Half
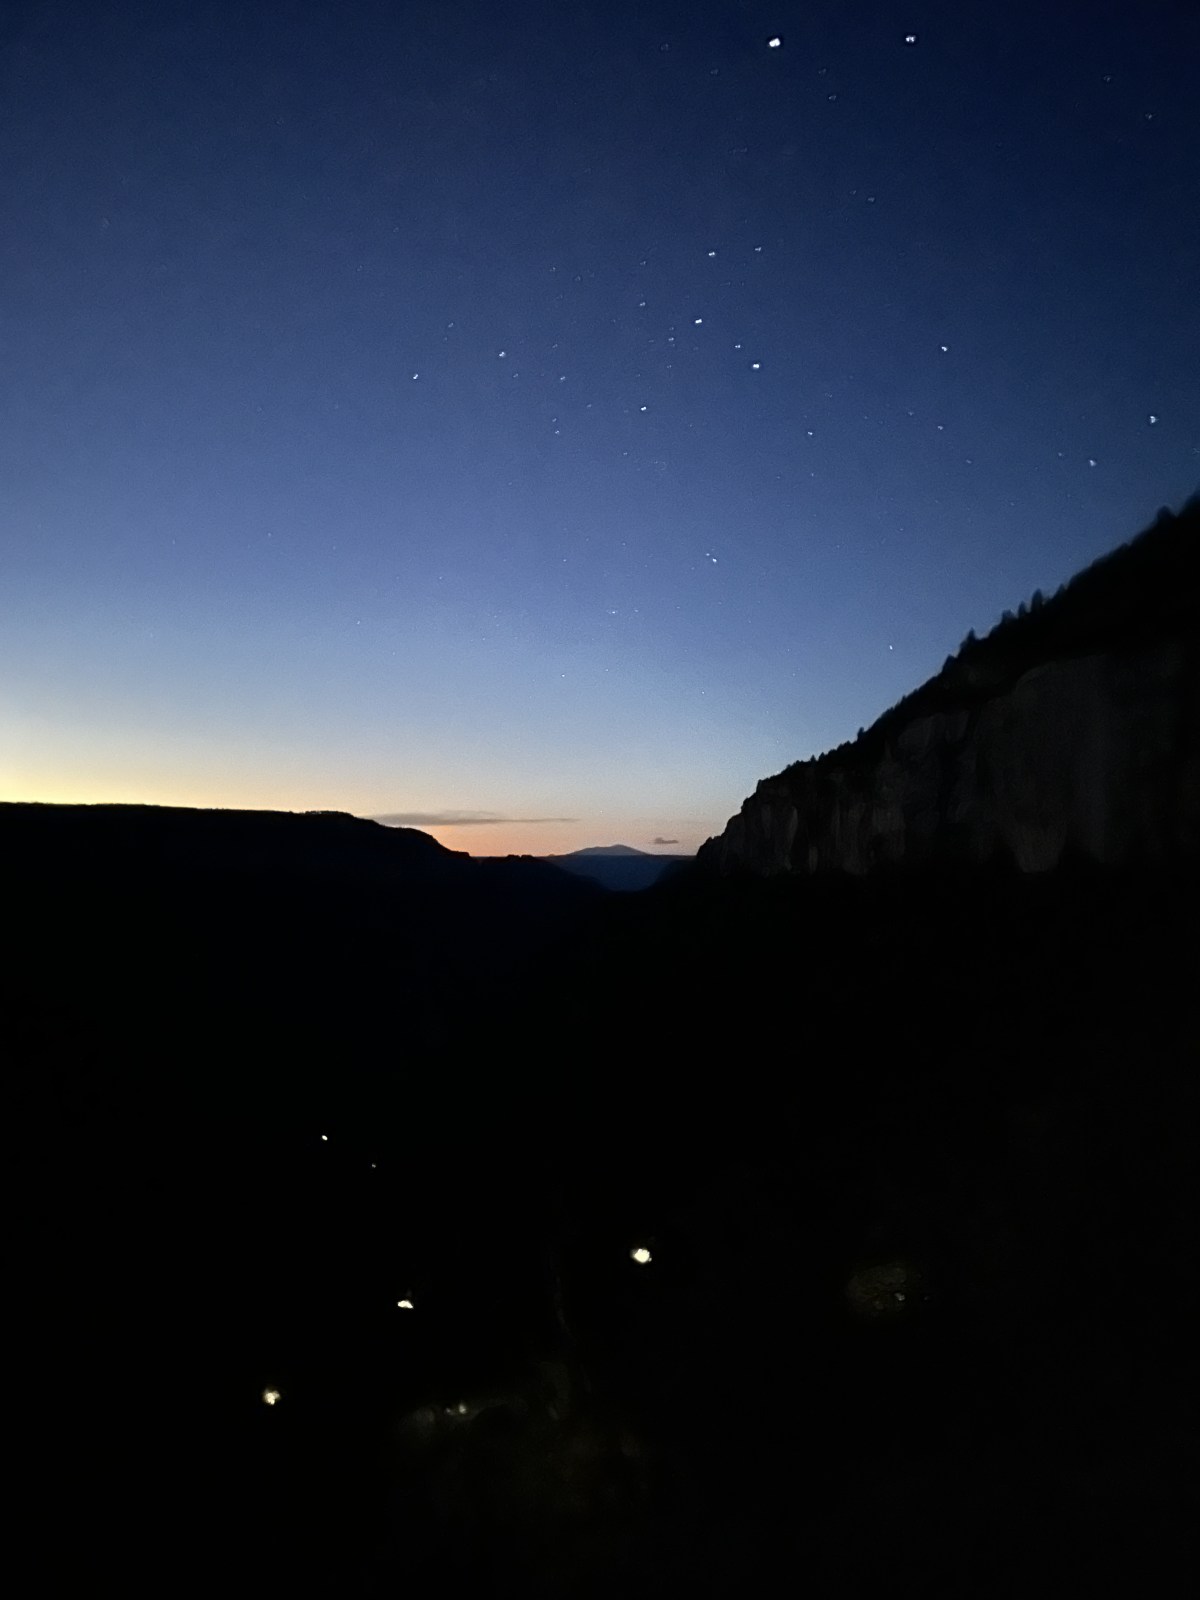
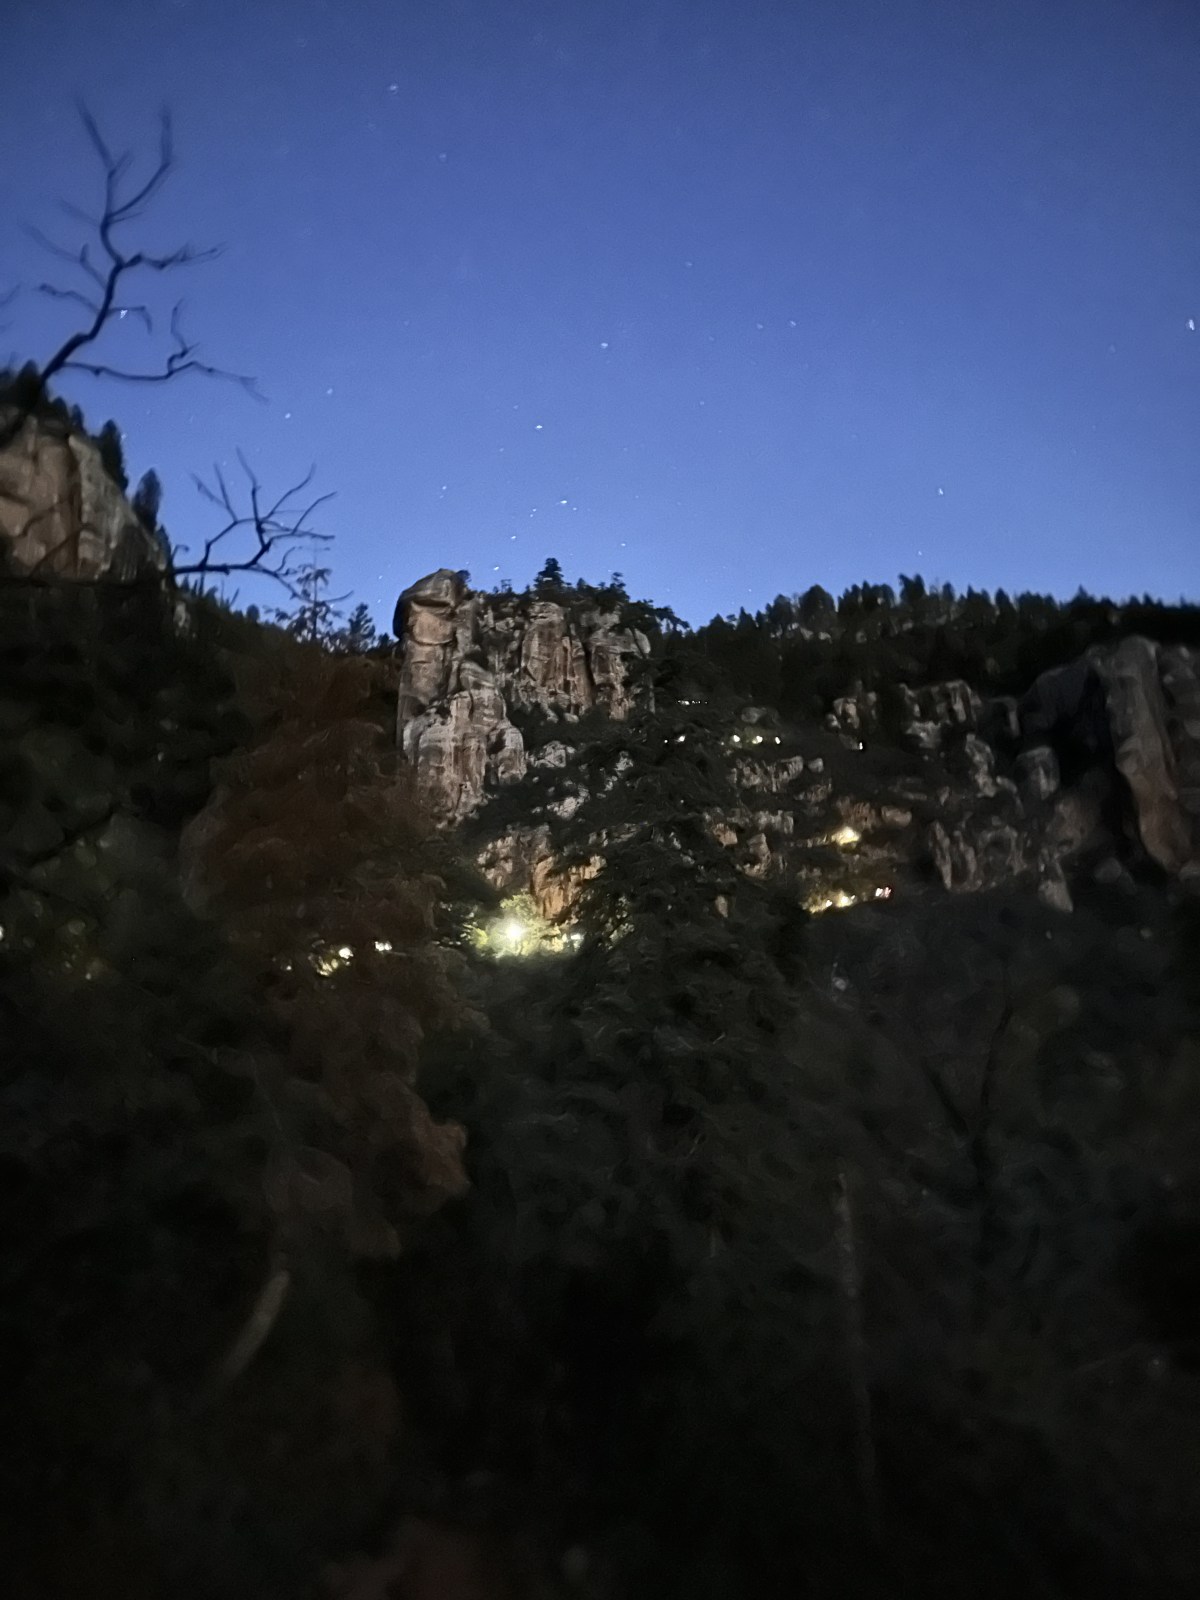
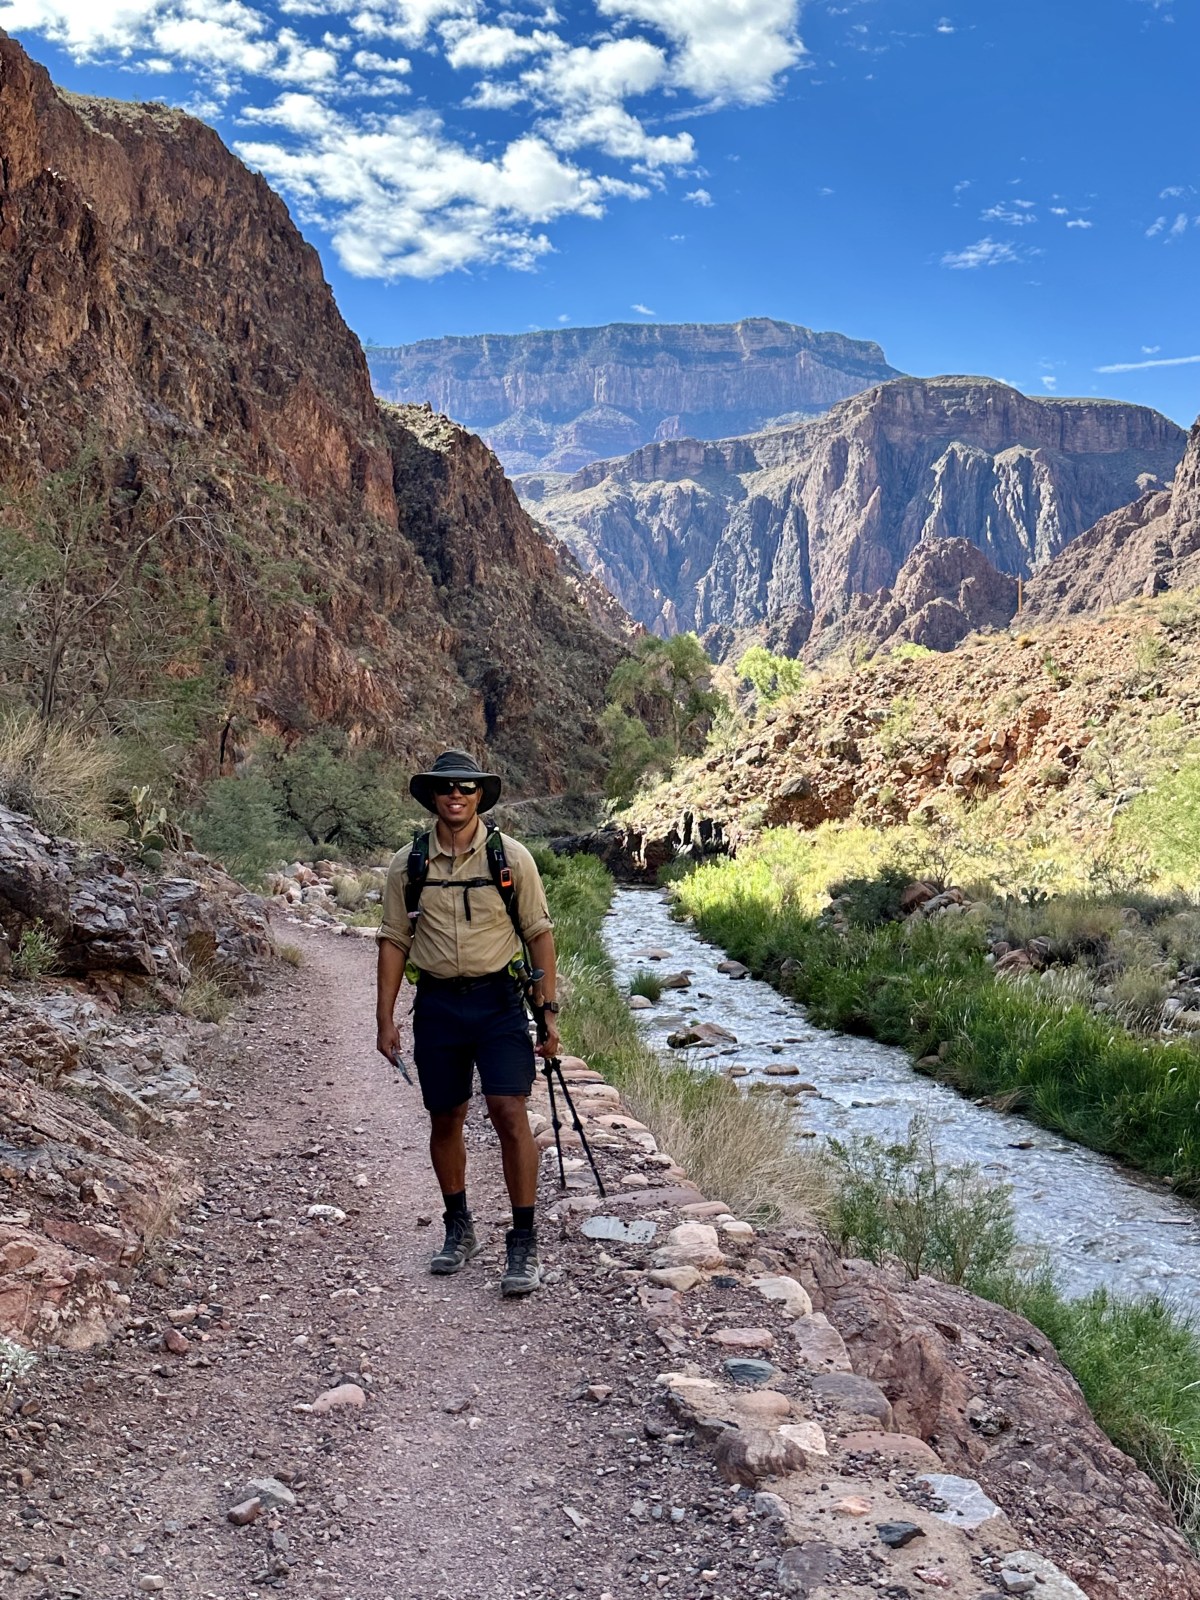
As we began descending through Roaring Springs Canyon, the geological layers of the Grand Canyon were absolutely mesmerizing. Just as the sun began to rise over the horizon, it lit up the canyon walls in soft earth tones, highlighting the distinct rock layers — each one representing a different chapter of Earth’s history. It truly felt like walking through a time capsule carved into the planet.
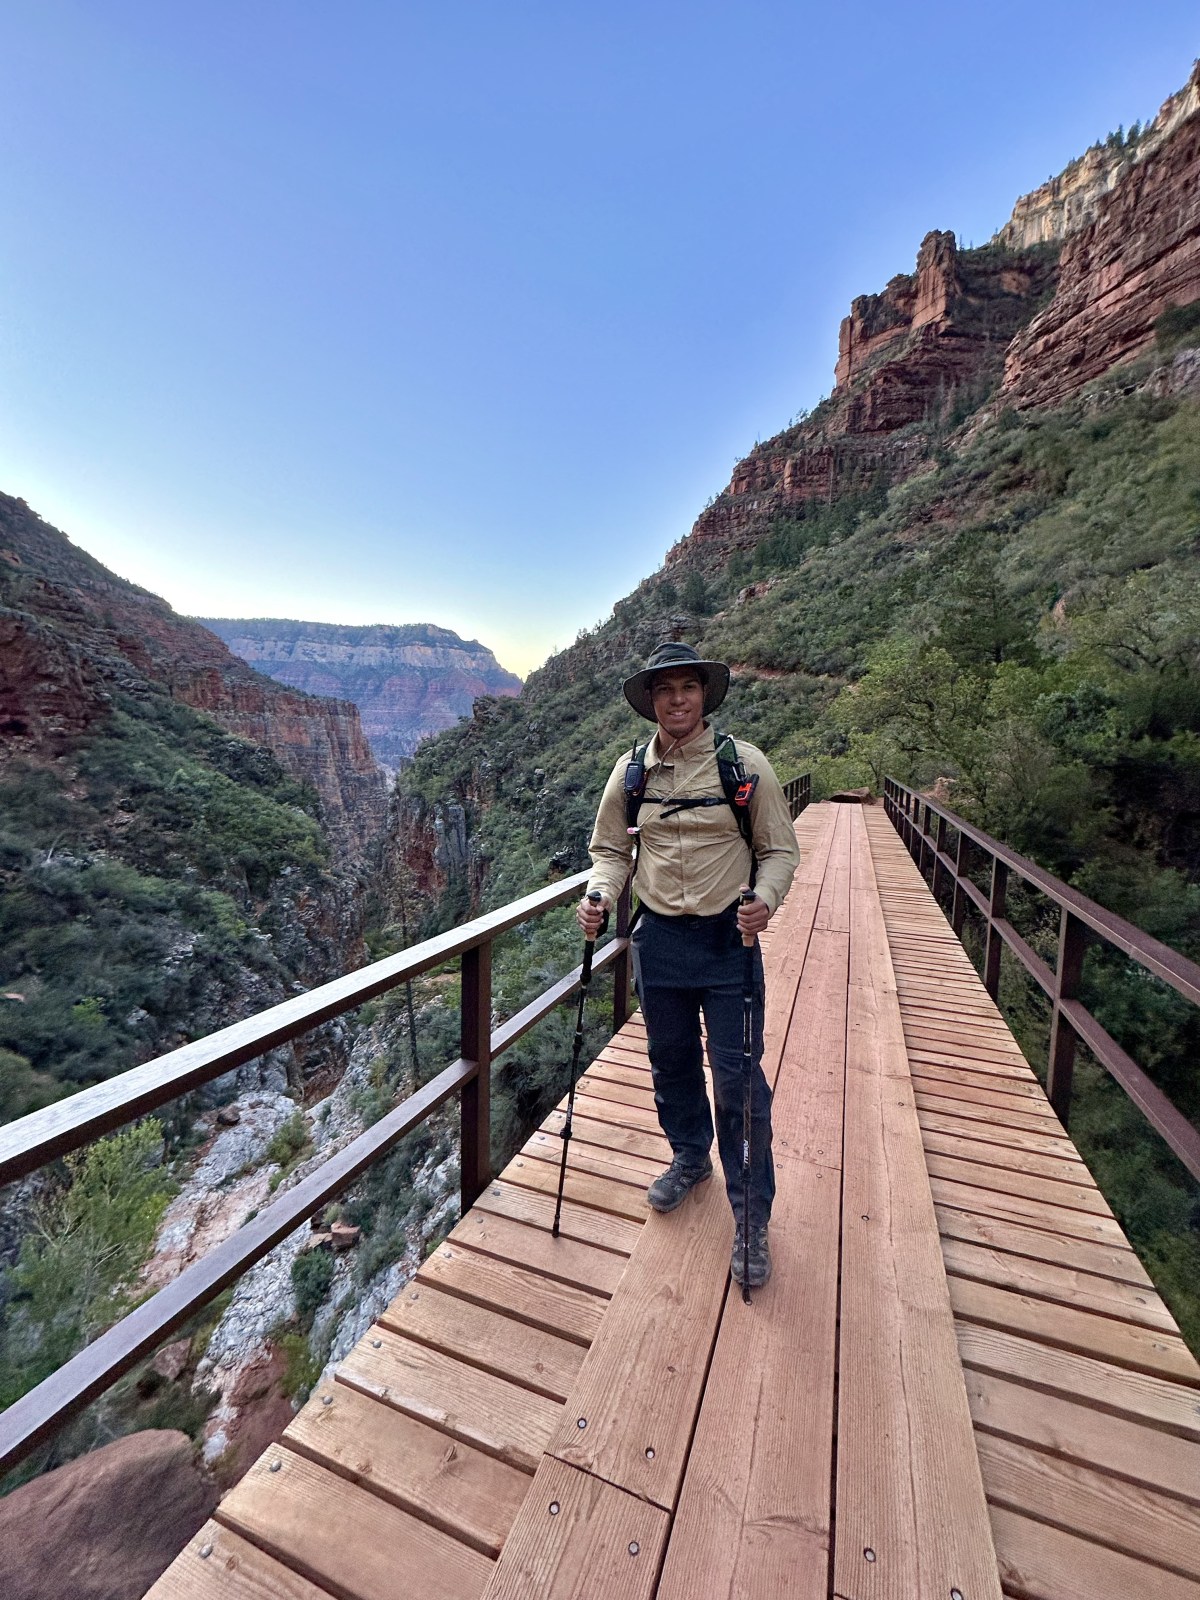
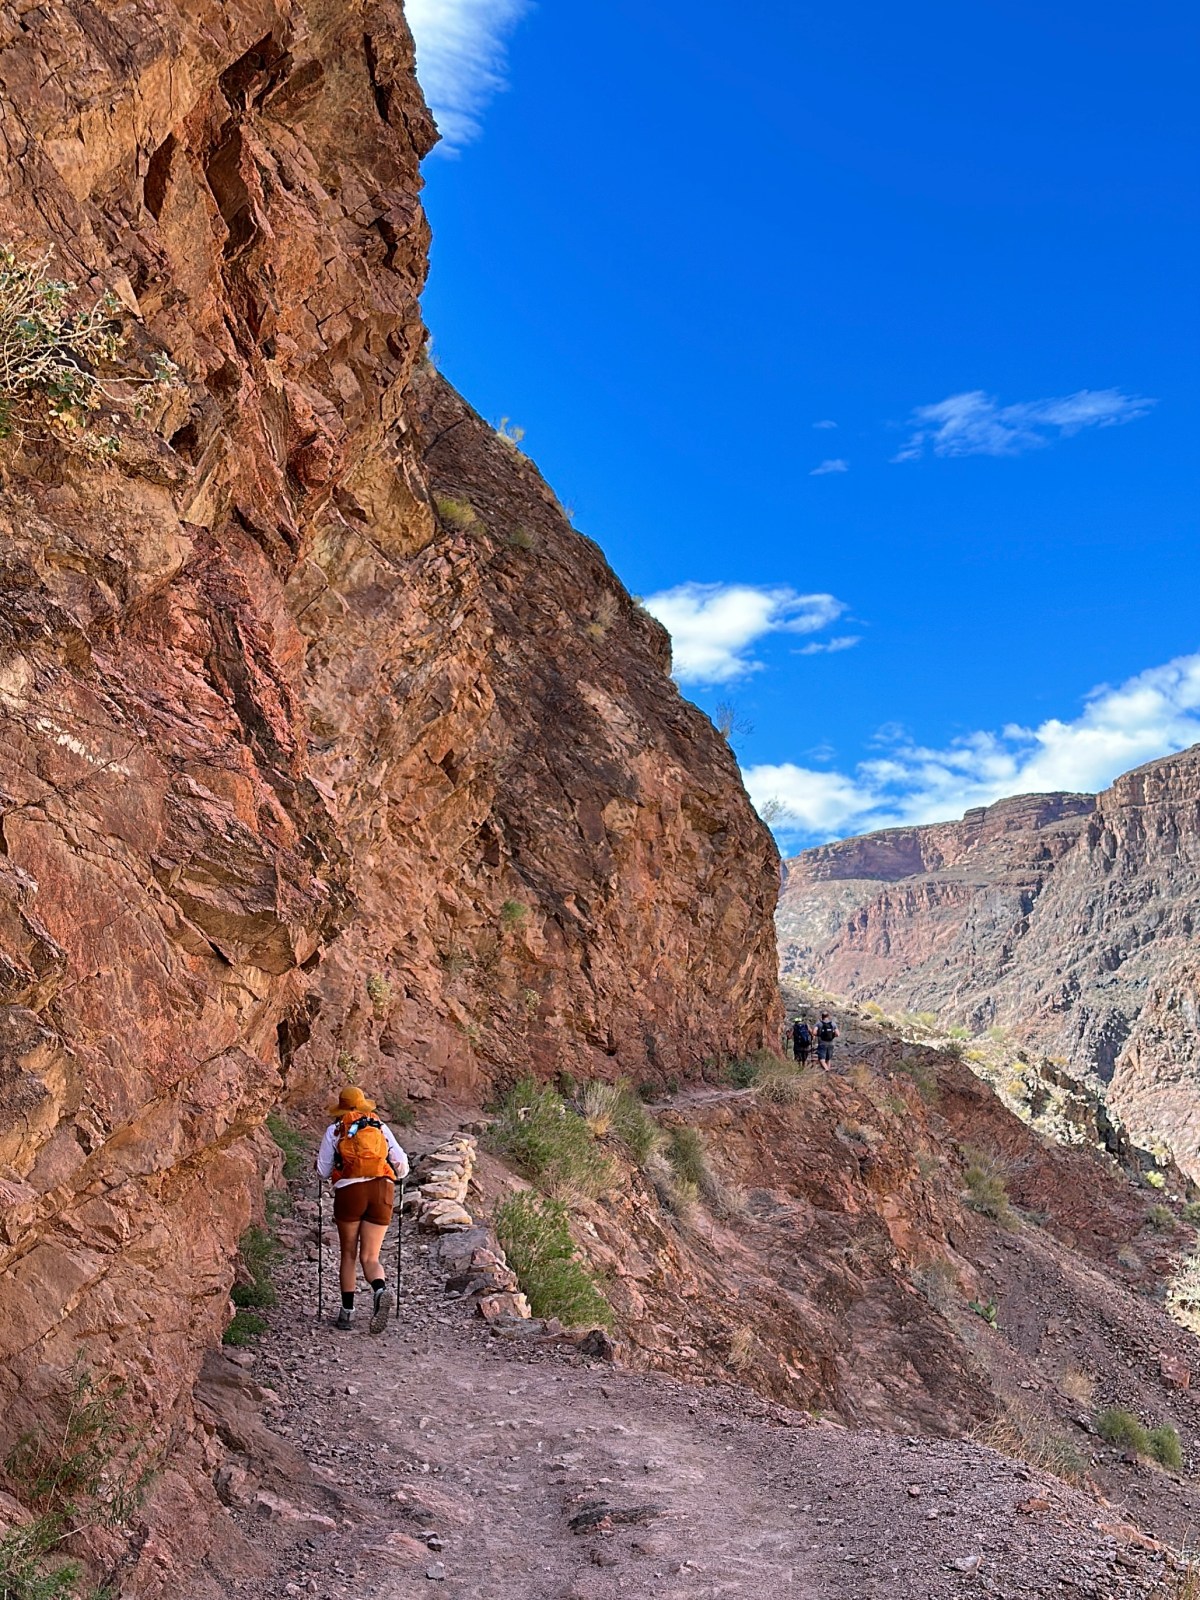
The trail was full of tight switchbacks in the early miles, then began crossing the creek several times via bridges and hugging the canyon wall in scenic sections. It made for some of the most beautiful views of the entire hike.
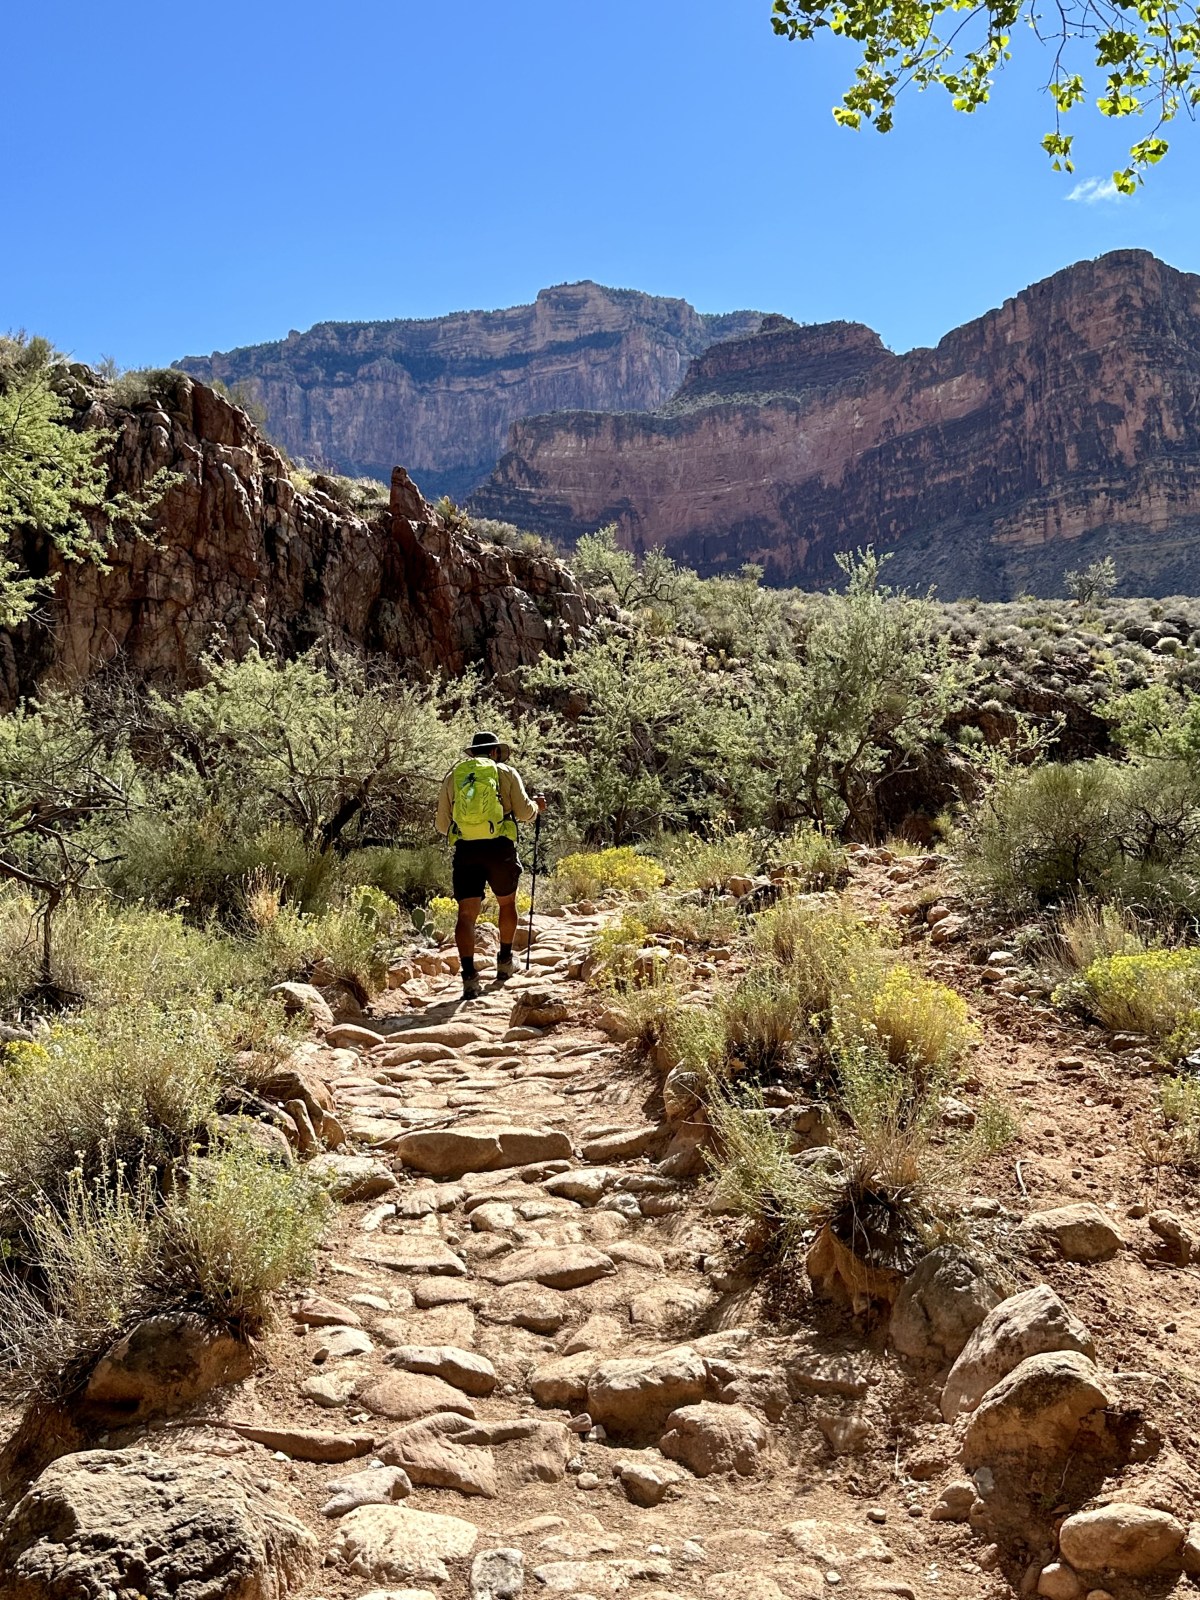
We stopped at Manzanita Rest Area to unzip our hiking pants into shorts and replenish with some quick carbohydrates. From there, we continued into Bright Angel Canyon, hiking alongside Bright Angel Creek. The canyon was quiet and cool, with the sound of flowing water, birdsong, and the crunch of boots on trail — an absolutely stunning morning.
Shortly after, we reached Cottonwood Campground, just 1.4 miles down the trail. We assessed our water and decided not to refill our reservoirs, but we did use a small Nalgene to mix up an electrolyte-heavy drink. After a quick snack and a bathroom break at the vault toilets, we got back on the trail — and were even treated to a surprise helicopter flyover as we continued deeper into the canyon.


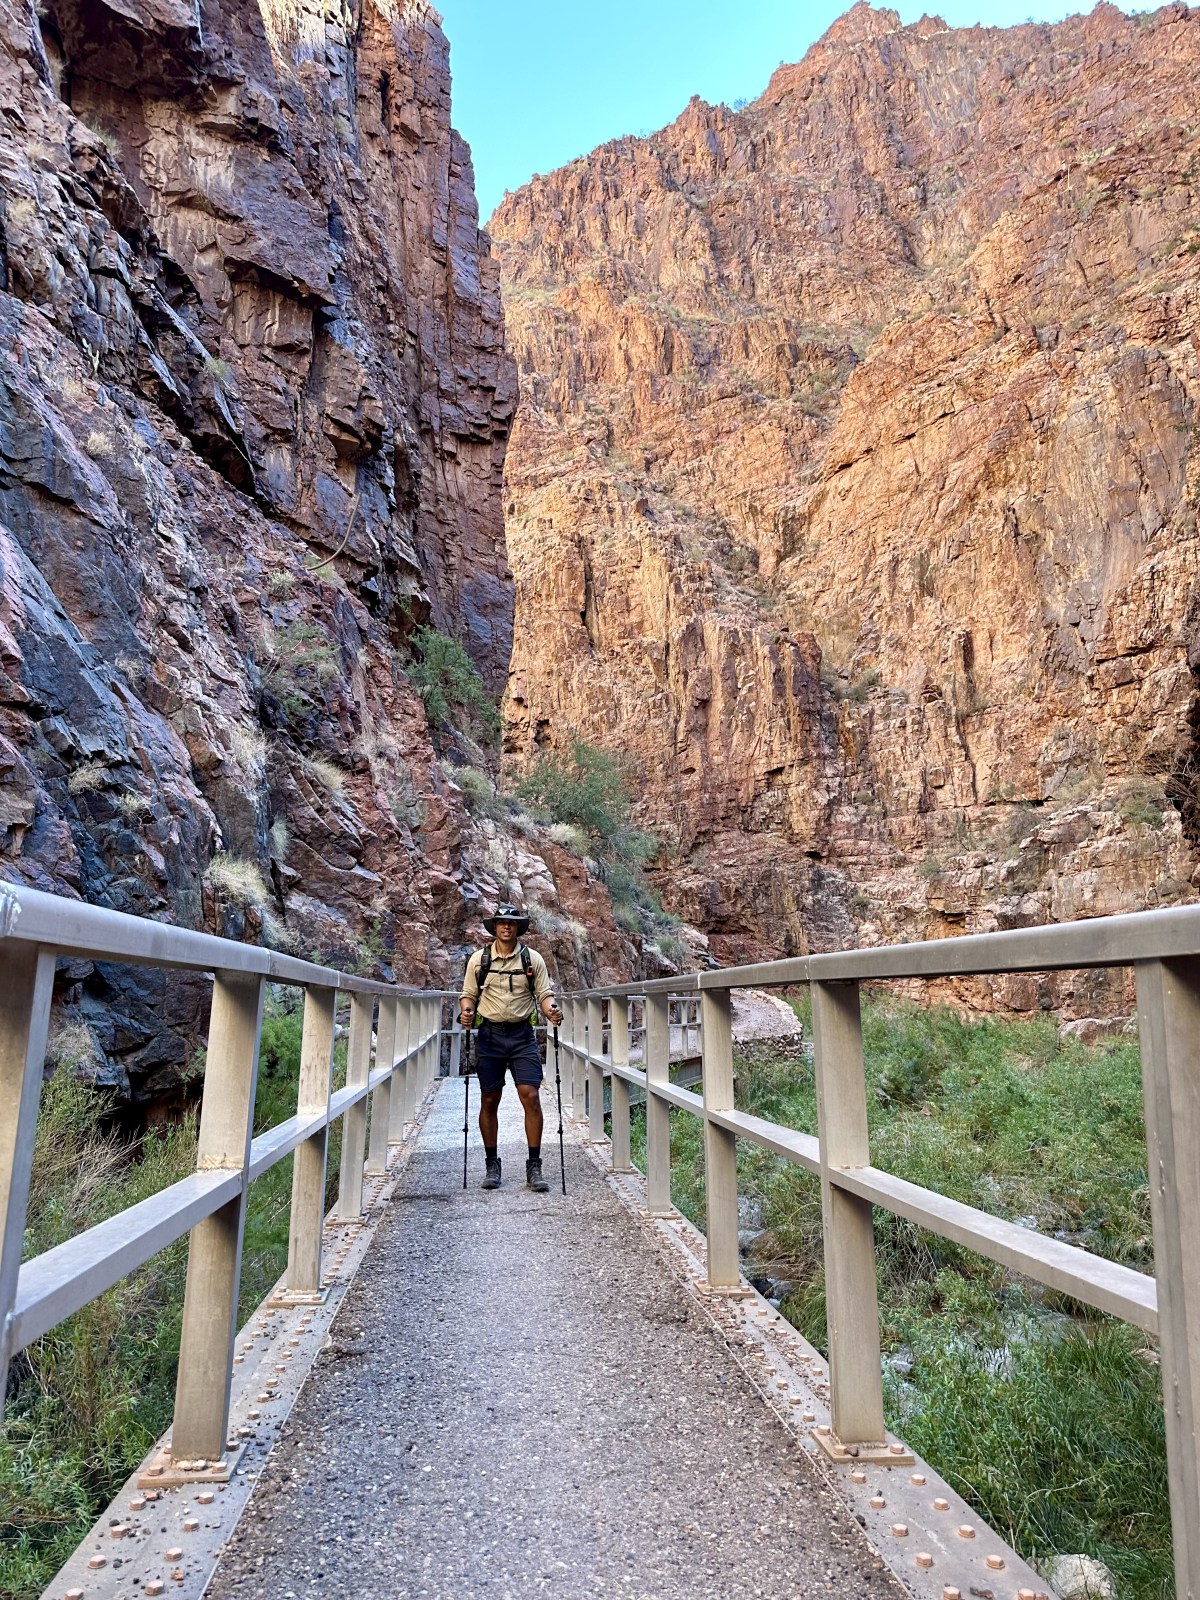
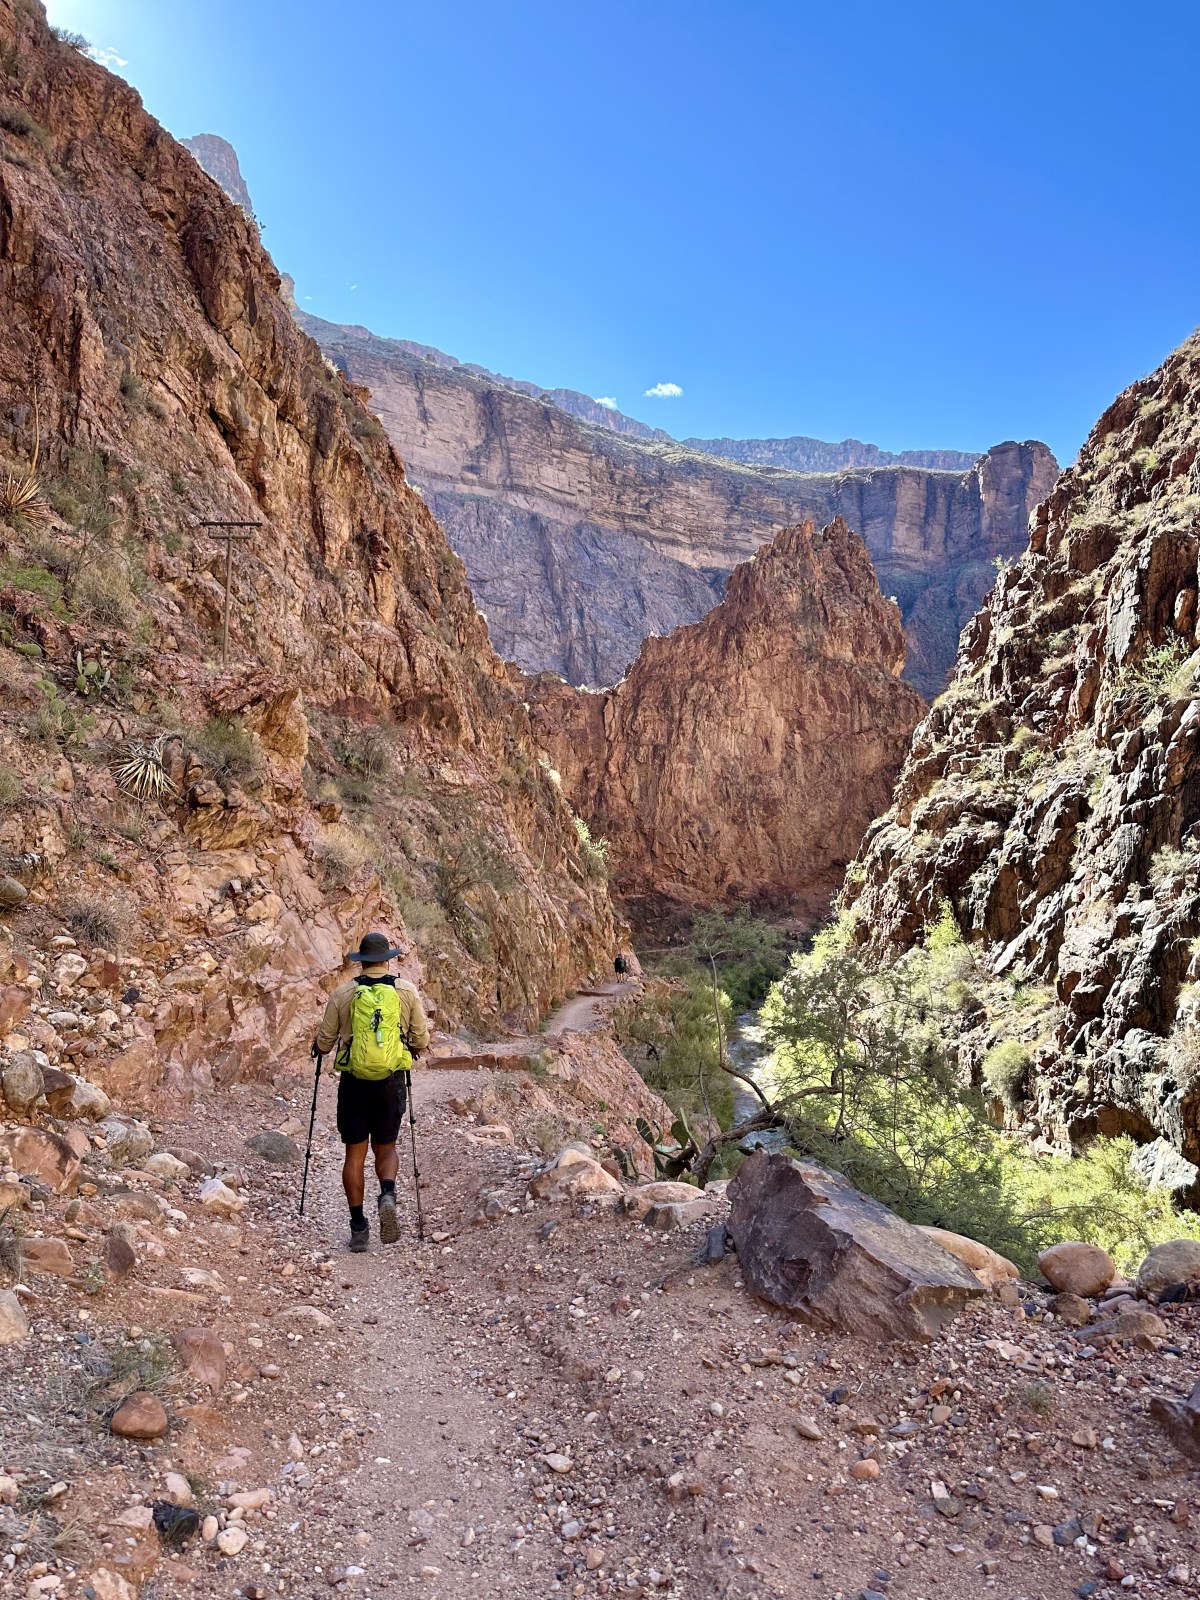
The Box + Phantom Ranch (Rim to Rim Midpoint)
The next major water source after Cottonwood Campground was at Phantom Ranch, nearly seven miles ahead — and past the infamous stretch of canyon known as The Box.
The bottom of the Grand Canyon is drastically different from the rim. It’s significantly hotter, with steep canyon walls that trap heat and block airflow. If you’re hiking The Box during midday, it can be brutally hot — often reaching the high 90s or even 100+ degrees. On the day we hiked, the forecast for Phantom Ranch showed a high of 90°F, so we planned to get through that section well before peak heat.
We entered The Box at approximately 9:40 a.m., based on timestamps from our photos. After hiking through this narrow, winding canyon, we arrived at Phantom Ranch where we filled up our water, ate PB&Js, snacked, took more electrolytes, and re-applied sunscreen. By the time we left around 11:35 a.m., it was already warming up fast.
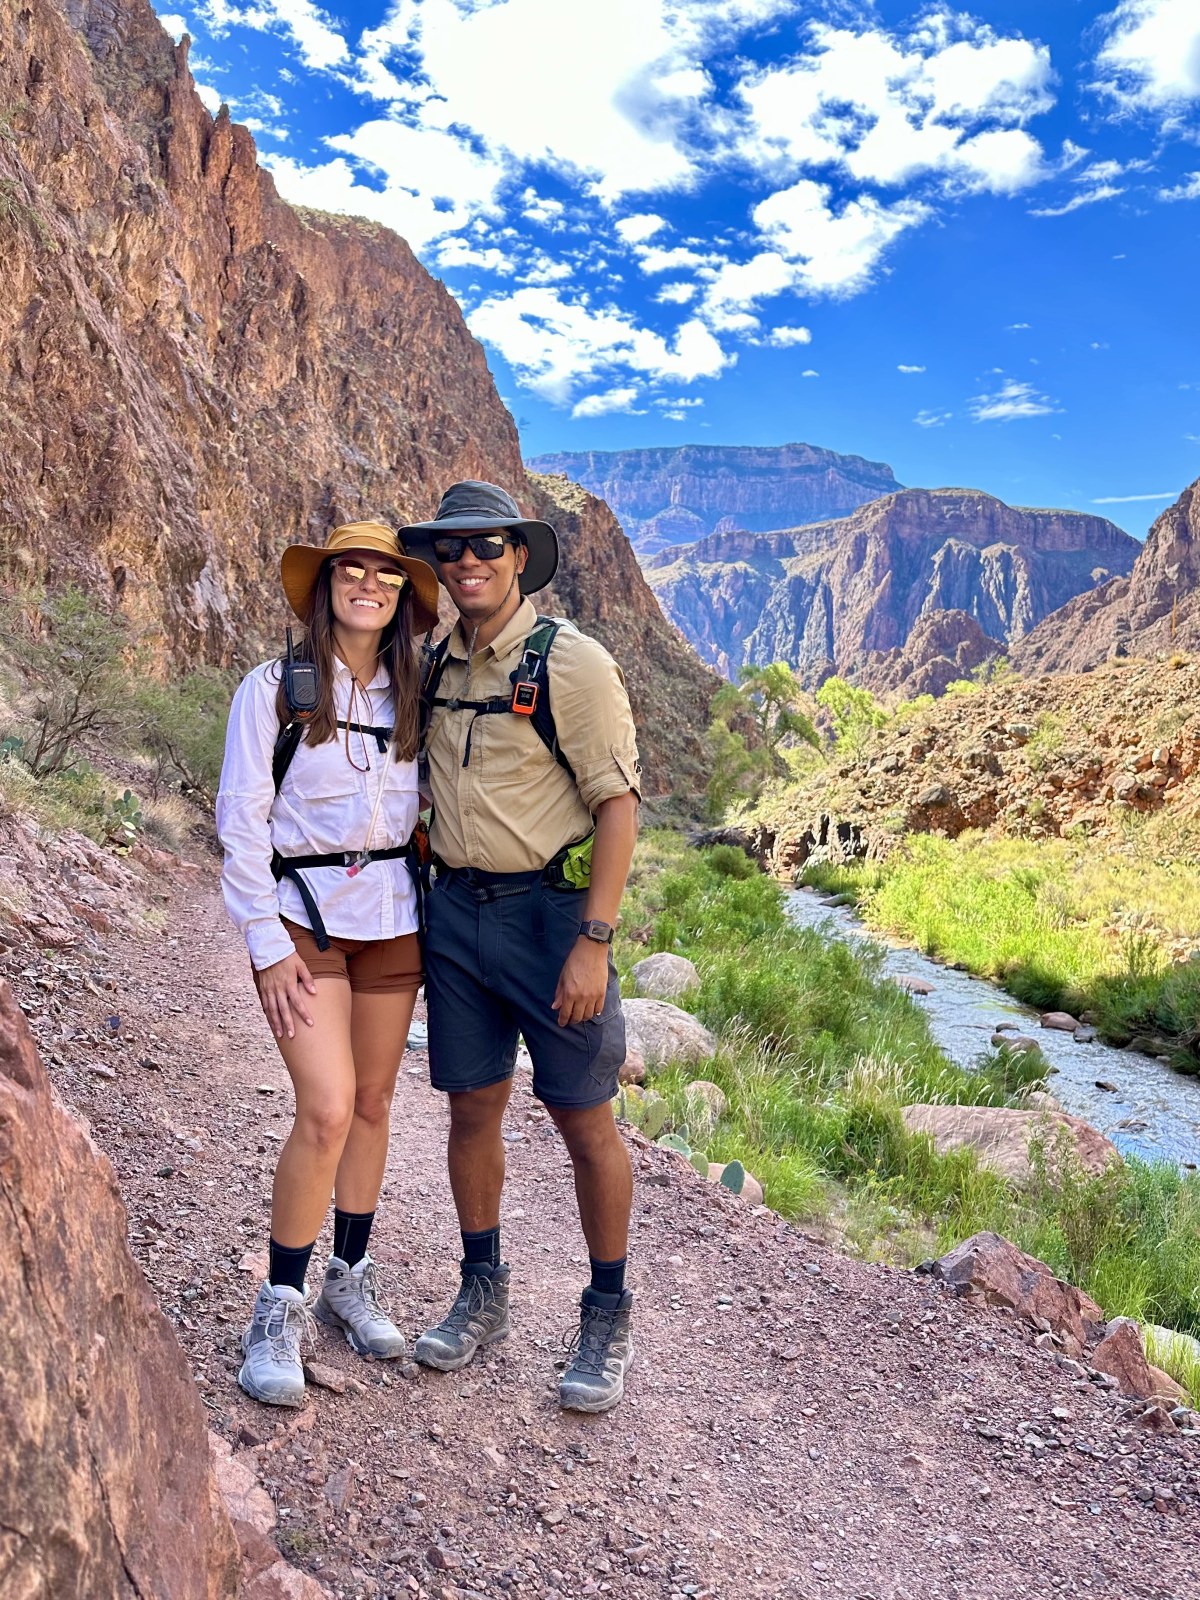
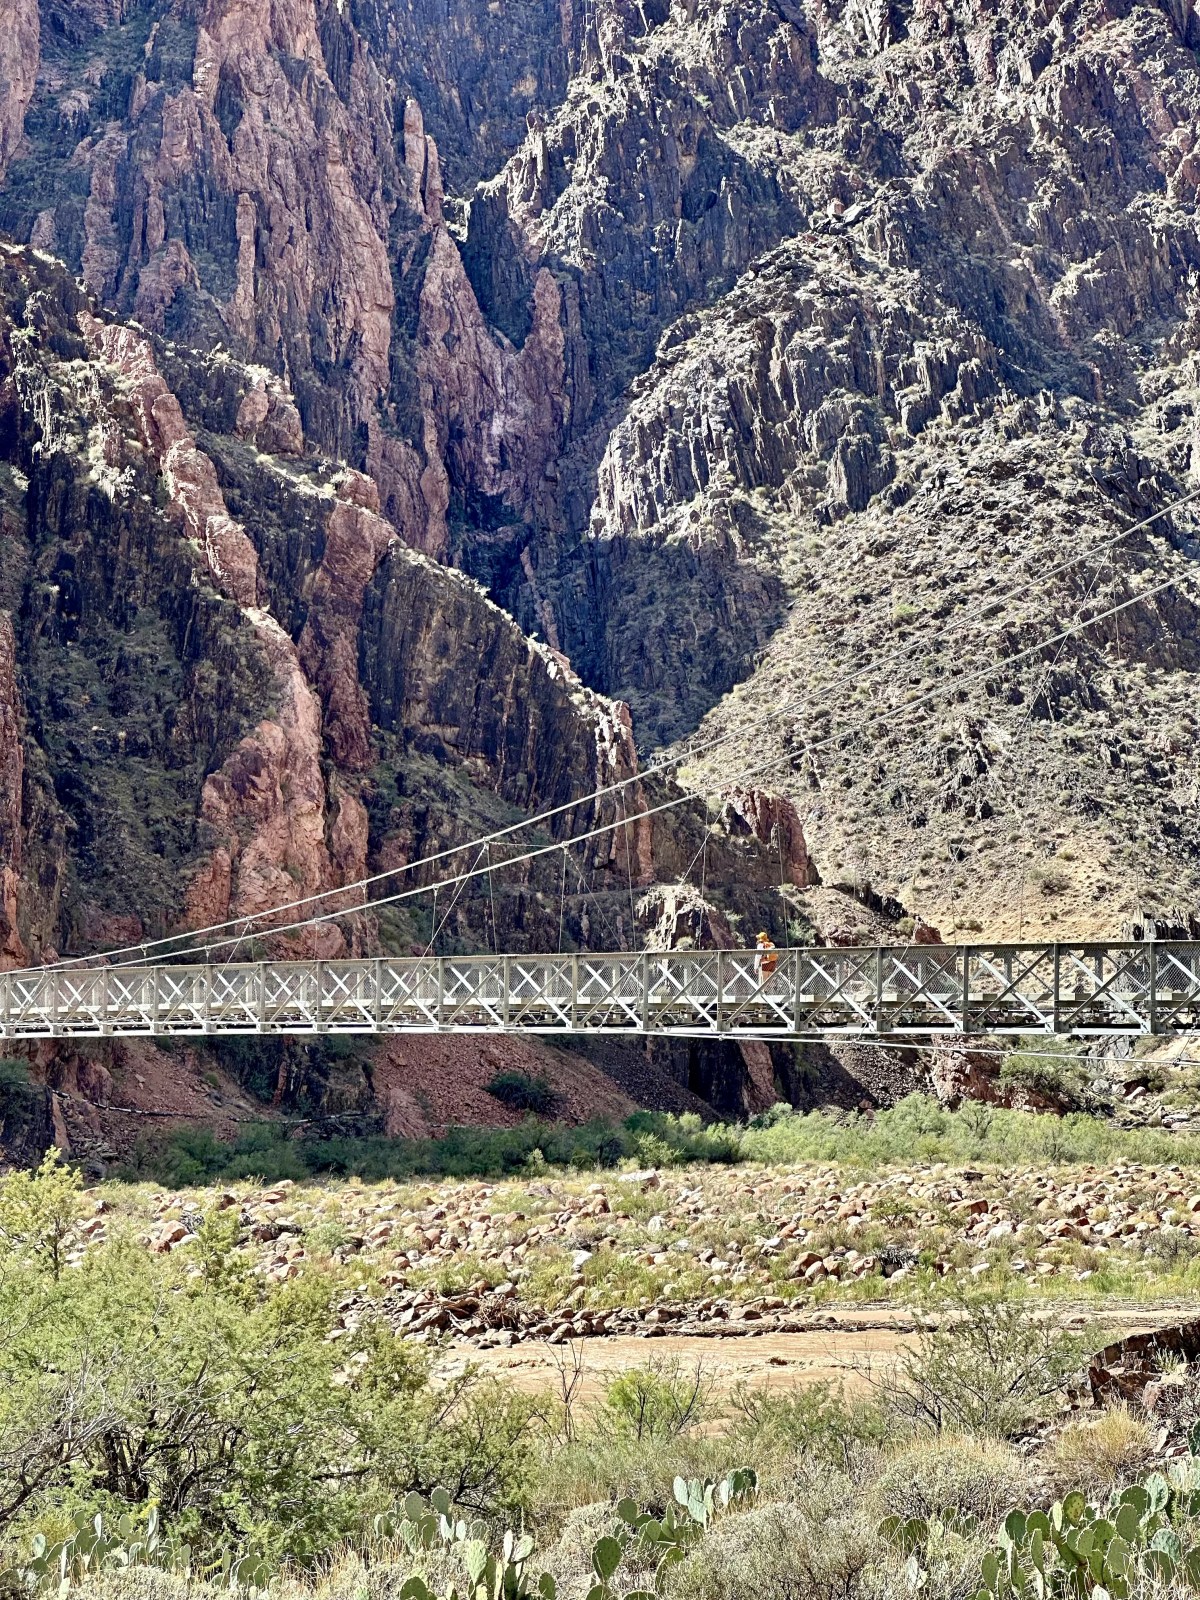
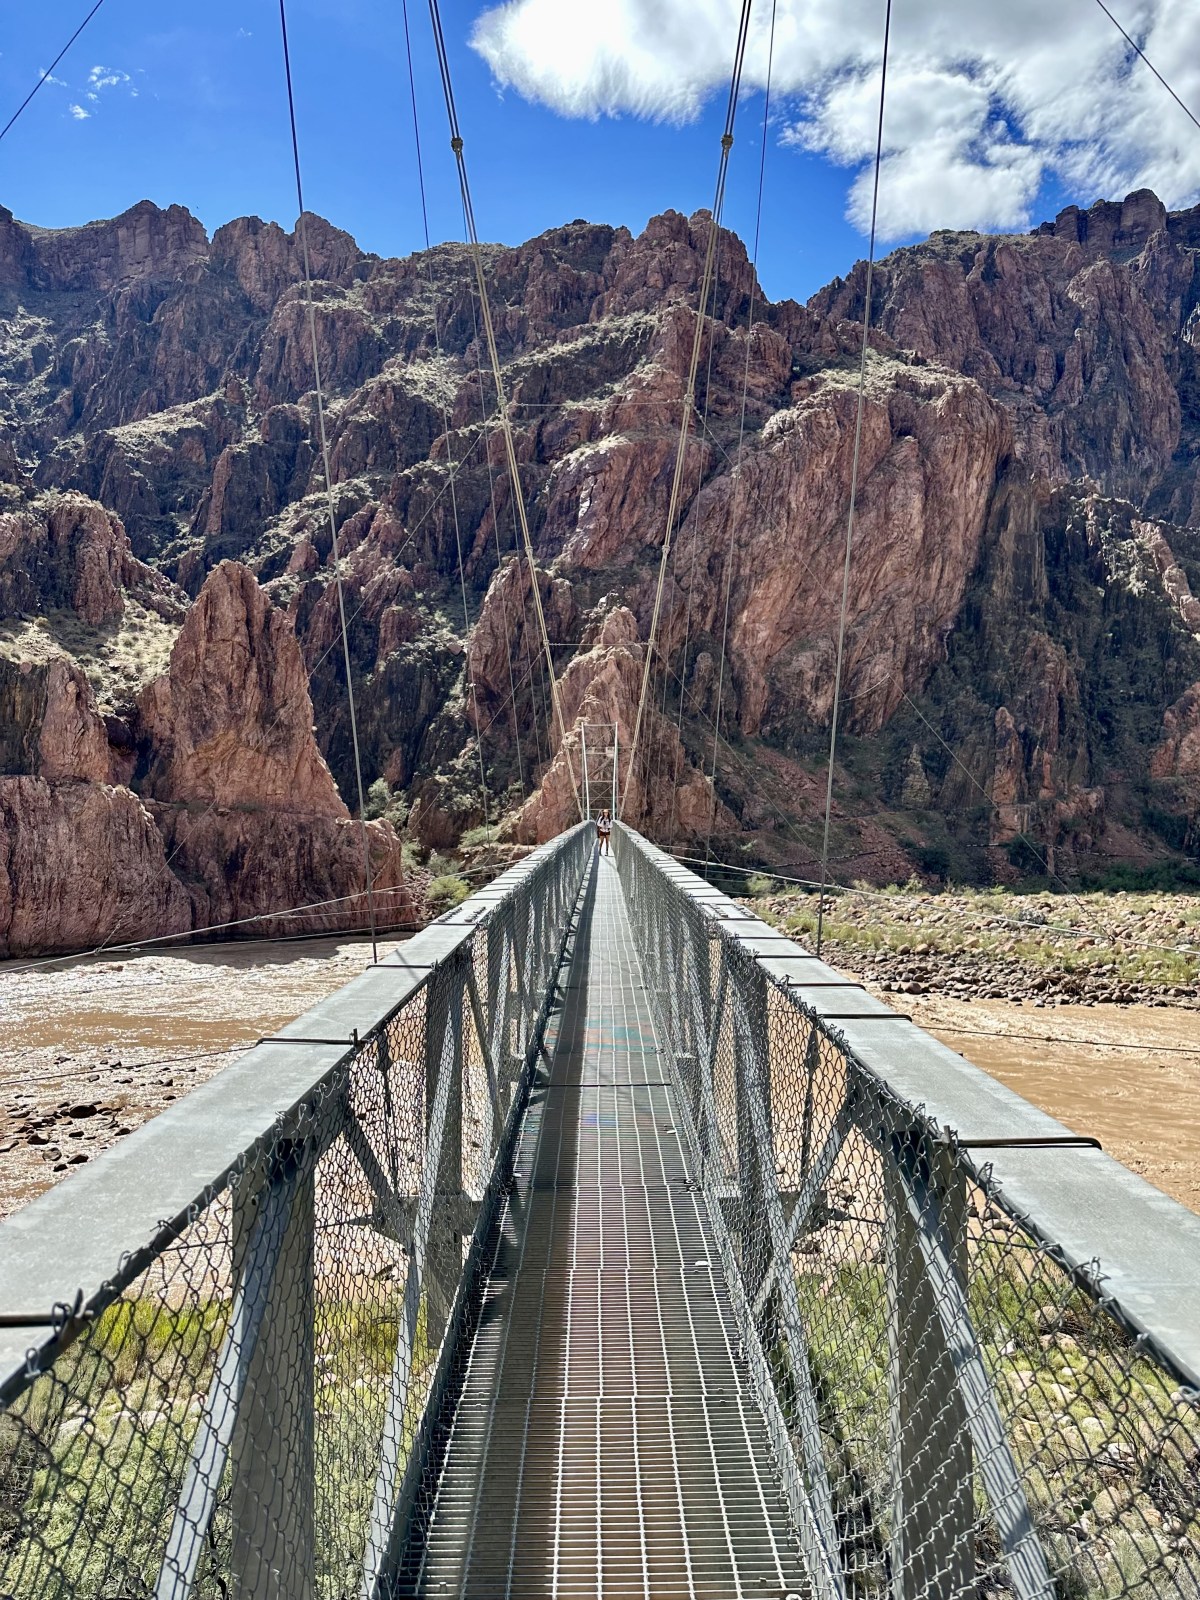
Just 10 minutes later, at 11:45 a.m., we reached the Silver Bridge on the Bright Angel Trail, crossing over the Colorado River. The roar of the river was incredible, and the moment felt surreal — a major milestone in the Rim to Rim hike.


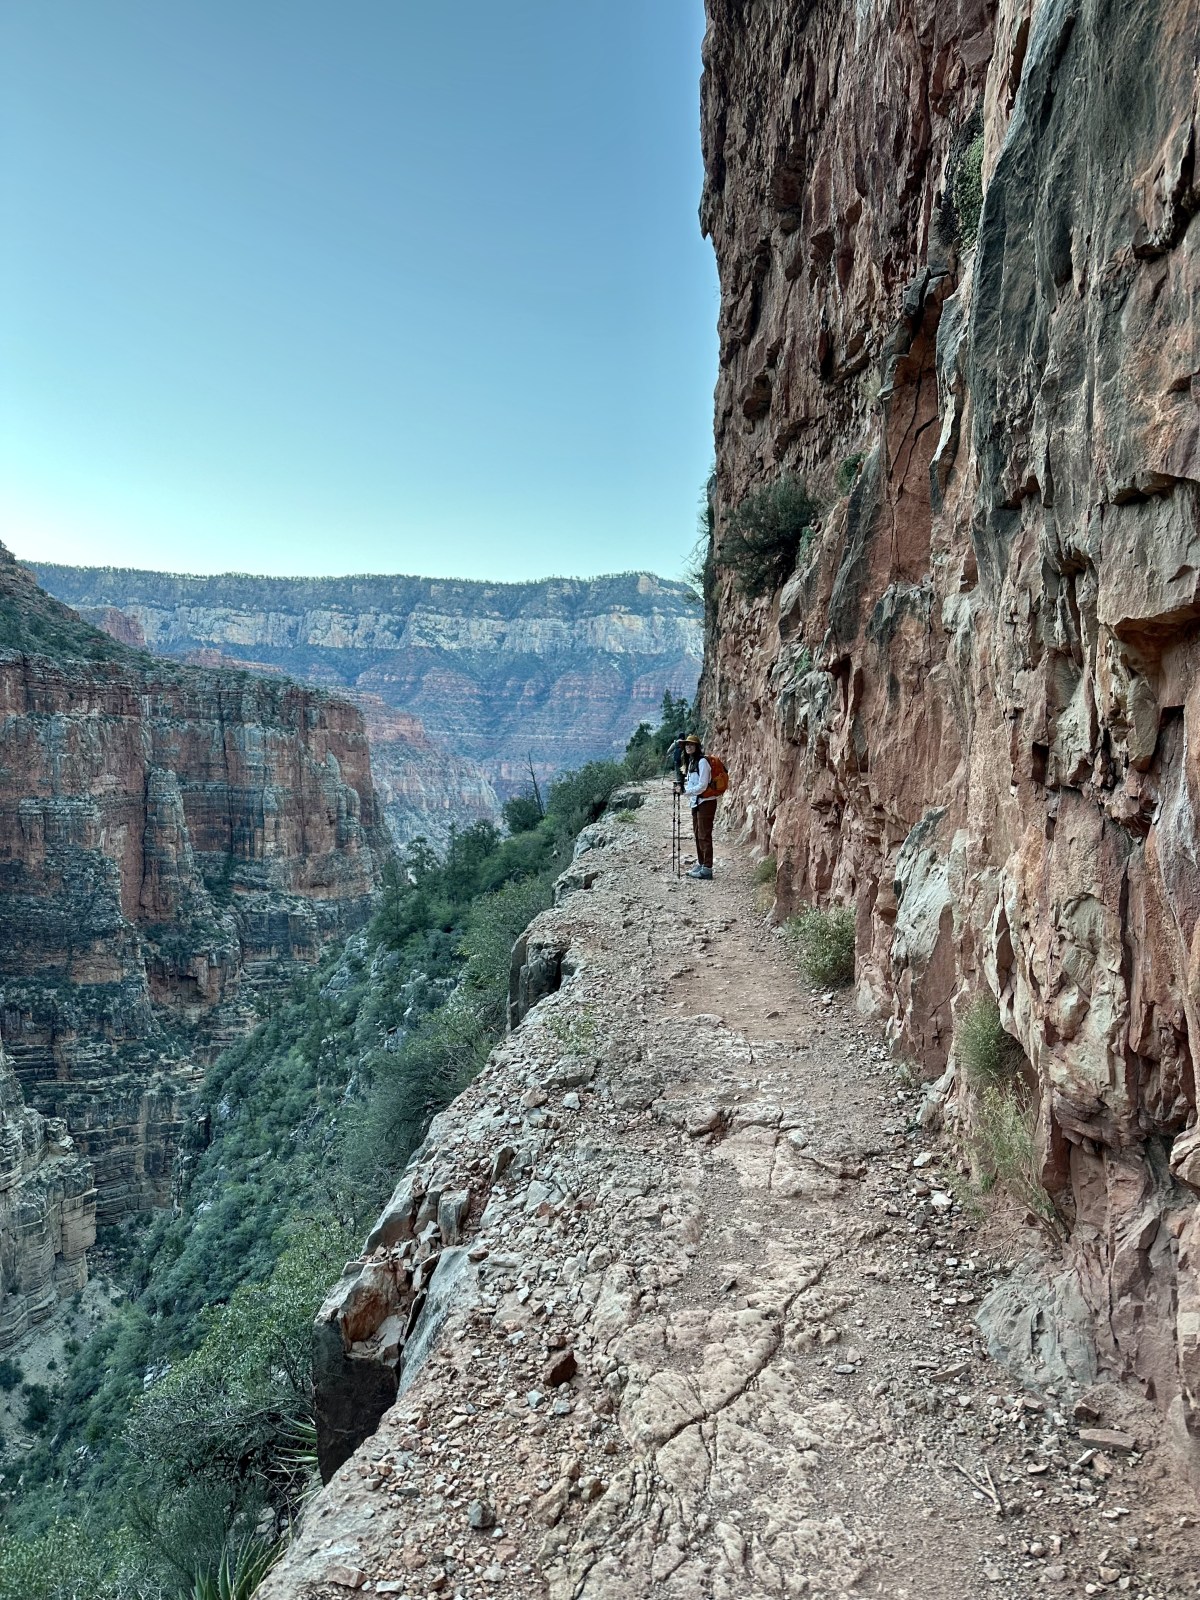
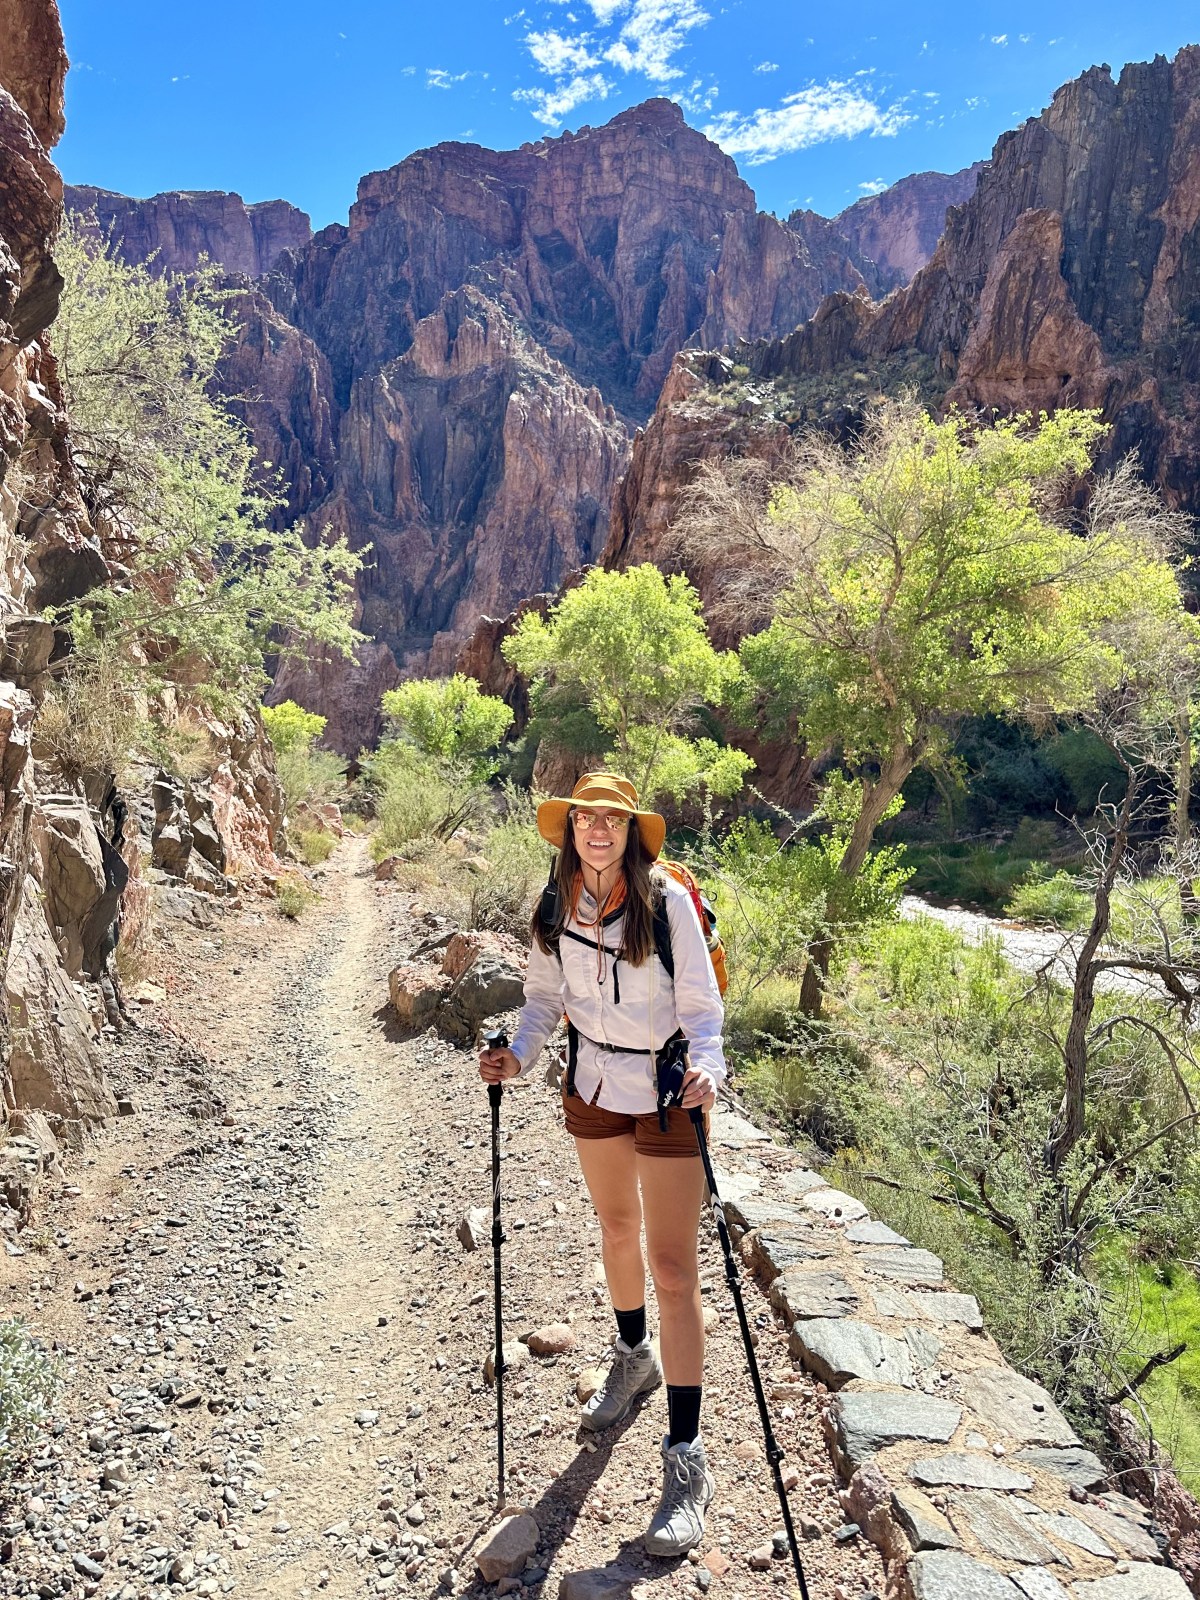
Climbing the Tonto Platform: Final Stretch to Havasupai Garden
In our opinion, this next part was the most brutal part of the hike — though not necessarily the hardest (that’s saved for the last 3 miles). The next 4.5+ miles had very little to no shade, were entirely uphill, and we were still close enough to the canyon floor to feel the temperatures rising. We were so looking forward to getting to Havasupai Garden.
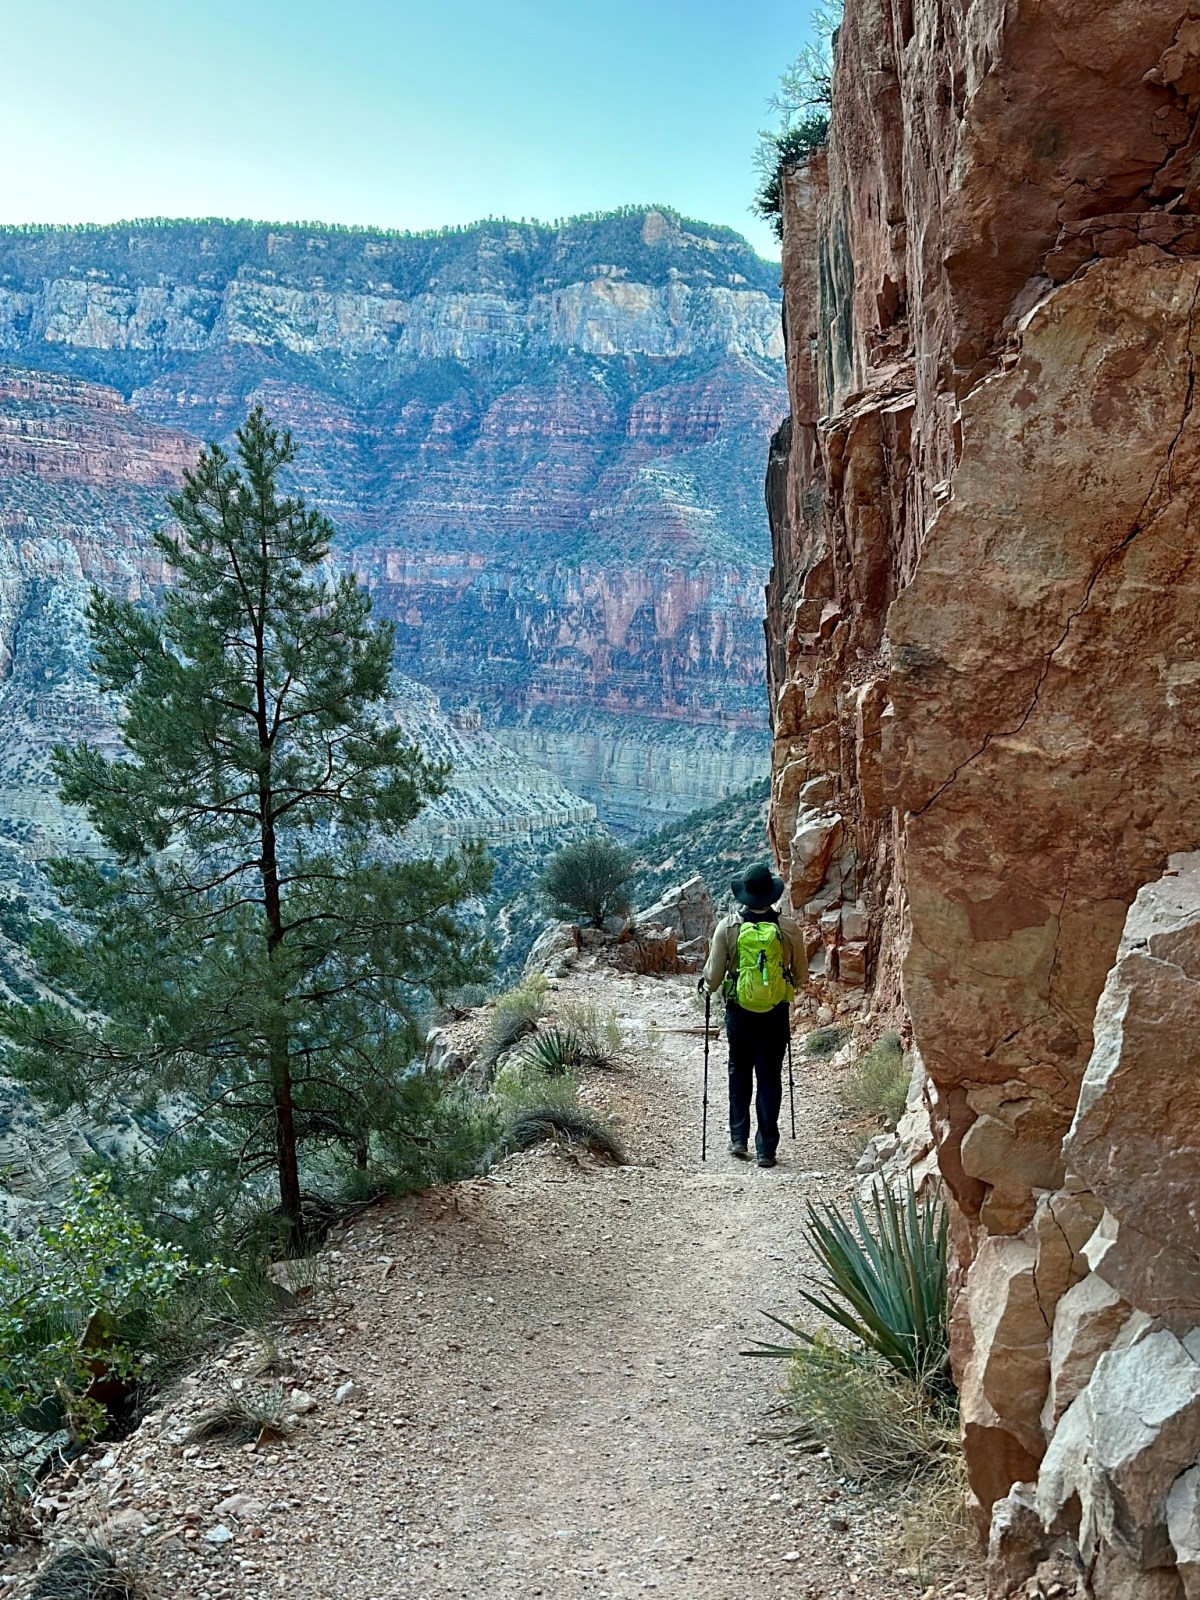
Climbing Toward Havasupai Garden
As we continued what felt like an endless uphill hike (really 10 miles), we were really starting to feel it, and we took fewer photos. Our focus was on keeping a consistent pace and staying cool. At this point, we put on neck gaiters designed to stay wet and help with heat relief. We dipped them into Garden Creek whenever we had the chance.
On our way up, we stopped more frequently to rest, and during those moments we were able to absorb the stunning timeline of rock layers around us — 2 billion years of geological activity on display as we climbed through the canyon’s history.
Reaching the Tonto Platform
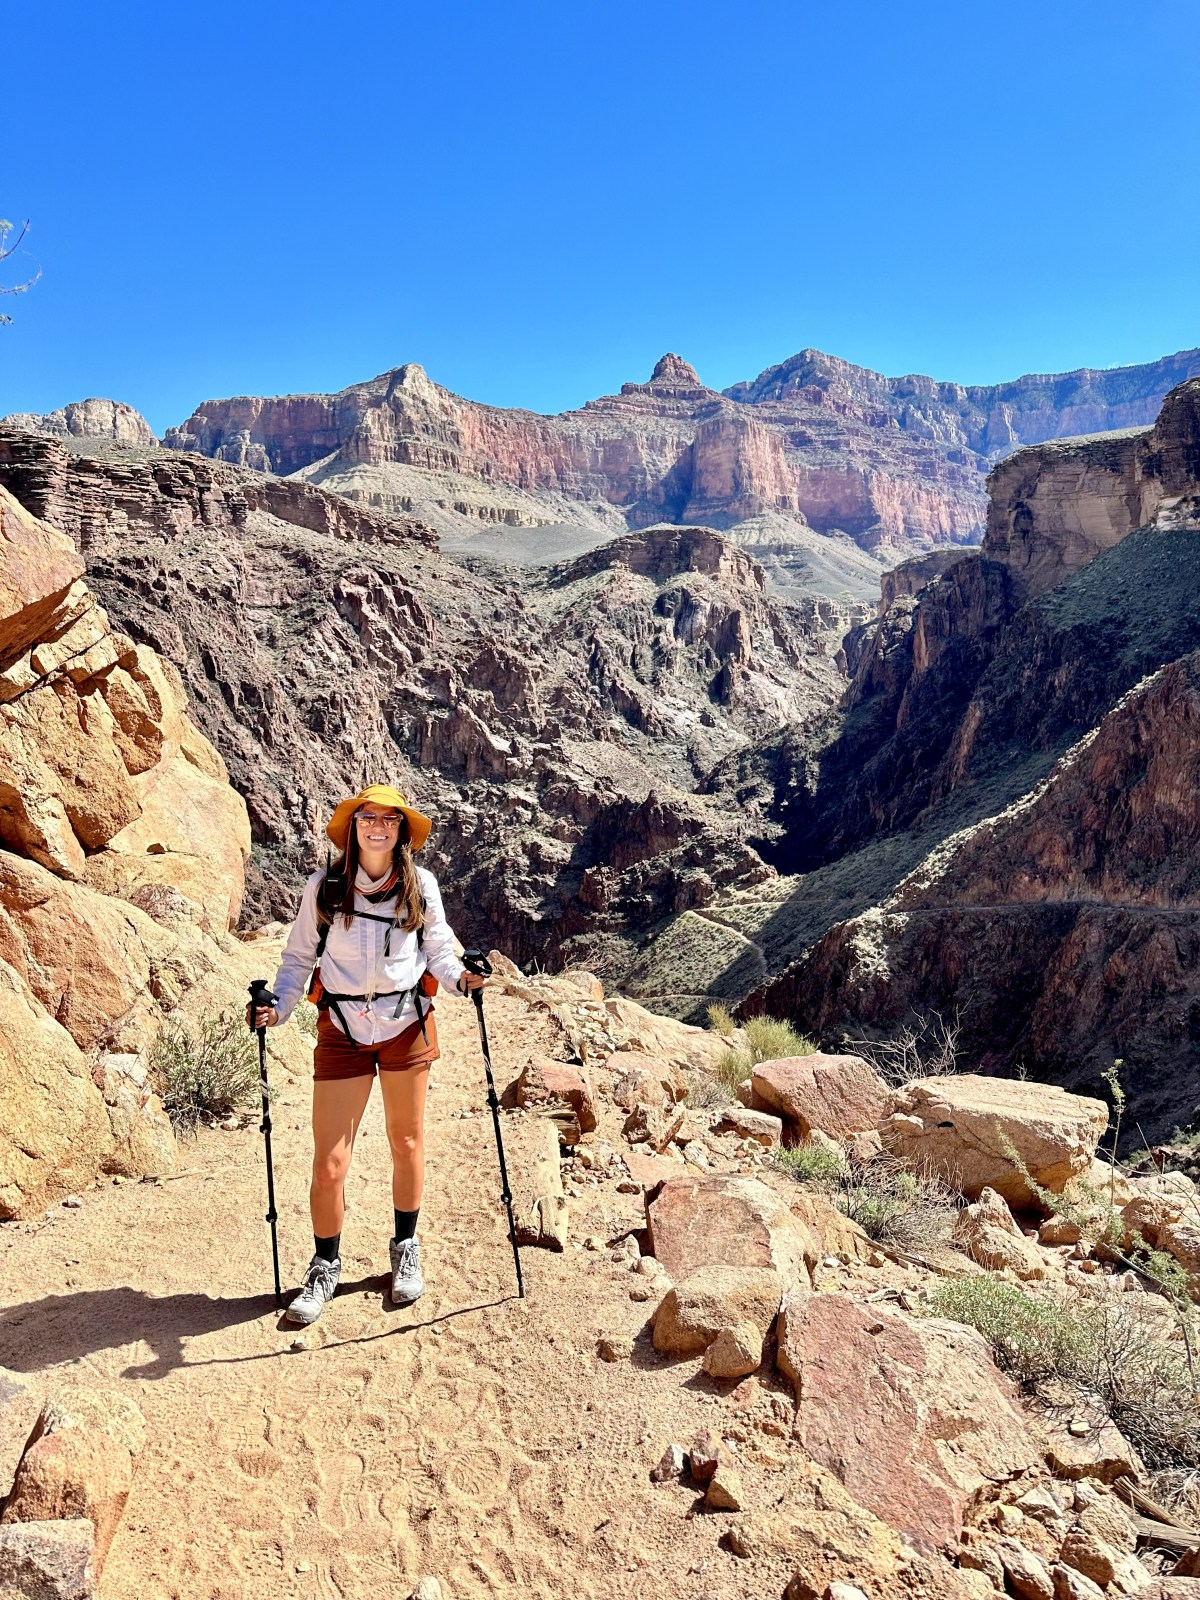
Getting up to the Tonto Platform (a large plateau within the canyon) was both a physical and mental challenge. Luckily, we had our hiking poles and a trail map, which helped us break the hike into segments and stay motivated to reach the next major rest stop.
The poles helped take pressure off each step and kept us stable. The map gave us mental checkpoints and helped us visualize progress, especially when the miles felt long.
Arrival at Havasupai Garden
Once we made it to the top of the plateau, we could tell we were getting close. The vegetation increased, there was a bit more shade, and it felt like a small reward. We finally reached Havasupai Garden, where we stopped to refuel with snacks and top off our water reservoirs at the spigot.
The stretch from the Colorado River to Havasupai Garden was the most brutal part of the Rim to Rim hike, though not the most technically difficult. That title goes to the final climb to the South Rim. Still, this 4.5-mile section was a steady, exposed uphill effort, and the heat was intense.
The climb felt endless at times with nearly 10 miles of uphill hiking on Bright Angel Trail; the fatigue was real. We stopped taking photos, stayed focused, and leaned heavily on the small things (like a soaked neck gaiter) to stay comfortable.
This section tested both our endurance and our mindset. Thankfully, reaching Havasupai Garden gave us a much-needed boost before the final 4.5-mile push to the rim.


The Final Climb: Finishing Our Rim to Rim Hike
The final three miles to the top of the South Rim were without a doubt the hardest for us. By that point, we had already covered 21 miles and the fatigue was setting in hard. The steady uphill climb was taking a toll on our hips, and it became harder and harder to lift our feet. Our pace slowed, and what began as a strong hike gradually shifted into a determined shuffle.
Just when we needed it most, we were gifted a moment of beauty, a rainbow arcing over the Grand Canyon. We like to believe it was a sign from Lauren’s late grandmother, who passed away in 2021, cheering us on in spirit.
As we neared the top, we began to encounter more day visitors hiking downhill, and trail etiquette became an unexpected challenge. Some didn’t yield to uphill hikers, which added a layer of frustration to an already tough final stretch.
But eventually, after 11 hours and 45 minutes, we reached the top. We had officially completed the Grand Canyon Rim to Rim hike in one day, and it’s an experience we’ll never forget.


What Gear to Bring for Rim to Rim Hike
Our goal was to hike smart — meaning we wanted to be well-prepared, carry enough hydrating and replenishing snacks, and keep our packs as light as possible for the 24-mile journey.
The day before our hike, we wore the same clothes we planned to hike in, or items we were okay with throwing away if needed. We kept things simple and low-maintenance.
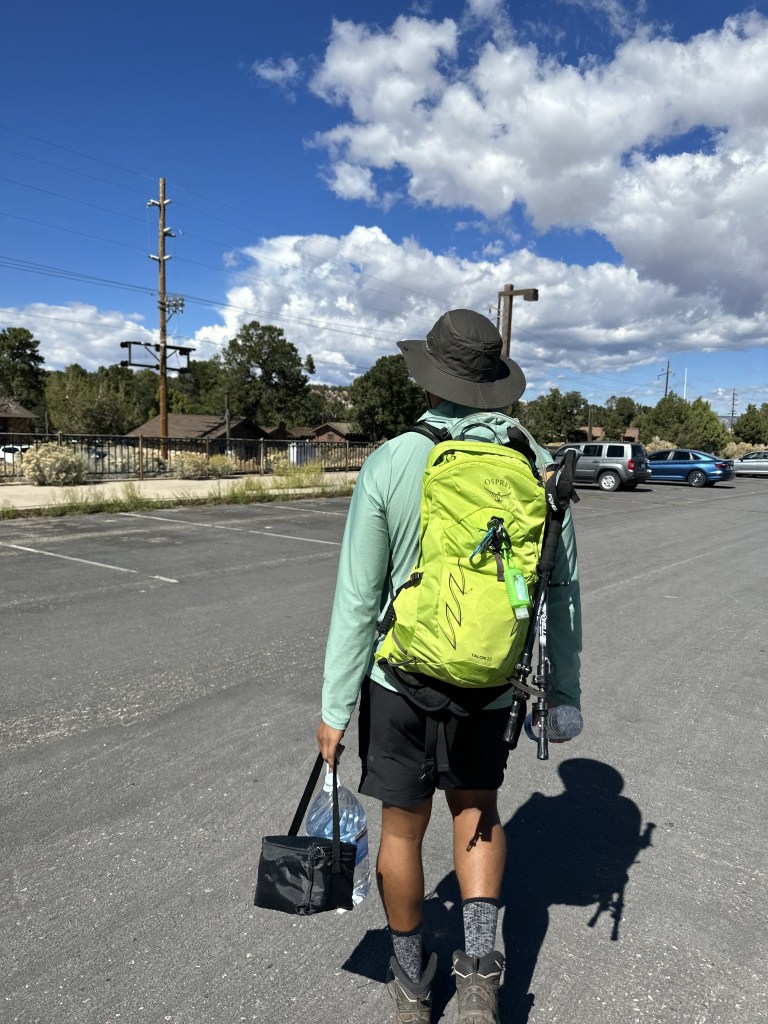
Our backpacks were 20L and 22L daypacks, and we pre-packed them at home to make sure everything fit. This helped avoid last-minute stress and let us dial in the weight ahead of time.
For footwear, we wore broken-in hiking boots that we trusted — supportive but not worn down. Many hikers also complete Rim to Rim in trail runners, which can be a great lightweight alternative depending on your foot support needs and the pack weight you’re carrying.
Some of the links below are affiliate links and we may receive a small commission through purchases made, at no cost to you. We greatly appreciate your support!
What to Wear Hiking Rim to Rim

Hiking Poles & REI Sahara Shirt
We both highly recommend hiking with poles. They were extremely helpful and took the weight off our knees. Lauren wore this REI Sahara shirt under her Cotopaxi. She kept it on for sun protection.

Black Diamond Headlamp & Cotopaxi Half Zip
We started the hike in the dark so we both wore Black Diamond headlamps. Lauren also started the hike in a half zip jacket because it was only in the 30’s
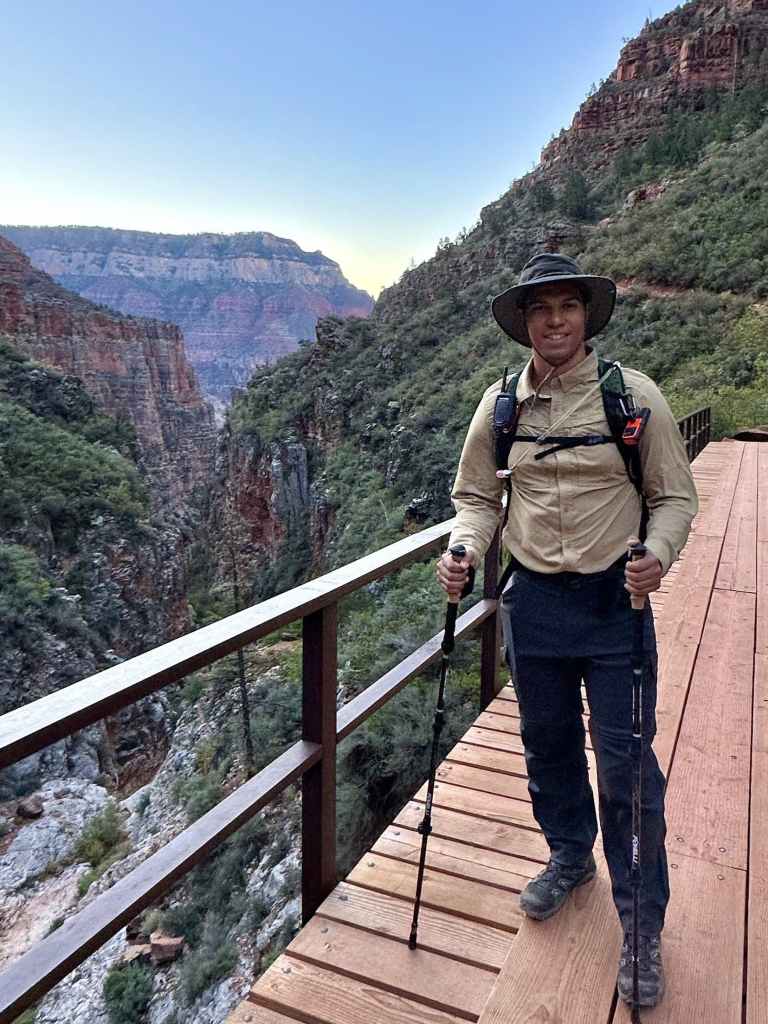
Sahara Convertible Pants & The North Face Horizon Breeze Brimmer Hat
Lauren wore REI convertible pants because she knew the start of the trail would be cold, but wanted to be able to easily take layers off. This North Face hat is one of Lauren’s favorite hats to hike in. It’s easy to pack up in her pack when she doesn’t want to wear it
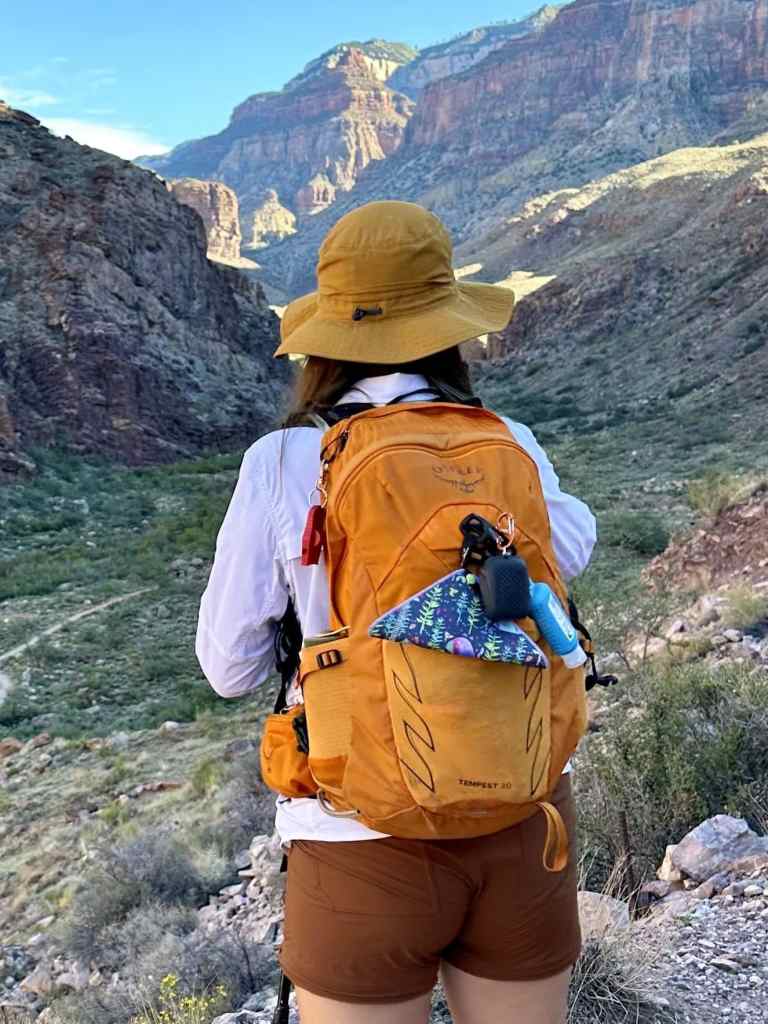
Lauren brought this bag because she needed enough room for her layers and snacks, but also didn’t want too big of bag because she didn’t want a lot of weight on her back.

Salomon X Ultra Mid Hiking Boots
Lauren wore Salomon 4 mids for this hike. She wore these because she knew they were comfortable and wanted the ankle support. We’ve updated to most recent version available. Salomon.com
Kuhl Renegade Convertible Pants & Sahara Solid Long-Sleeve Shirt
Owen wore Kuhl convertible pants because he also wanted to be able to turn them into shorts when he got warm. He wore the Sahara long sleeve for sun protection
Osprey Talon 22 & Hiking Poles
Owen brought this pack for similar reasons as Lauren. He needed space for his layers and enough room for snacks.

REI Vented Hat & Bison Designs Pure Trek Belt
Owen hiked in this hike REI hat because it is super lightweight and breathable. The Bison Designs belt because it is a strong material and pretty universal for belt loops. More recently, Owen has been using the Resistor Belt from Kuhl the Class V Brimmer Hat from The North Face.

Salomon X Ultra Mid Hiking Boots
Owen wore Salomon X Ultra Mid 4 hiking boots because he knew they are comfortable and he wanted the ankle support. Today, these are the latest version available from Salomon.
What to Bring in Your Hiking Bag
We both always bring our headlamp with us when we hike because we never know when will we need it. For R2R we started the hike in the dark so we knew we needed it. We always bring extra batteries with us just incase.
We both carry our own first aid kit. We bought them at REI and we refill it when we run out of items.
It took us awhile to invest in one of these but we can’t imagine hiking without it now. The purpose behind this device is to be able to contact emergency services if we needed to. We also use it to communicate with our families while hiking without service. We updated our parents along R2R. There are monthly fees and activation fees that are associated with Garmin Satellite Communication Services.
We absolutely love these walkie talkies! It makes it easy to communicate with each other when one of us hikes ahead of the other. They worked great within the canyon walls.
We brought SaltStick chews with us. They help reduce muscle cramping, reduce heat stress, boost Stamina, and maintain electrolyte levels. We found them very helpful on trail and easier to consume compared to always drinking a packet made electrolyte mix.
We love Honey Stinger and ate their energy gummy chews, waffles, and gels on trail. We like their clean ingredients and natural energy sources.
PB&J Lunch
For lunch we ate at Phantom Ranch and ate Smuckers Uncrustables. We also got a lemonade from the little store! It. was so refreshing
Energy Sustaining Snacks
We brought Clif Bars, trail mix, beef jerky, etc.
We always keep paracord on us in case something breaks like a shoe lace, strap, belt, etc. or a bone; paracord can be used in stabilizing a splint. It’s a very strong rope used throughout the outdoors industry
We always bring these emergency blankets with us. If we were to get hurt they would come in handy
Our Osprey packs do have a small whistle attached to them but Lauren likes to carry a larger whistle on our pack for emergencies
Lauren always carries a Kula Cloth on the outside of her bag. It’s a reusable Antimicrobial Pee Cloth. This is to help eliminate tissue waste!
We always carry a compass just in case
Lauren always carries an emergency mirror. It could help signal someone if we got hurt
For a comprehensive list of all of our gear check out our post HERE. For more details on hiking pack essentials, check out our blog post on Our Ten Must-Have Gear Picks for Every Hike. We also have individual posts about what we like to use, especially in warm conditions: Lauren | Owen.
What to Consider in Your Pysical Training
We didn’t follow a strict training plan for our Rim to Rim hike, but we’re both regular hikers and go to the gym four days a week. Owen works with a personal trainer, and Lauren goes to Orangetheory Fitness — both helped with overall strength and endurance.
Still, we wish we had done more targeted training for our knees and quads. By the end of the hike, they were definitely feeling it. If we did it again, we’d spend more time on the stair master and include more leg-focused exercises like step-ups, lunges, squats, and deadlifts.
Beyond gym workouts, doing long hikes beforehand is key for building endurance and testing gear. In the Phoenix area, we recommend the Superstitions, McDowell Sonoran Preserve, and South Mountain.
For steep climbs that prepare you for Rim to Rim’s elevation gain, check out:
Thompson Peak (McDowells)
Telegraph Pass (Yuma)
Mount Wrightson (near Tucson)
Pusch Peak (Oro Valley)
Doing these ahead of time will give you a solid sense of your pacing, gear comfort, and hydration needs for Rim to Rim.

