
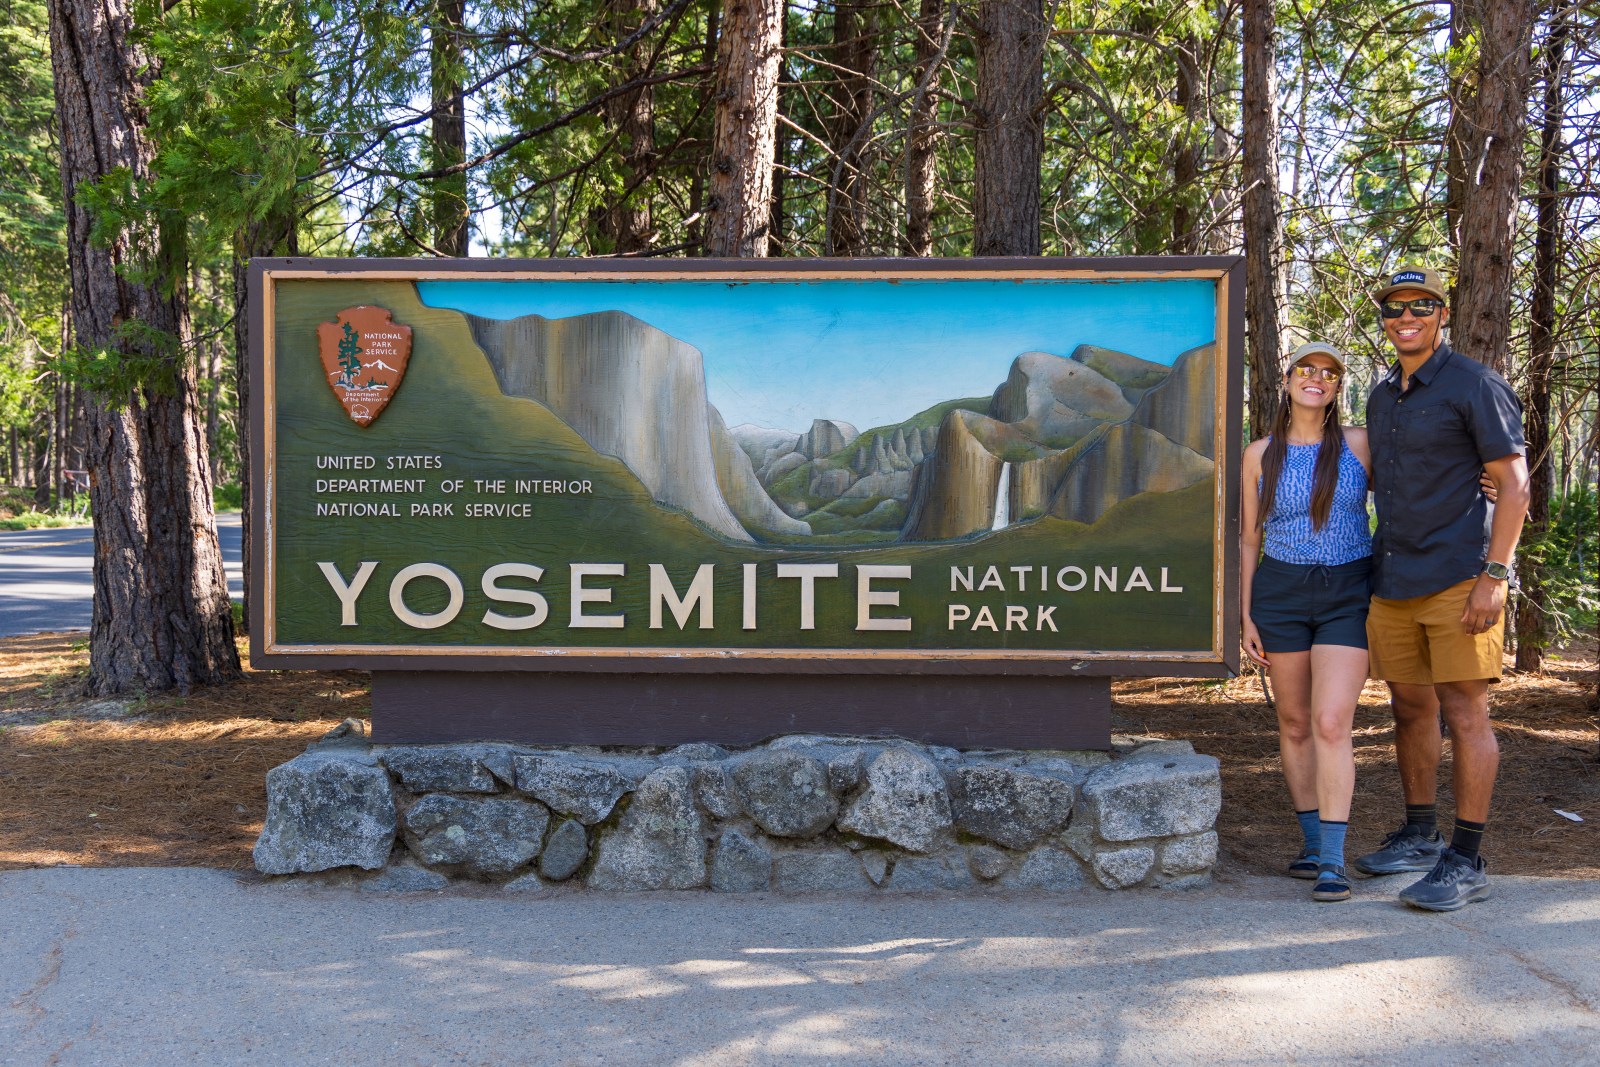
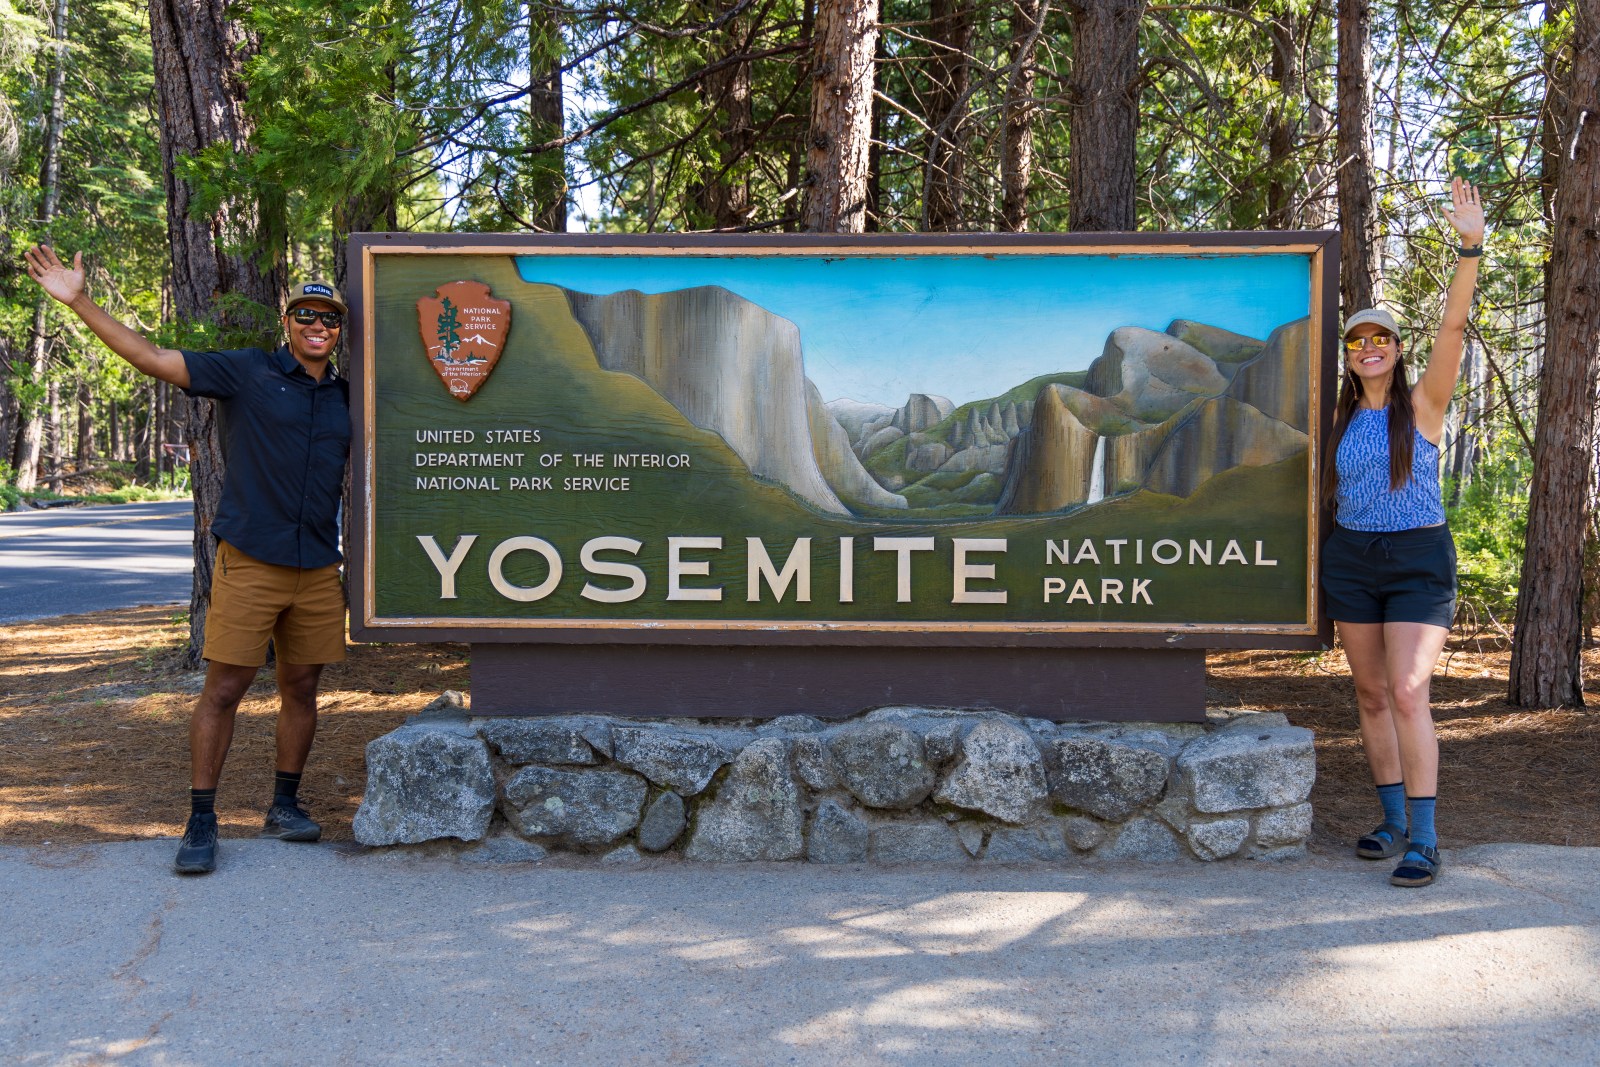
Visiting Yosemite in the Summer
Visiting Yosemite National Park had been on our list for a long time. We dreamed of standing in Yosemite Valley, surrounded by towering granite cliffs, cascading waterfalls, and meadows split by the Merced River. When we finally made it happen, we wanted to make the most of every moment, knowing we might not be back for a while.
To maximize our time in the Sierra Nevada Mountains of central California, we planned a 10-day summer road trip that also included Sequoia and Kings Canyon National Parks. We spent seven nights camping in the parks, from June 14 to June 21.
Why Visit in June
We chose mid June for a few reasons. First, the weather is typically ideal with low chances of rain, long daylight hours, and warm days with cool, comfortable nights. Second, most of the park is fully open by this time, and the waterfalls are still flowing strong from snowmelt.
The only downside is that summer is the busiest season, so expect crowds. But with some planning, it is still absolutely worth it.
Why Start in Yosemite
We originally planned to work our way north through the parks, but because Yosemite campsites were released prior to Sequoia for that week, we took what we could get which lead us to starting in Yosemite and working our way south. We’ll dive deeper into campsite reservations further below.
Throughout this blog we will share our exact four-night itinerary for visiting Yosemite National Park. Additionally we’ll share suggestions for shorter visits, tips and advice we learned throughout the process, and other factors to consider for future visits to Yosemite National Park.
Our Route
We drove from Phoenix for this trip, but you can also fly to Fresno and rent a car to get their faster. On Friday after work we left Phoenix, stopping overnight in Santa Clarita just north of Los Angeles. The next morning, we continued another 4.5 hours to Yosemite’s South Entrance. After four nights in Yosemite, we headed south to Sequoia and Kings Canyon. On Saturday we made our way back to Los Angeles, making a final overnight stop with friends before heading home Sunday.

Table of Contents
Important Things to Consider When Visiting Yosemite
Yosemite National Park is a large and diverse park with many stunning natural attractions. Some of the most popular spots require long drives, waiting in traffic, or navigating limited parking. That is why we recommend arriving with a flexible itinerary that includes backup plans. Be prepared to adjust based on how you are feeling, changes in weather, or unexpected closures.
Timed Entry Into Yosemite
Over the past few years, Yosemite has tested out a timed entry system. In 2024 they ran a trial and used that experience to shape their future plans or so we were told.
In 2025, the park implemented timed entry again, but the announcement came very late. The system did not go into effect until June 15, just as the busy season was starting. We are not sure why the rollout was delayed, especially since they had originally planned to announce details in late winter or early spring.
Hopefully in the future, the National Park Service will either finalize a permanent timed entry system or give visitors more notice. Either way, make sure to check Yosemite’s official website before your trip to confirm entry rules for your dates.
What Type of Trip to Yosemite and For How Long
There are many ways to experience Yosemite National Park. We camped for four nights with one night in Wawona and three nights in Yosemite Valley. Yosemite Valley has hundreds of campsites, and there are additional campgrounds spread throughout other areas of the park. Beyond camping, there are several lodging options inside the park, including in Yosemite Valley, Wawona, and the park’s west end, with even more hotels and cabins just outside the entrances. Just keep in mind that the park entrances are far from the main valley, so location matters when booking.
We could have easily stayed longer and still not seen everything Yosemite has to offer. Since our PTO was limited, we aimed to make the most of our four days and took full advantage of the long summer daylight. Most of our time was spent hiking when we weren’t driving between areas.
That said, you do not need to fill every minute with activity. For a slower-paced trip, there are plenty of easy river access points perfect for a beach day, scenic drives with overlooks, and even guided tours for those who prefer a more relaxed visit.

Factor in the Distance Between Yosemite Sections
Most areas of Yosemite National Park are between one to two hours apart. There are no long stretches of straight road with high speed limits, which can be both a challenge and a benefit. This is bear country, and many animals cross the roads throughout the park.
You will see yellow “Speeding Kills” signs placed where a bear was hit and killed by a vehicle. These are a powerful reminder to stay alert and drive carefully.
The roads often twist and turn along the mountains and cliffs, with maximum speed limits around 35 miles per hour. In Yosemite Valley, things move even slower due to heavy traffic, pedestrians, and cyclists.
When planning your itinerary, we recommend mapping out drive times between destinations and noting nearby gas stations if needed. Factoring in travel time will help your days feel smoother and more relaxed.
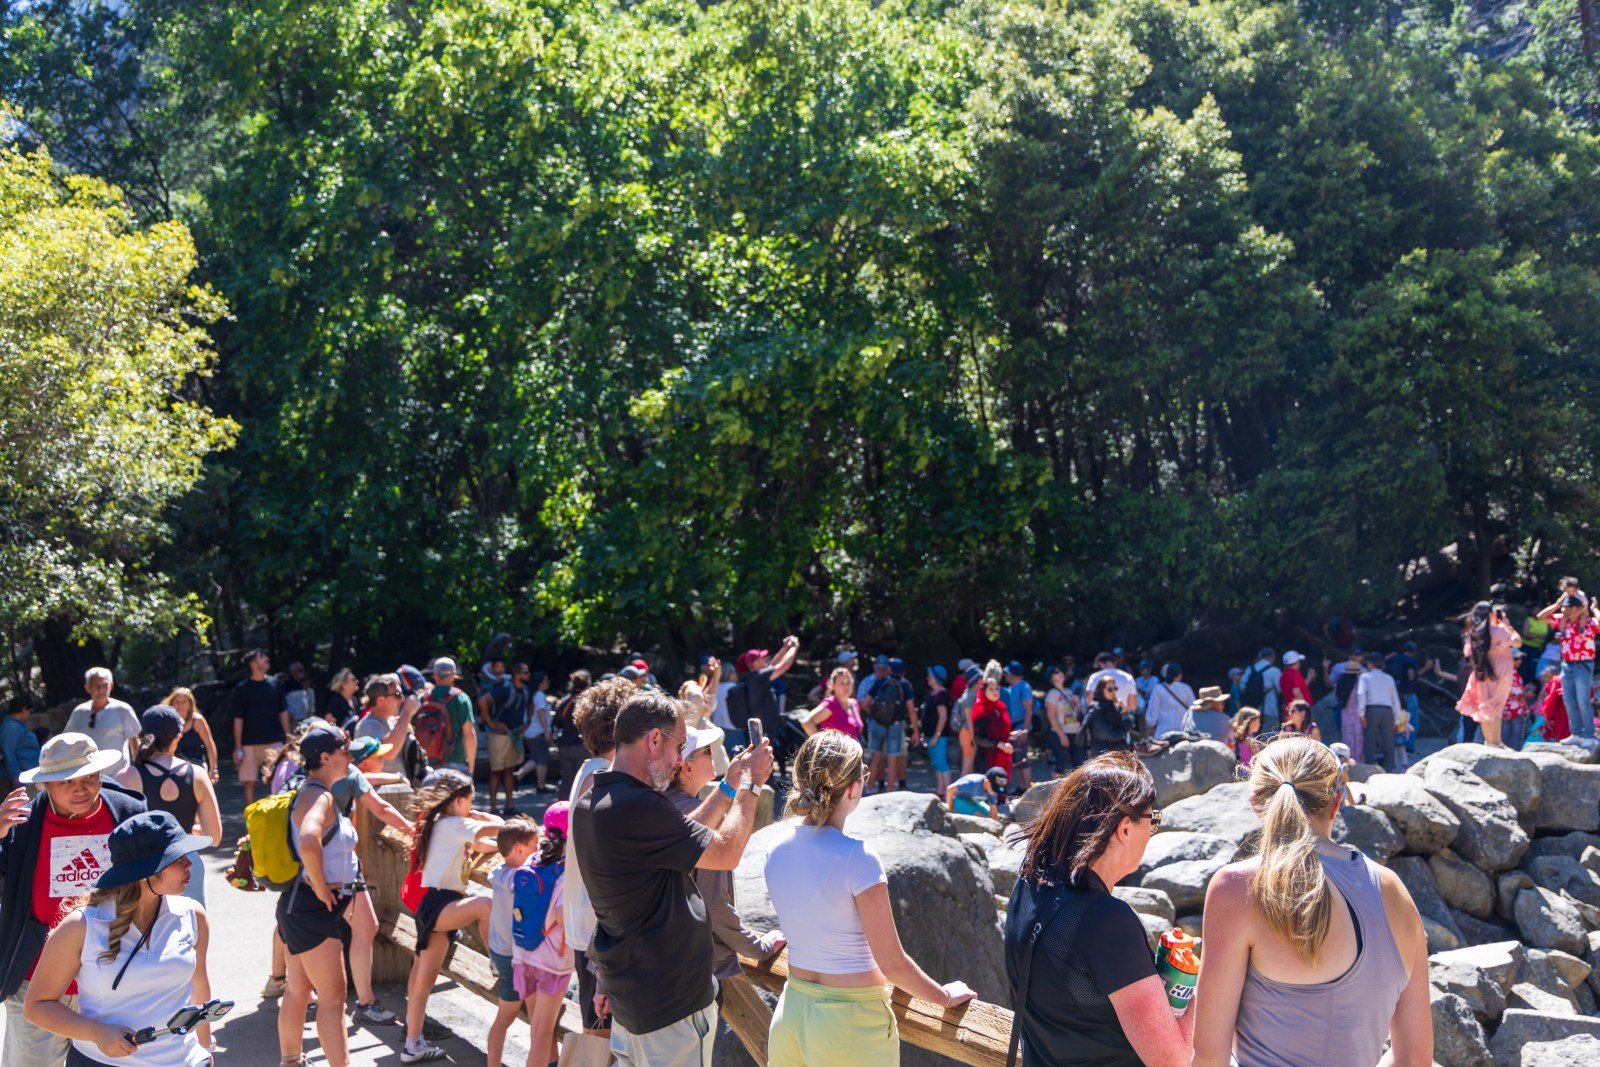
Will Yosemite be Crowded
The short answer is yes. But the good news is that it does not always feel that way, depending on what you are doing.
In mid June and throughout the summer, Yosemite is one of the most popular national parks in the country. We expected crowds going into our trip, and after experiencing the park’s stunning scenery and perfect weather, we completely understood why.
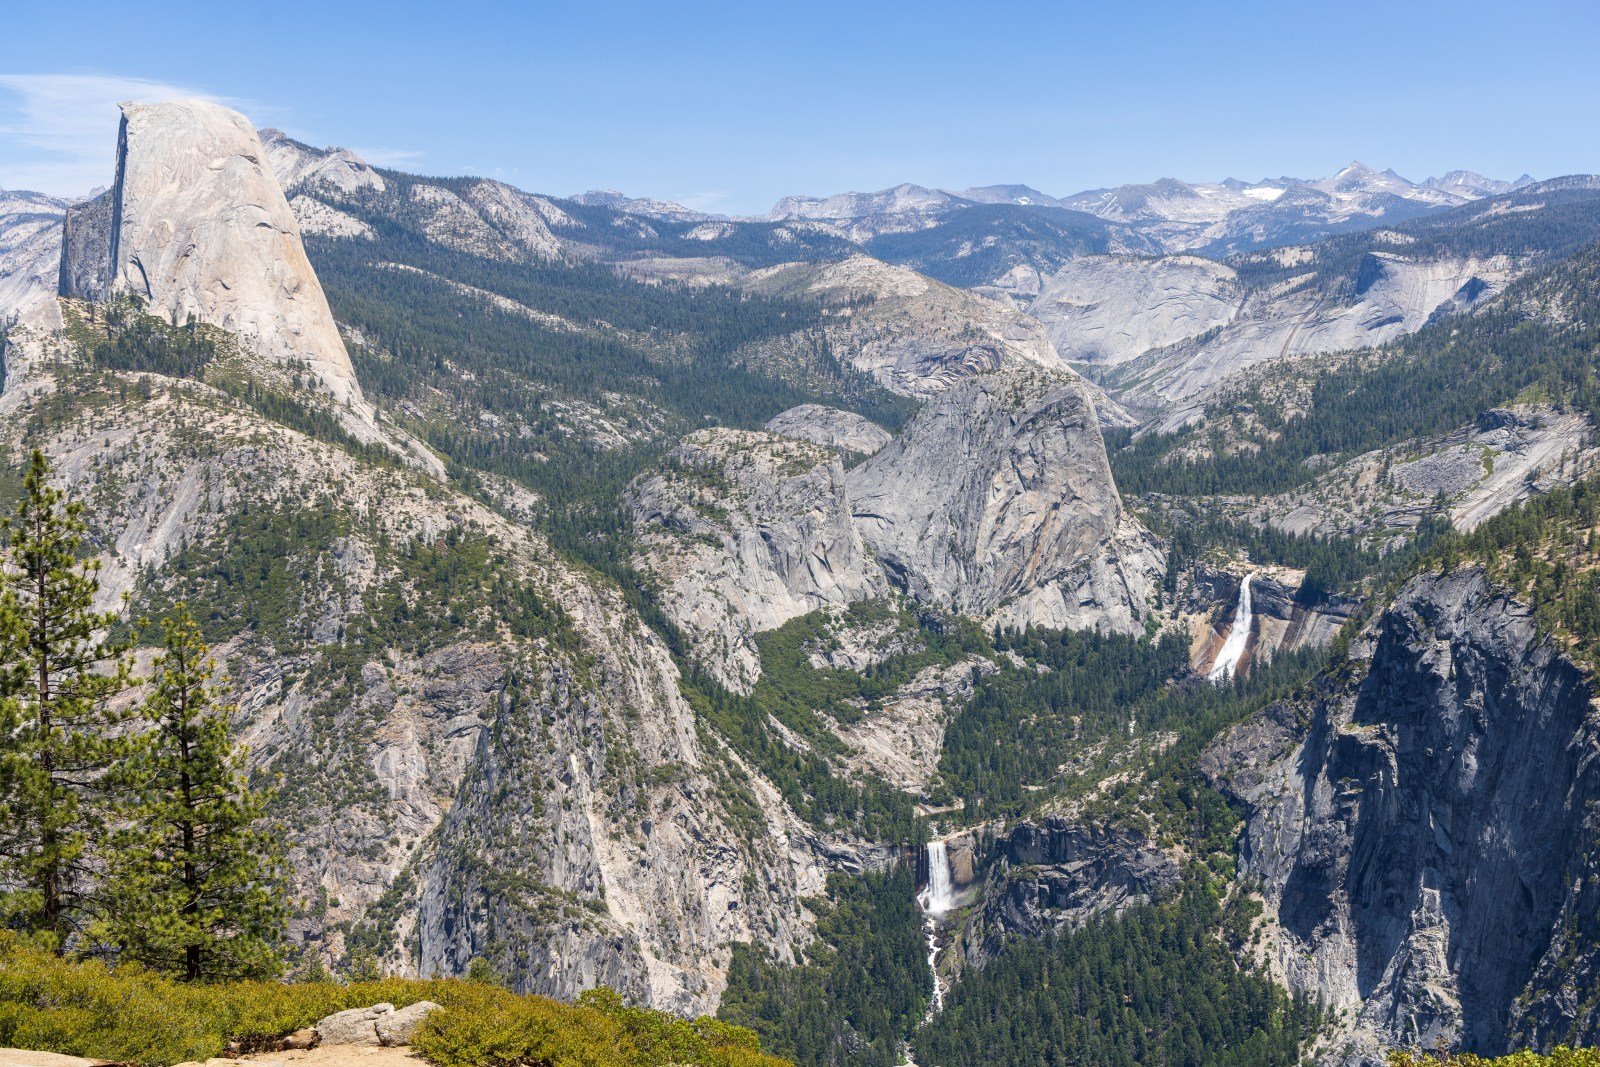
For us, it felt busiest on the roads, in parking lots, and around the campgrounds. But once we got on the trails, the crowds usually thinned out. The one exception was the hike to Vernal and Nevada Falls. As the most popular trail in the park, it gets very crowded later in the morning. The same goes for short and easy walks, they tend to attract more visitors at all times of day.
Tips to Beating the Crowds
Start your day early
Hike farther on the trail than most people go
Choose more challenging hikes if you are able
Explore areas outside of Yosemite Valley
Yosemite Temperatures and Forecasts
Yosemite Valley sits at about 4,000 feet above sea level, while other sections of the park range from 1,000 feet to nearly 9,000 feet. These elevation changes can lead to very different weather conditions from one part of the park to another.
Because of this, we highly recommend checking the official weather section on the Yosemite National Park website. It provides more accurate and location-specific forecasts than general apps.
During our trip, we noticed a big difference between the forecast for Yosemite Valley on Apple’s weather app and the forecast provided by the National Weather Service through the park’s site. If you are planning to visit higher elevations or do longer hikes, this can make a major difference in how you pack and prepare.
Getting Around Yosemite Valley
Yosemite Valley Shuttle
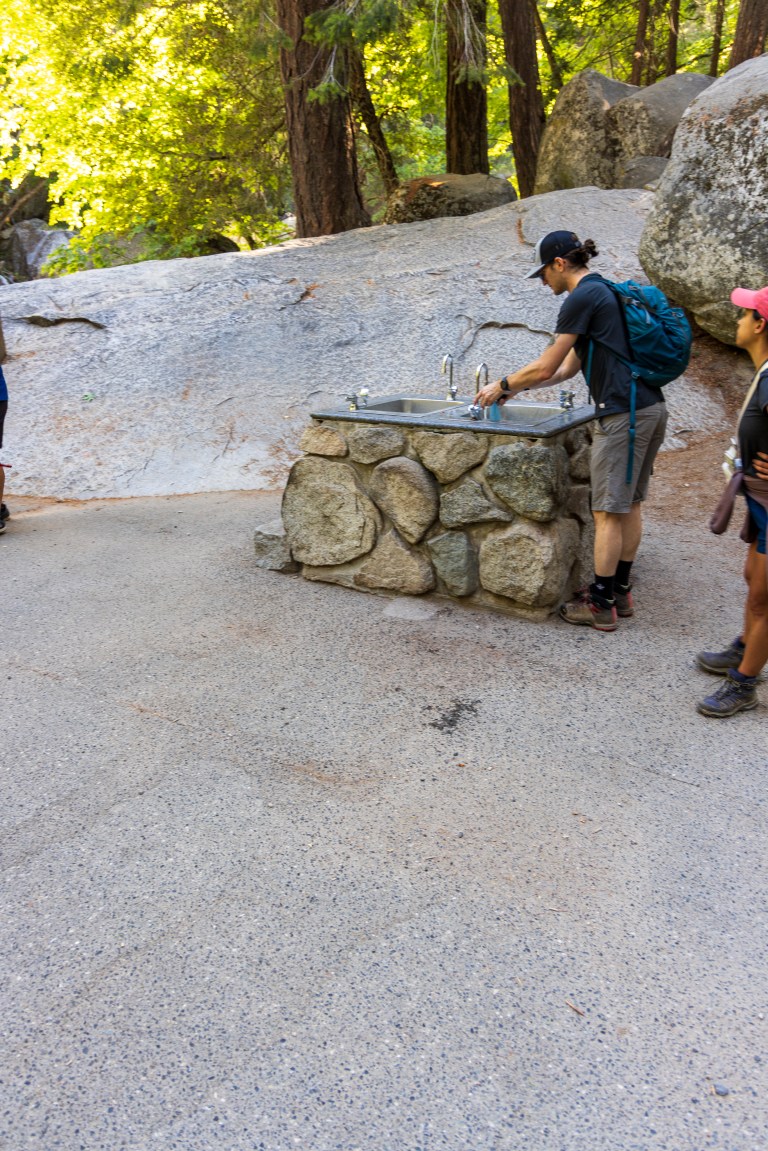
Yosemite Valley has a well-connected and completely free shuttle bus system for visitors. We found it pretty easy to use, although it can get crowded at times, especially during peak hours. When you enter the park, rangers will usually hand out a park newspaper that includes the shuttle route map and helpful tips. You can also find updated shuttle info on the park’s website.
If you are staying within Yosemite Valley, using the shuttle is a great way to get around without needing to move your car. You will not have to stress about parking every day, which can be very limited during the summer. Even if you are just visiting Yosemite Valley for the day, the shuttle makes it easy to park once and explore multiple destinations.
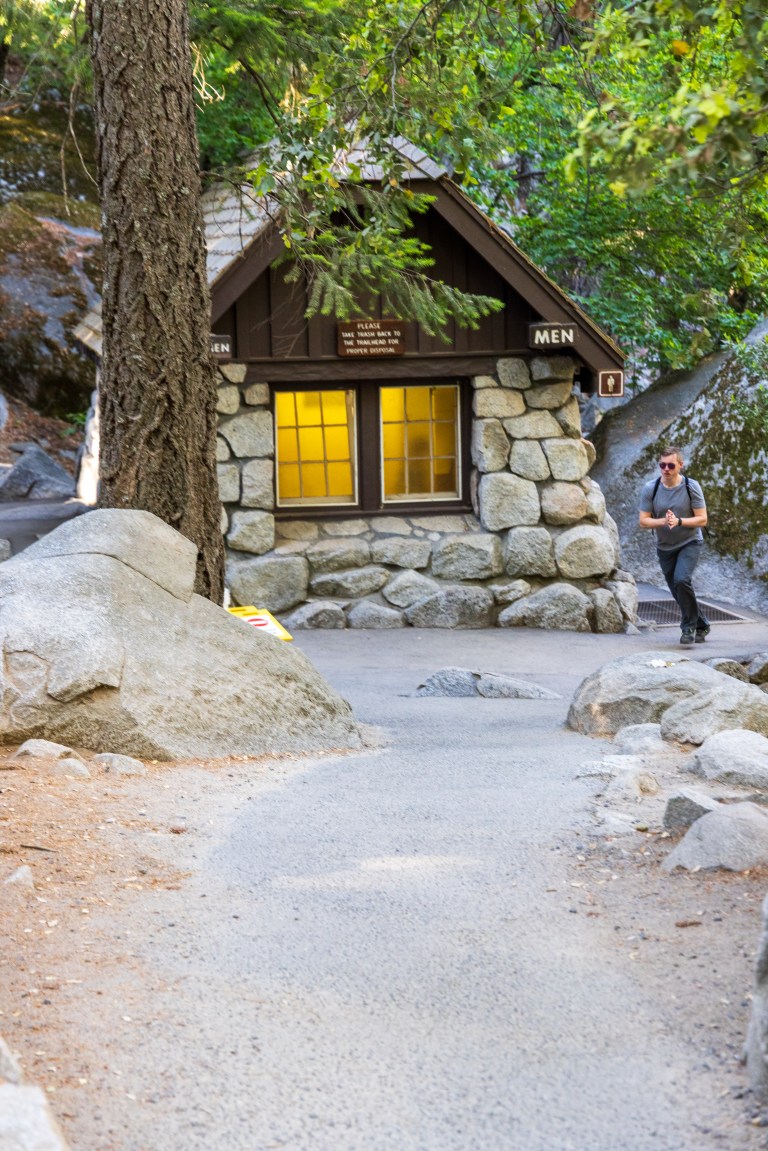
Just keep in mind that you will need to carry anything you plan to bring with you and may need to factor in time for food, water, or bathroom breaks between stops.
Biking in Yosemite Valley
Yosemite Valley is also very bike friendly. There are bike rentals available as well as a bike share system. While we did not use either during our trip—since most of our time was spent hiking—we saw plenty of visitors biking around and it looked like a fun and efficient way to explore.
Part of us wished we had brought our own bikes, but in the end we were glad we didn’t. Our setup would have made it tricky to keep them secure, and we would have needed to store and transport them during the second half of our trip without using them. For us, it would have been more of a hassle than a benefit.
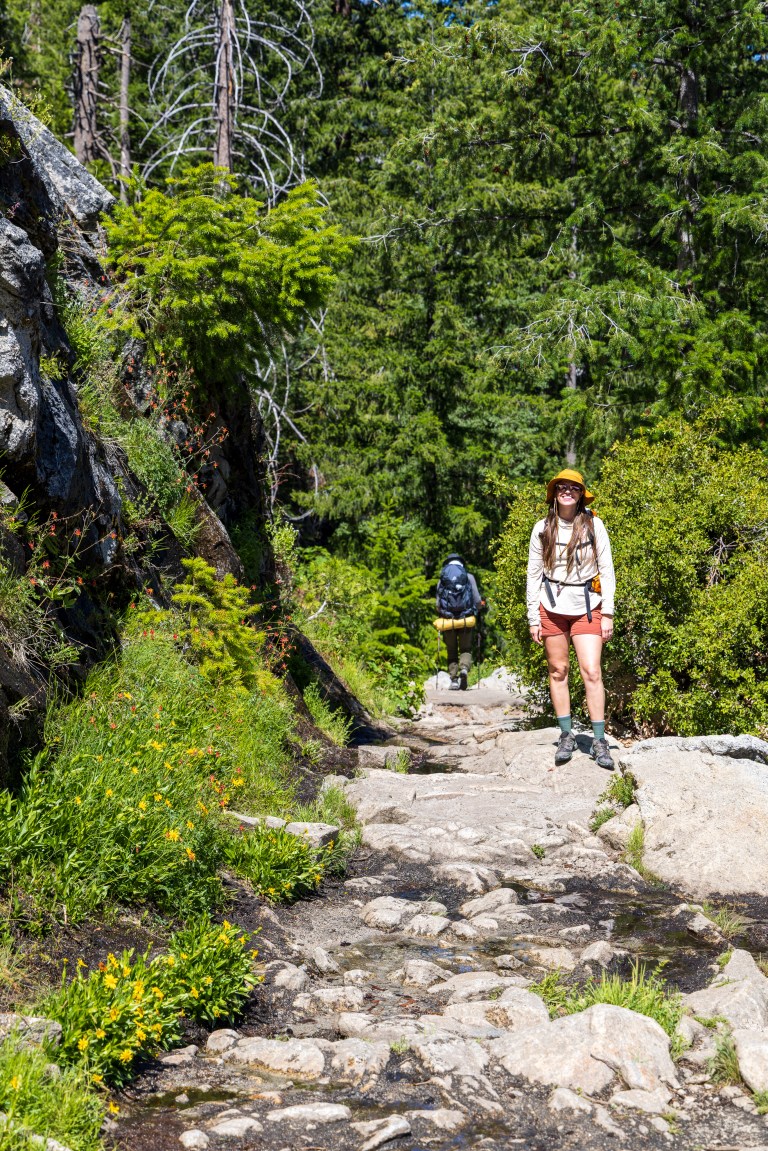
Must do Hikes in Yosemite National Park
- Day 1: Arrived around 11am. We checked out our campsite at Wawona (more on that later) and then went to Mariposa Grove to hike around 1pm. Hiked to Lower Chilnualna Falls after.
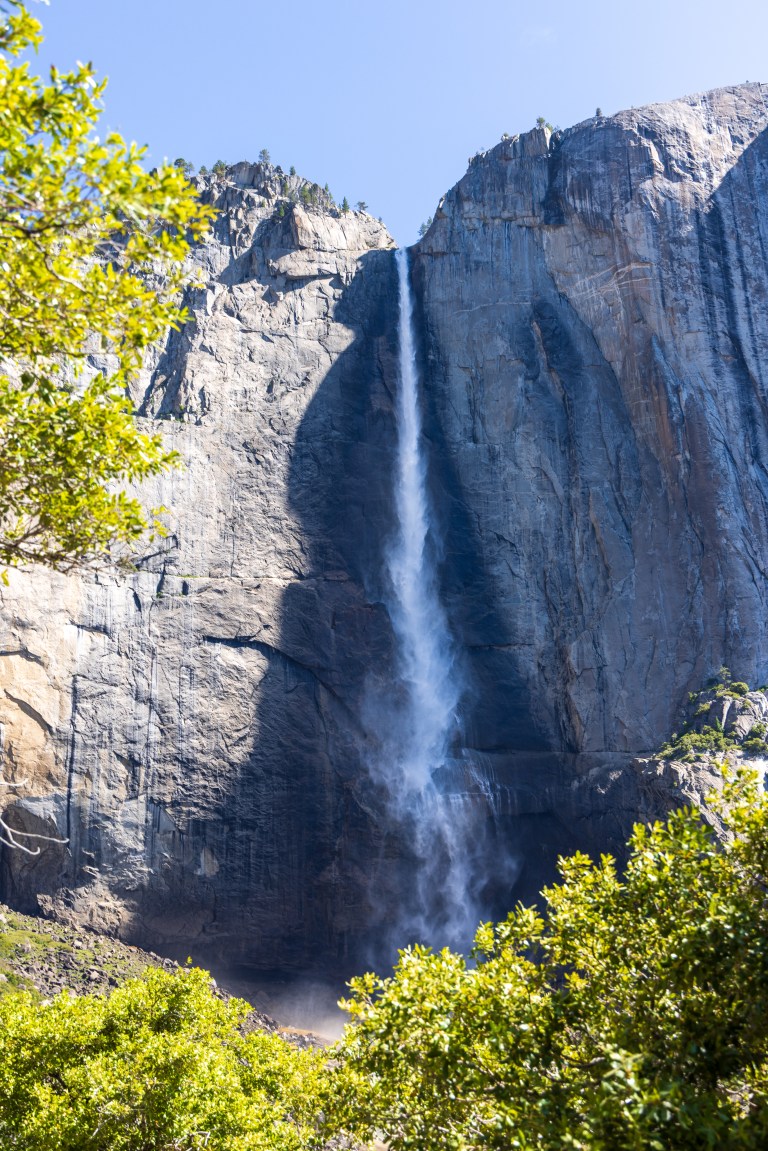
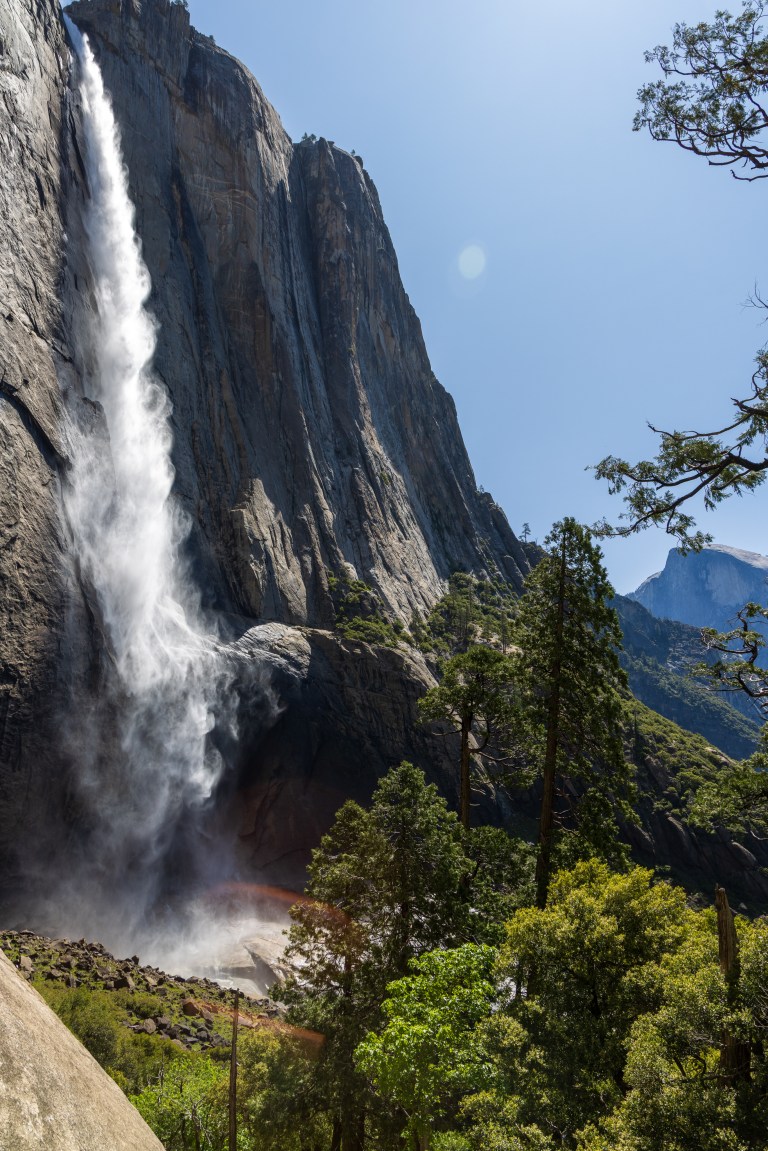
- Day 2: Up early to get to Yosemite Valley. Hiked to Upper Yosemite Falls. Walked to the swinging bridge spot over the Merced River
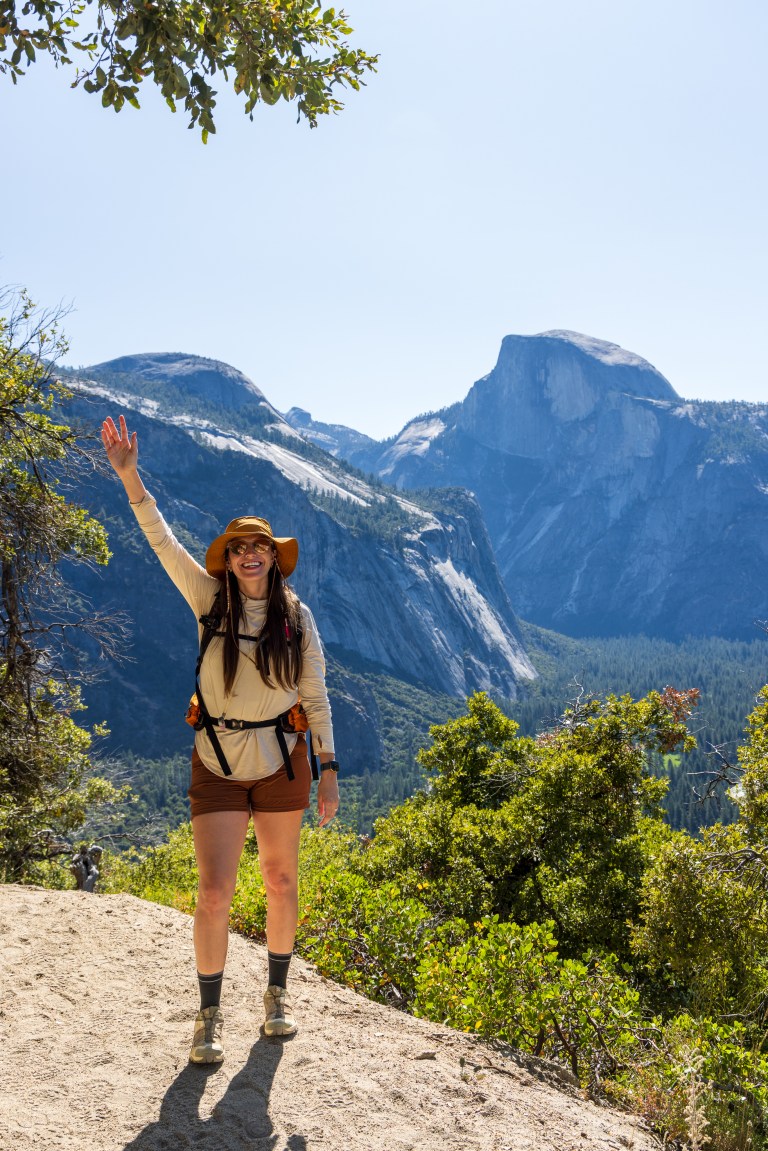
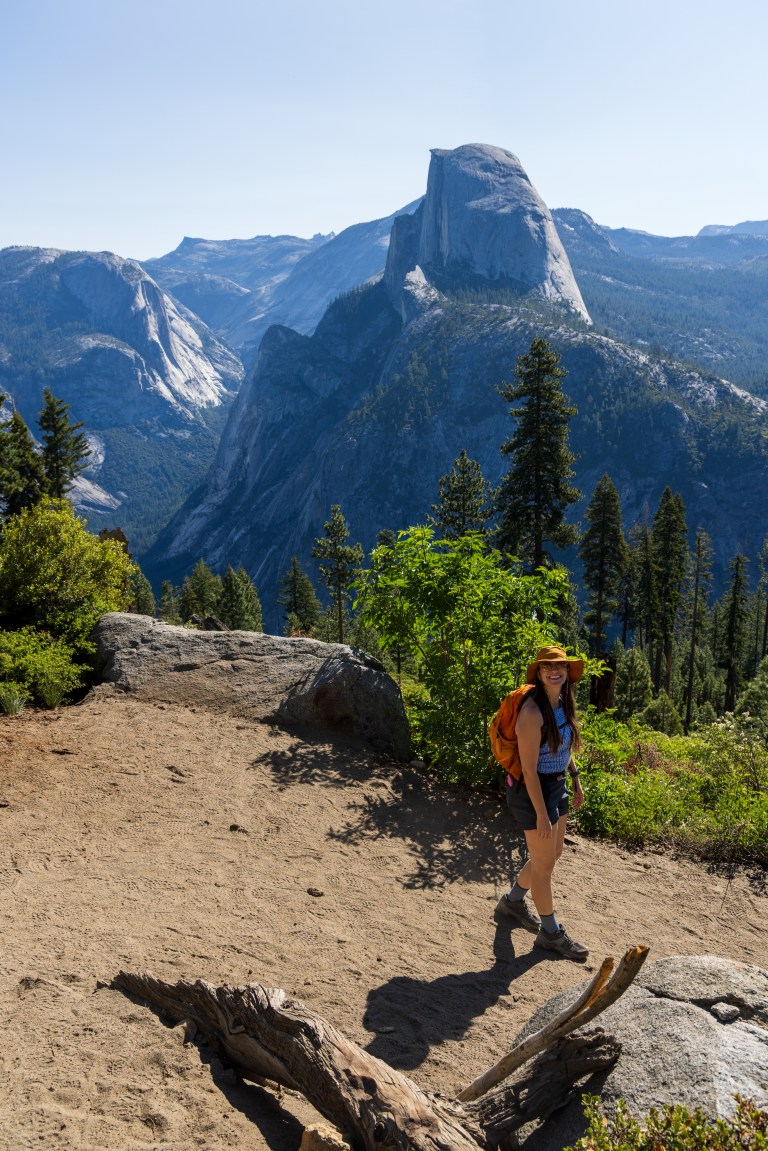
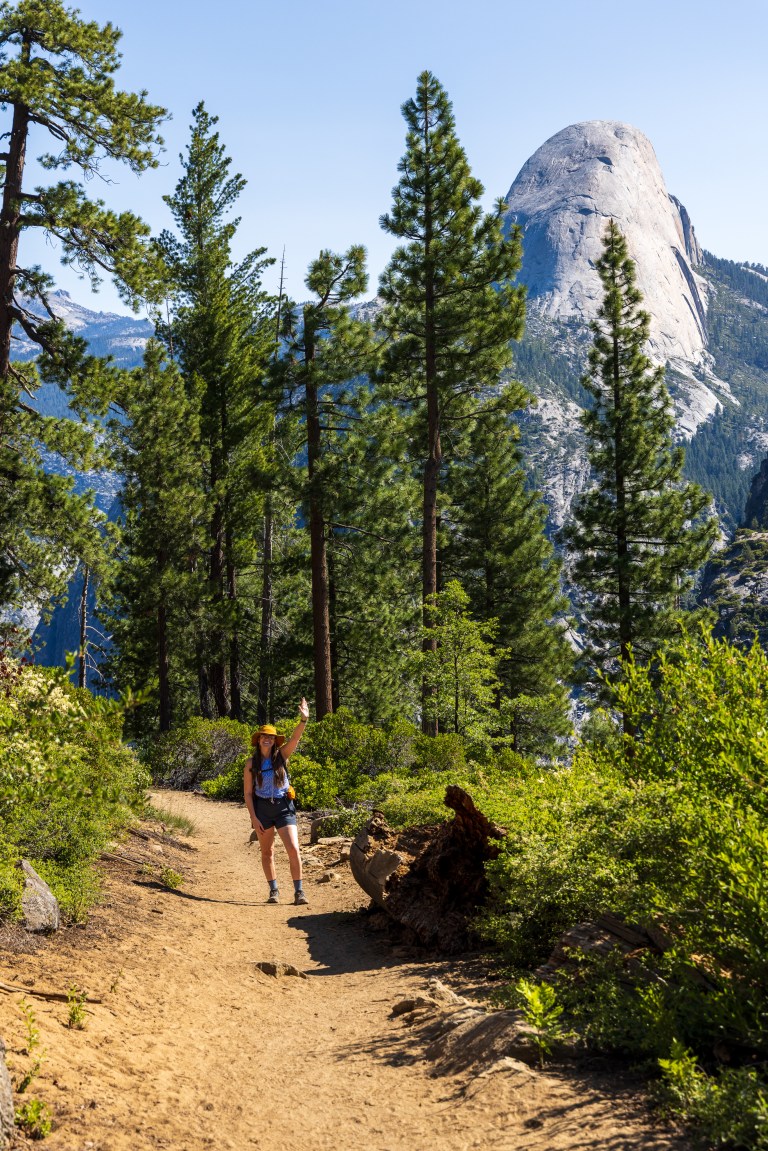
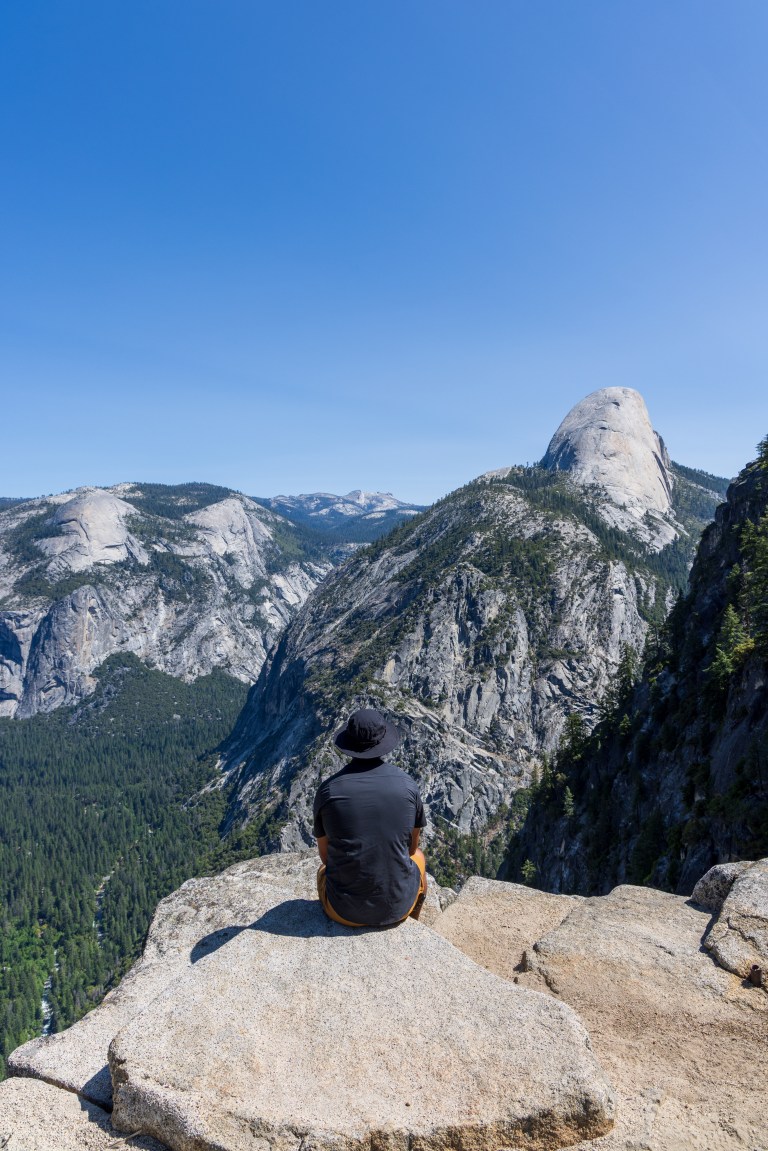
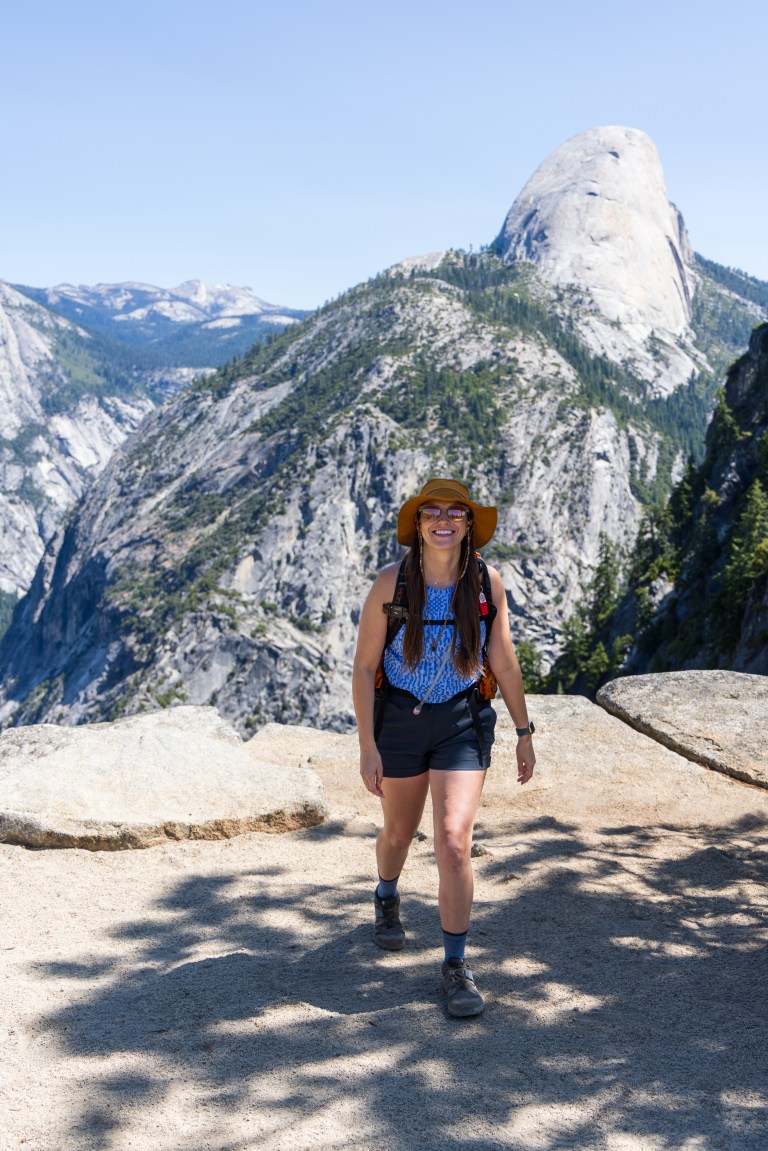
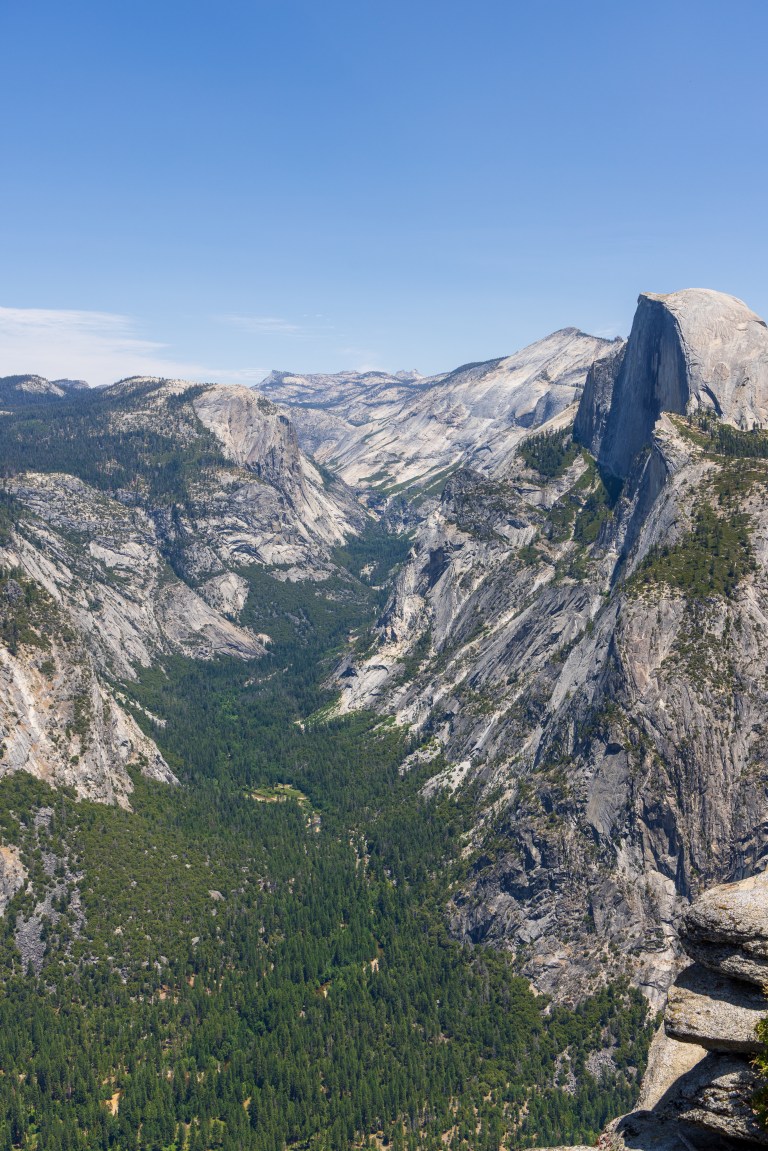
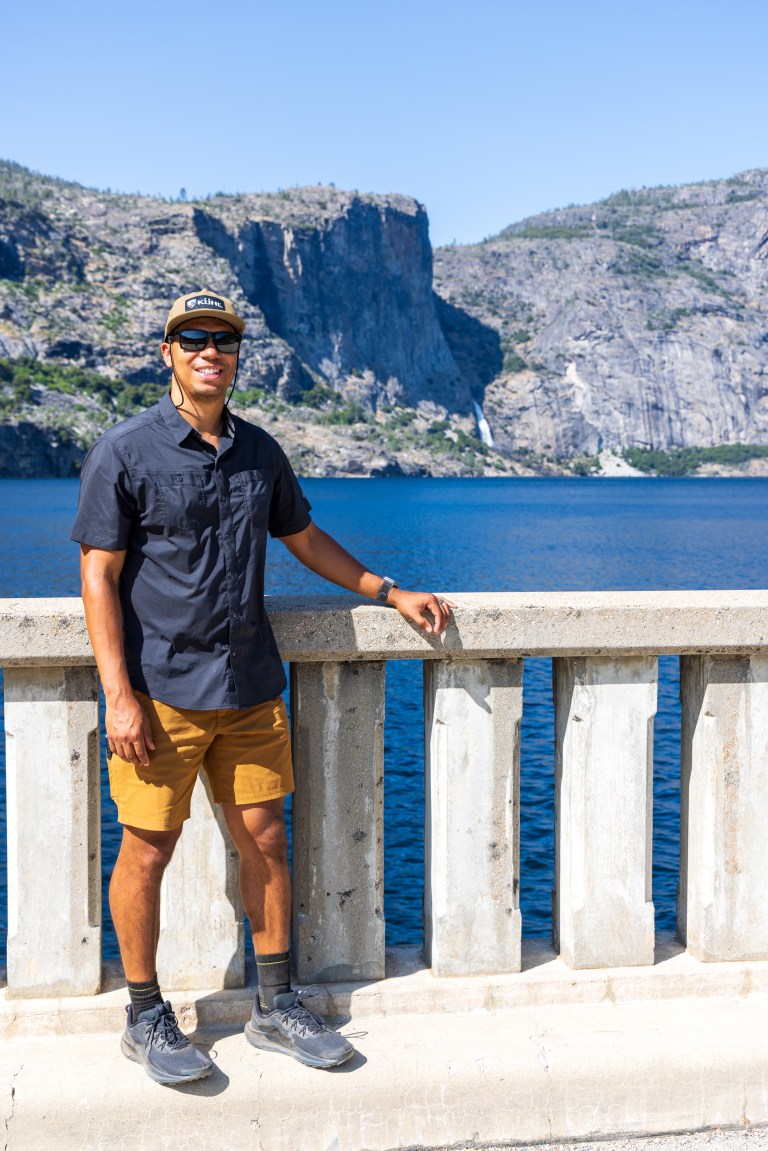
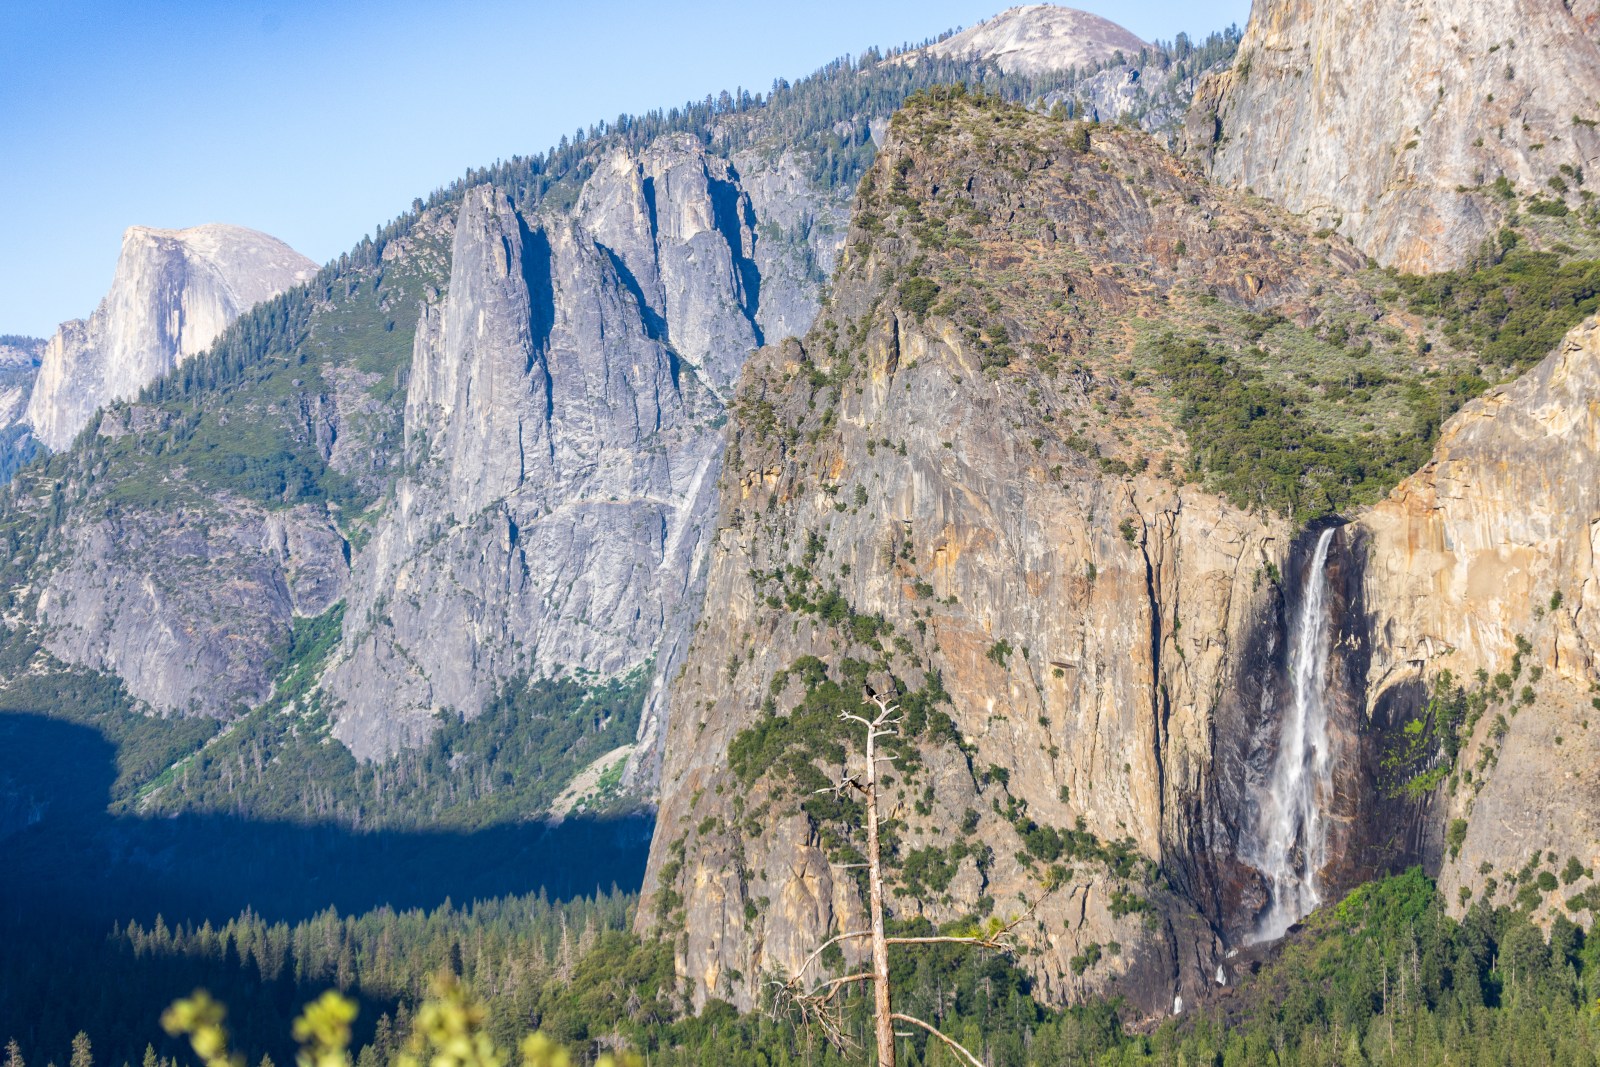
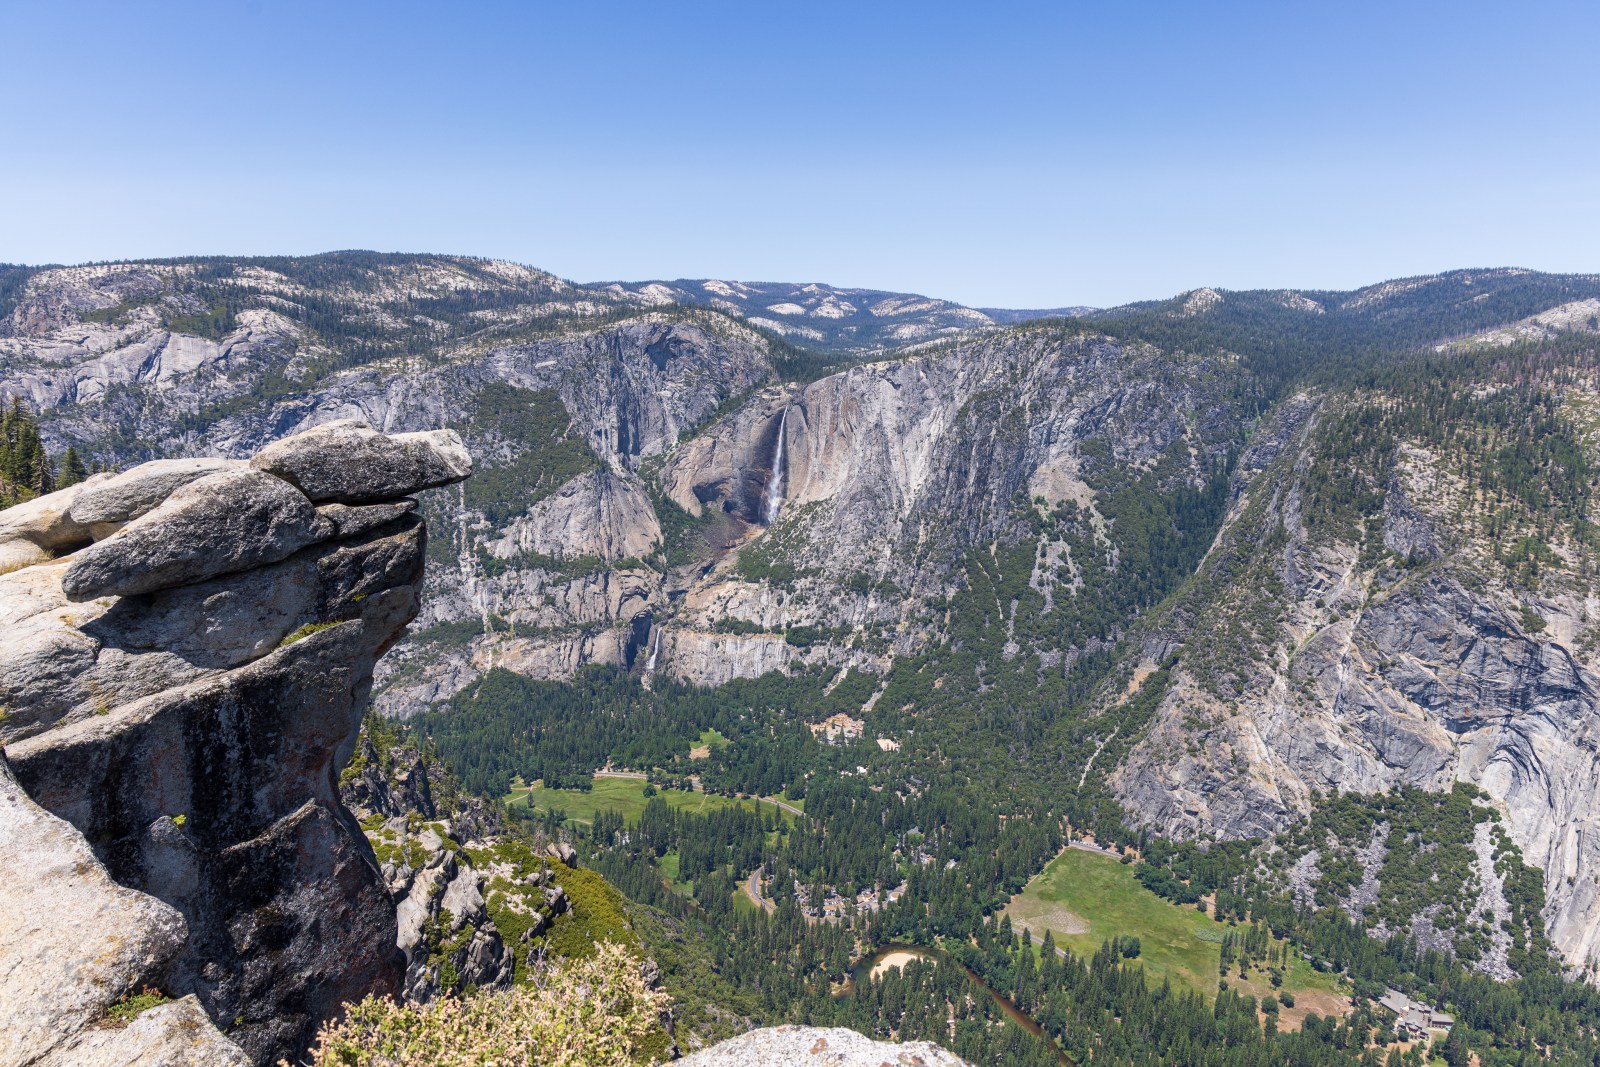
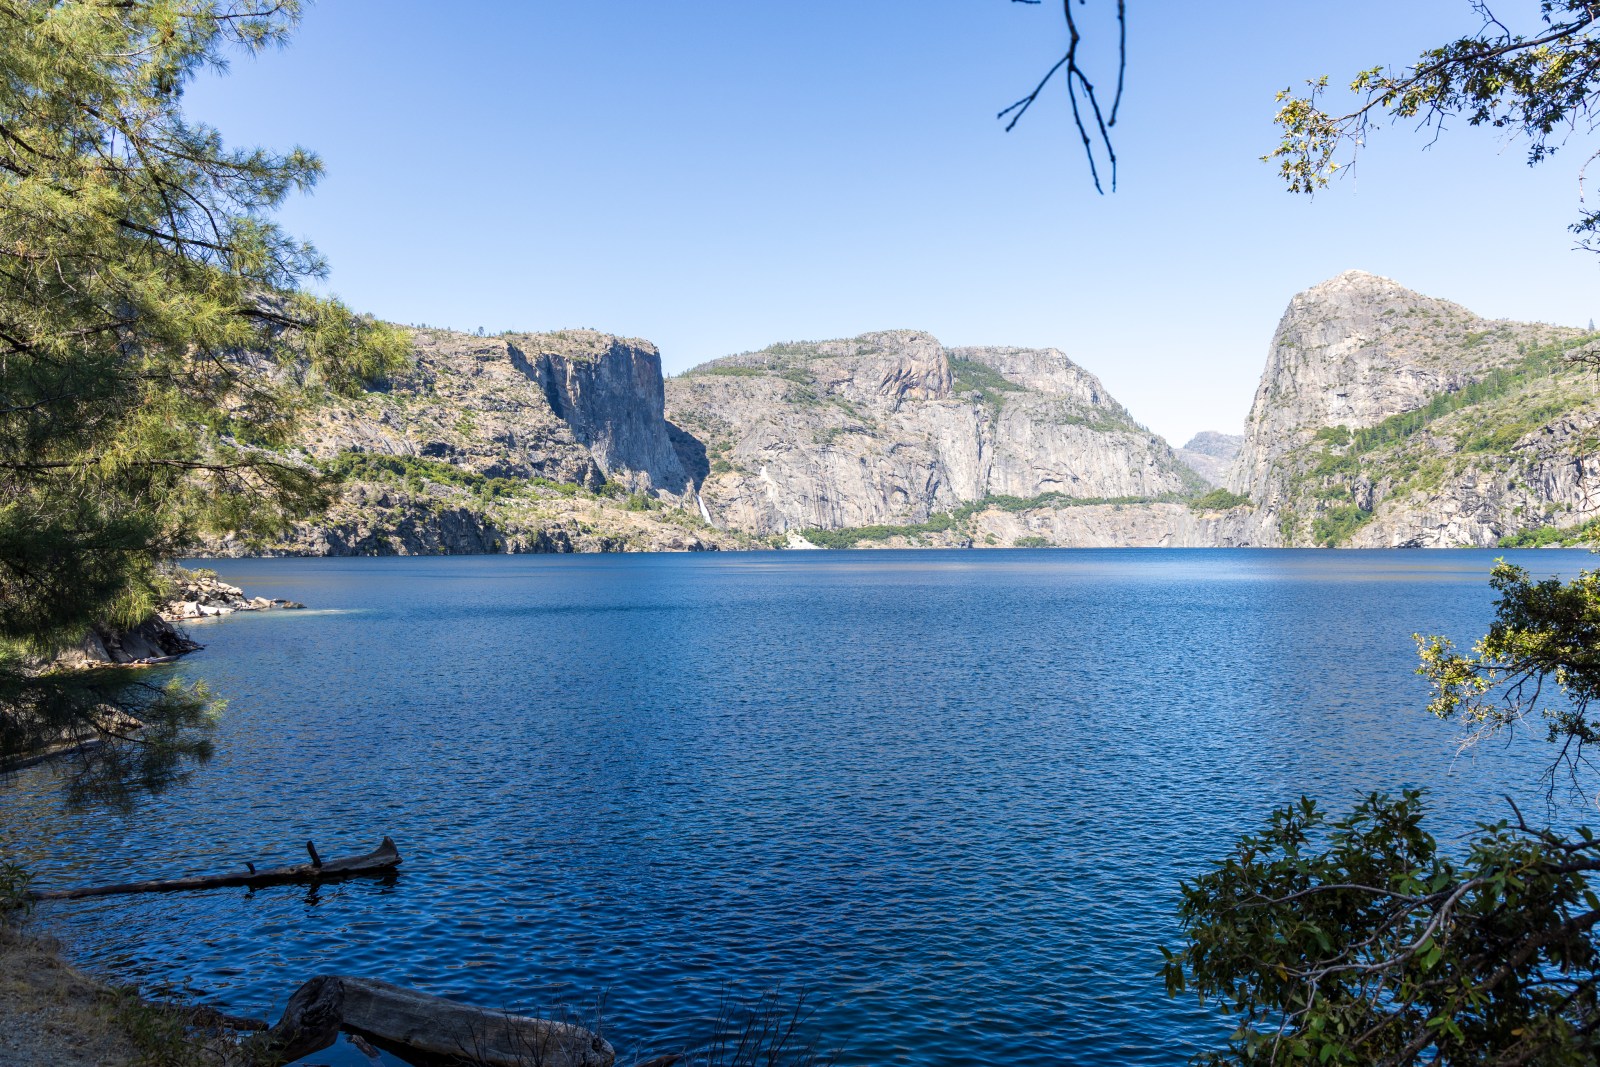
- Day 3: Up early to hike Panorama Trail from Glacier Point. Drove to Hetch Hetchy after. Took in late afternoon views from the tunnel viewpoint
- Day 4: Hiked to Vernal and Nevada Falls from our campsite. Took the shuttle to the valley welcome center and then walked the Lower Yosemite Falls trail
- Day 5: drive to Sequoia and Kings Canyon National Parks
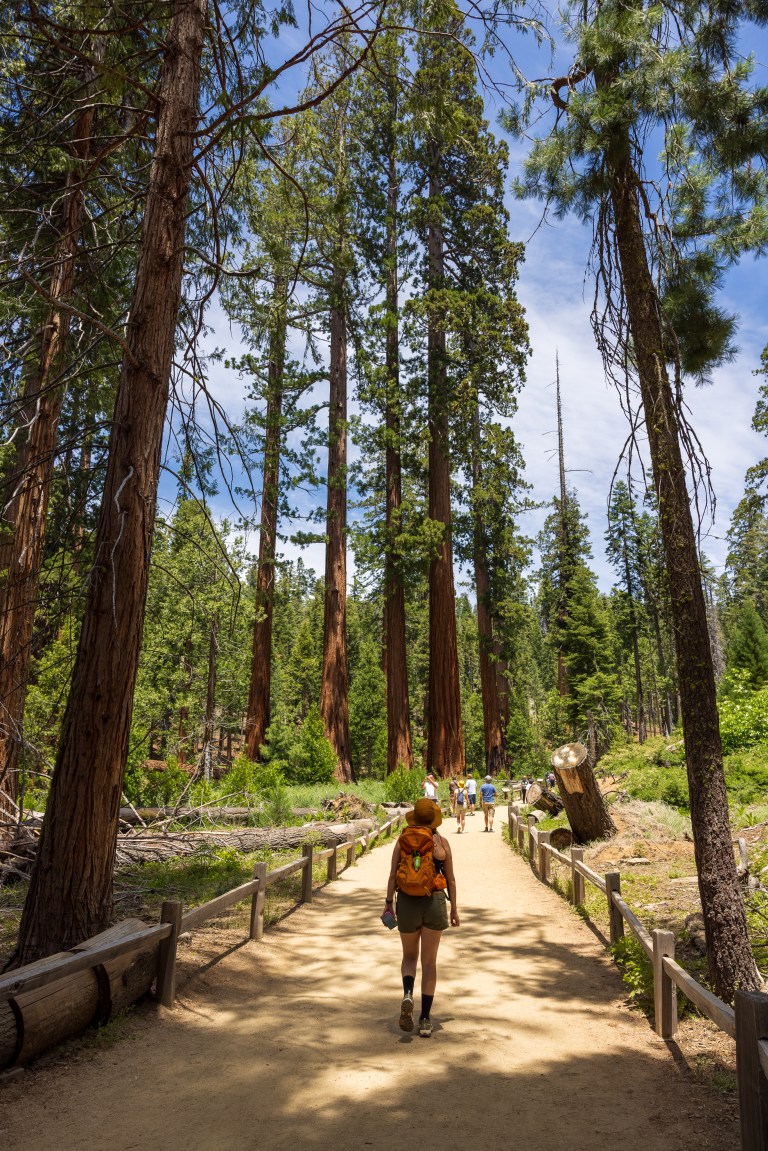
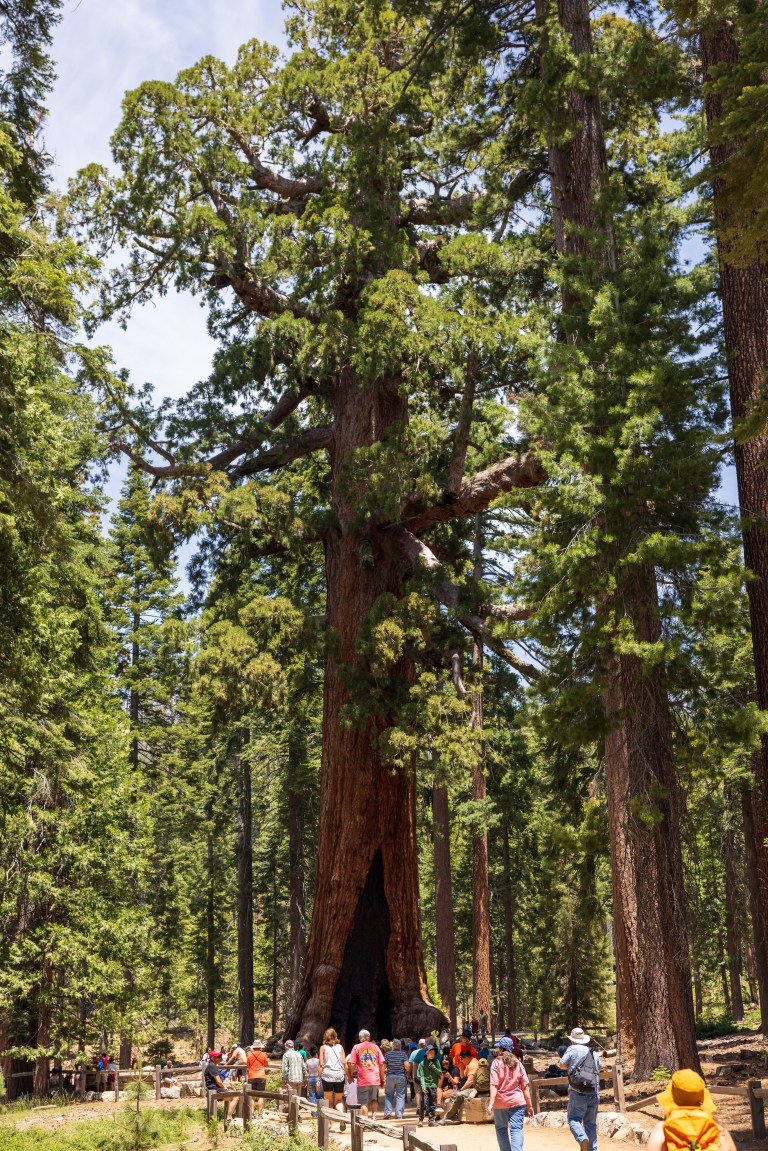
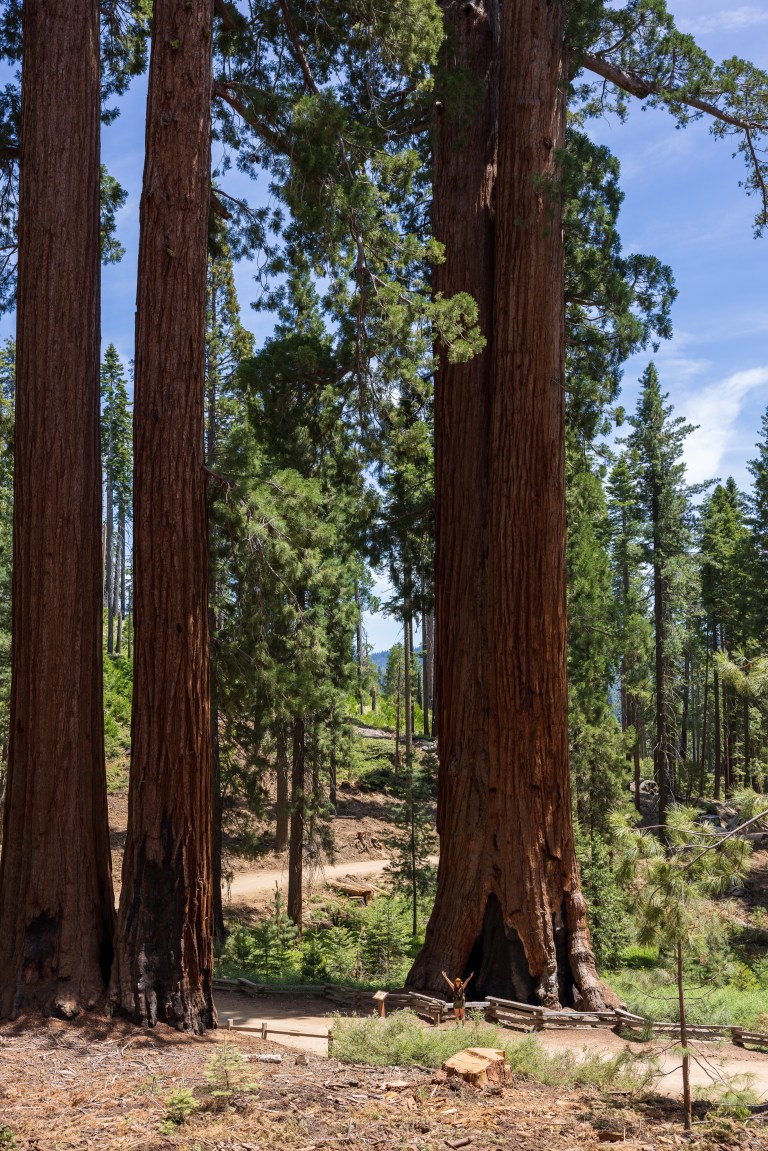
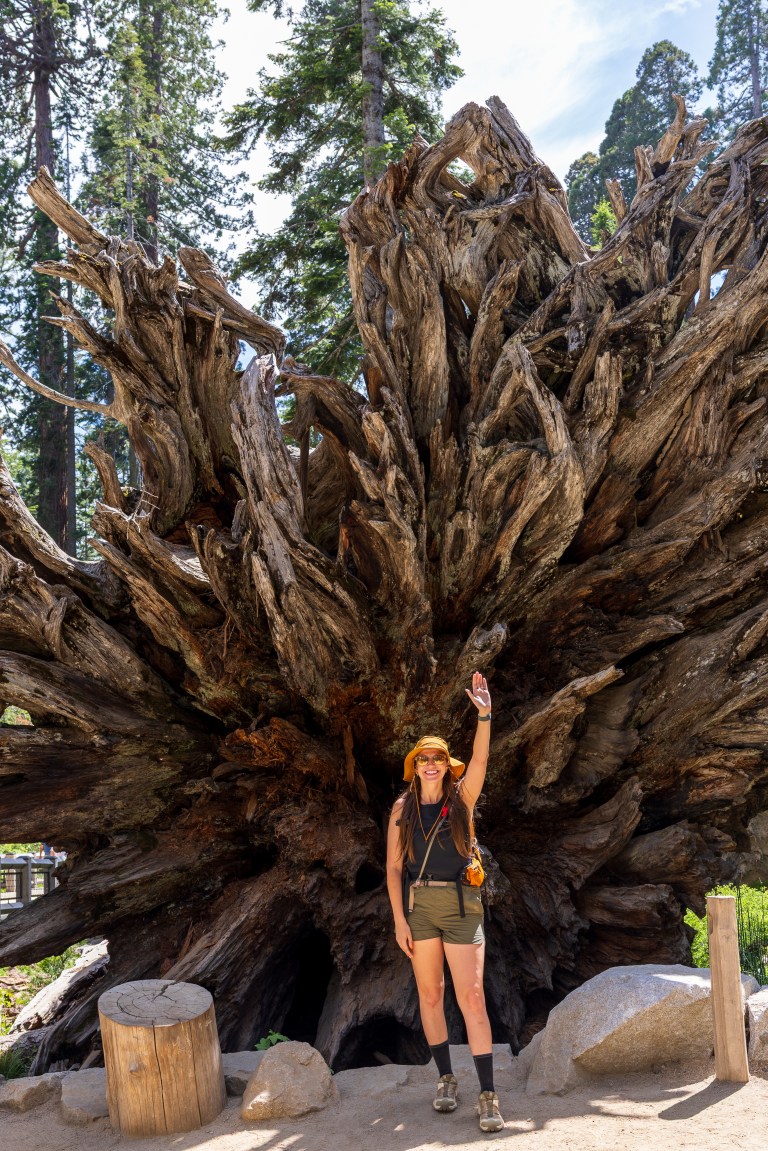
Mariposa Grove of Giant Sequoias Trail
Recommended
For our hike in Mariposa Grove, we combined several trail segments instead of following one exact route. We mostly followed the Grizzly Giant Loop Trail, continuing up Mariposa Grove Road to the Sequoia Trail intersection, where we turned around. On the way back, we briefly connected with the Perimeter Trail before rejoining the Grizzly Giant Loop and finishing at the Fallen Monarch.
Once we moved beyond the main trailhead and the more popular trees like the Grizzly Giant, the crowds thinned out significantly, even on a Saturday. It became much quieter and more peaceful, which was a pleasant surprise.
We highly recommend this hike, especially if you have never seen a giant sequoia before. It is also a great option if you are not planning to visit Sequoia National Park during your trip.
Quick Stats
Length:
4 miles recorded
Route Type:
Out and back
Elevation Gain:
553 ft recorded
Vaulted Toilets:
Yes
Dog Friendly:
NO
Fee:
Yes (Park Entrance)
Difficulty:
Moderate
Water:
At parking lot and at trailhead


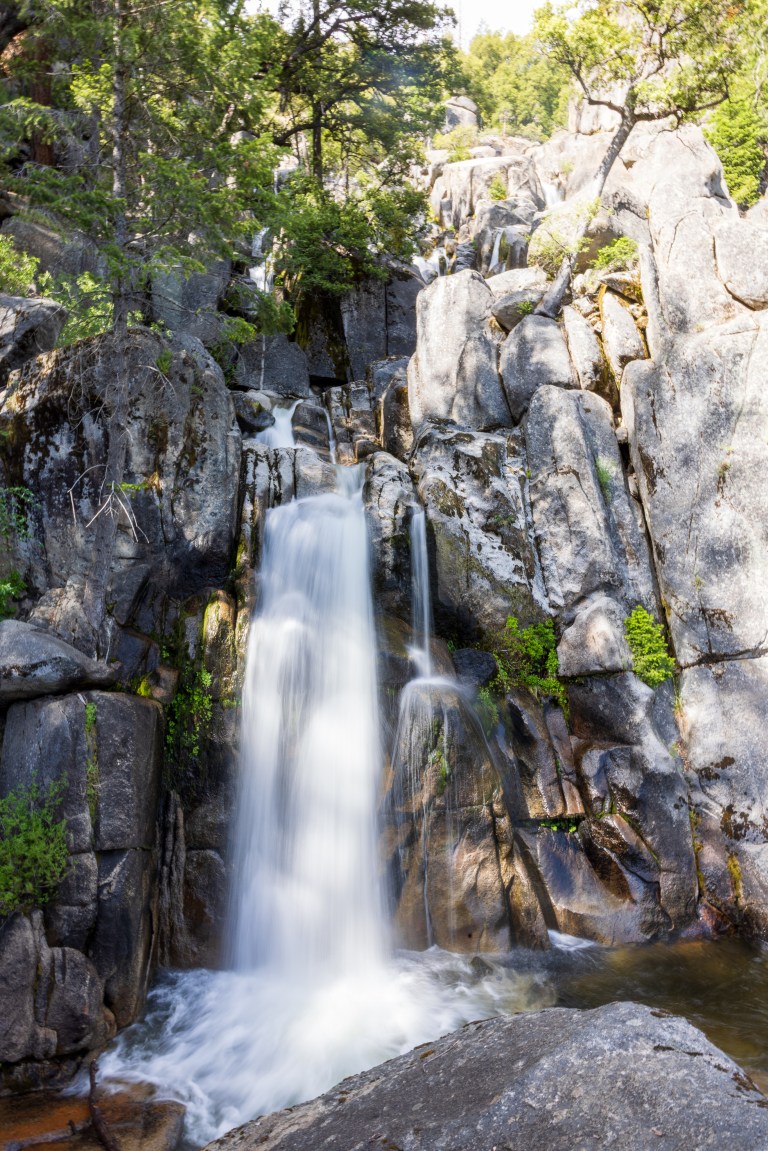
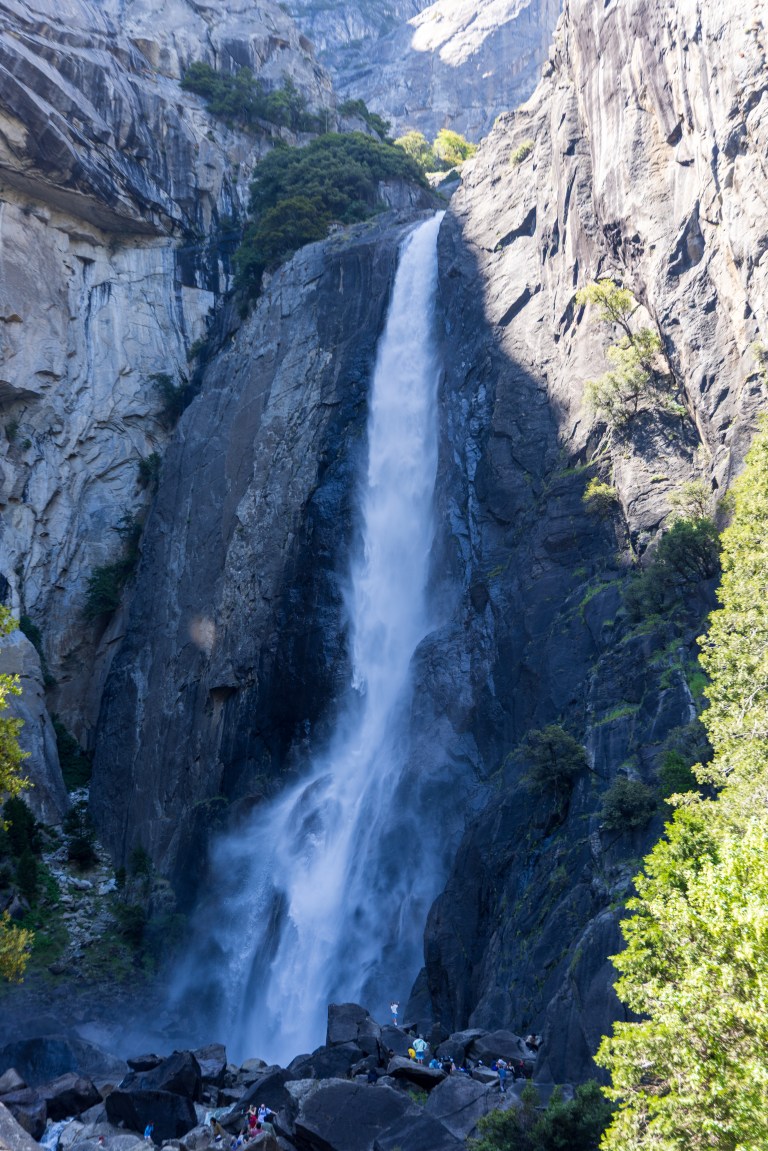
Lower Chilnualna Falls Trail
Quick
This is a short trail but all incline. We enjoyed the view and brief trail after a long day of driving and hiking already. This is an short add and doesn’t take too much time, but the trail is rocky. We recommend this if you have time to burn near the south entrance or are staying in the Wawona area.
Quick Stats
Length:
0.5 miles recorded
Route Type:
Out and back
Elevation Gain:
142 ft recorded
Vaulted Toilets:
Yes
Dog Friendly:
NO
Fee:
Yes (Park Entrance)
Difficulty:
Moderate
Water:
No

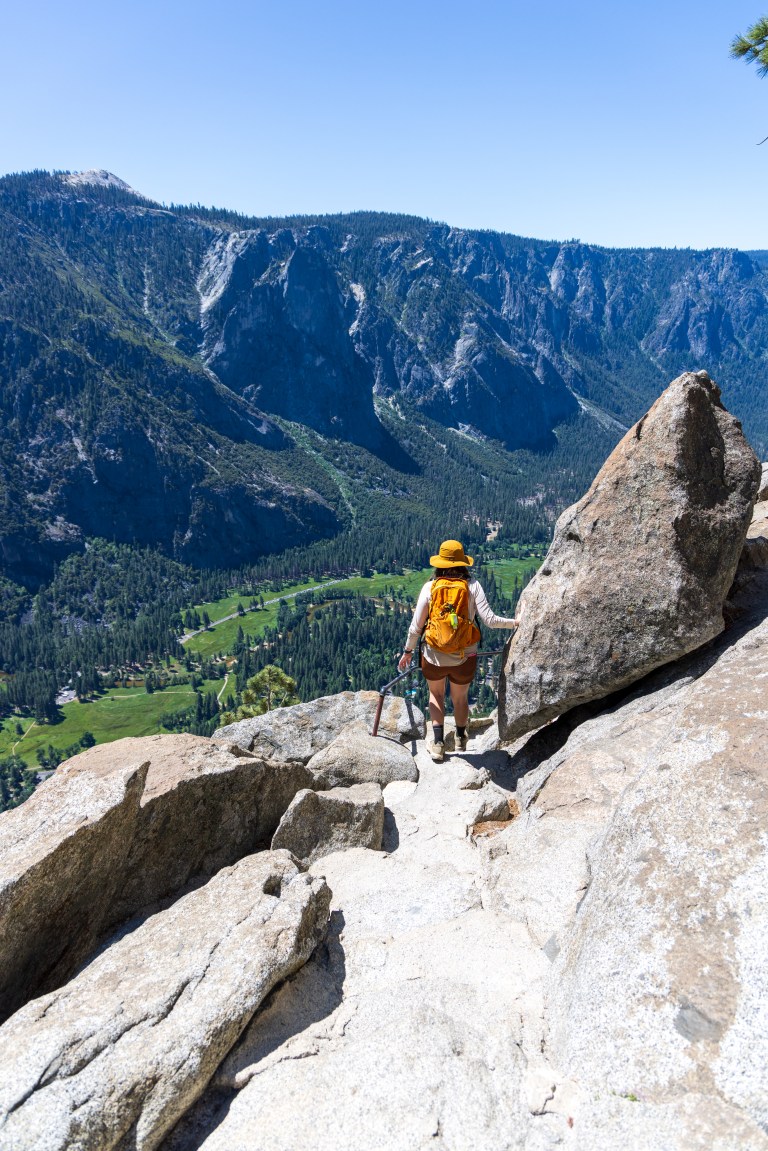
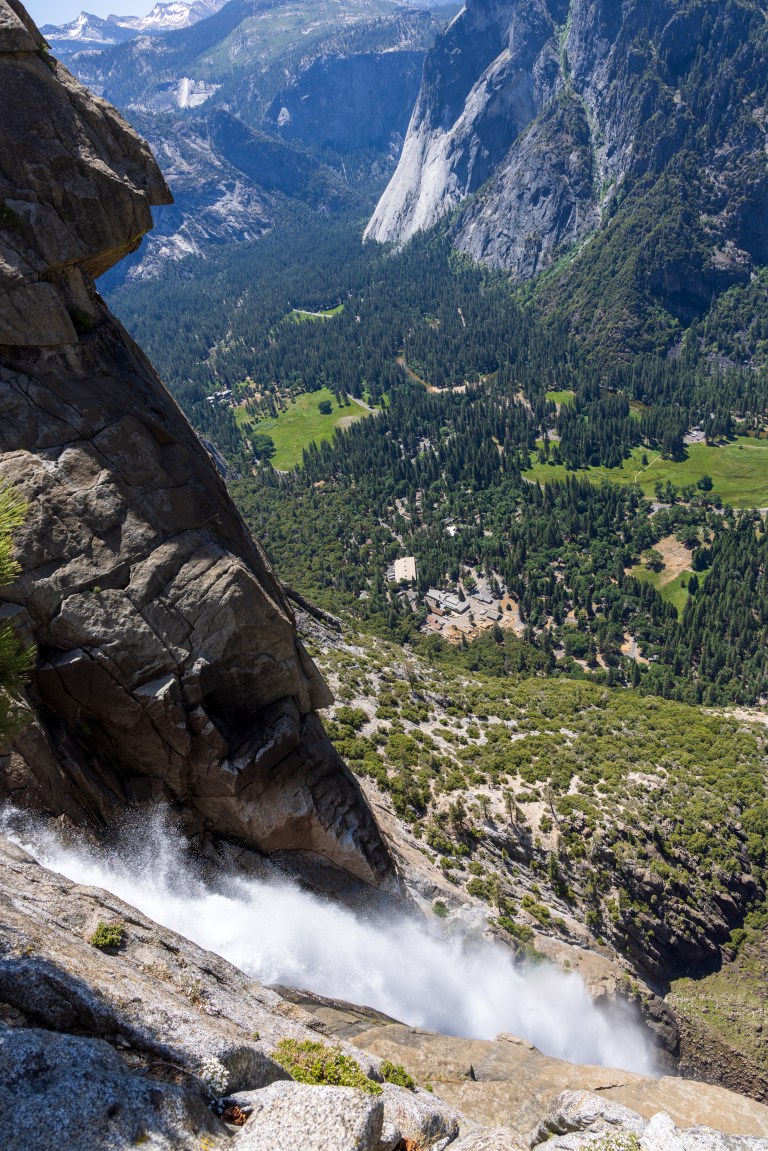
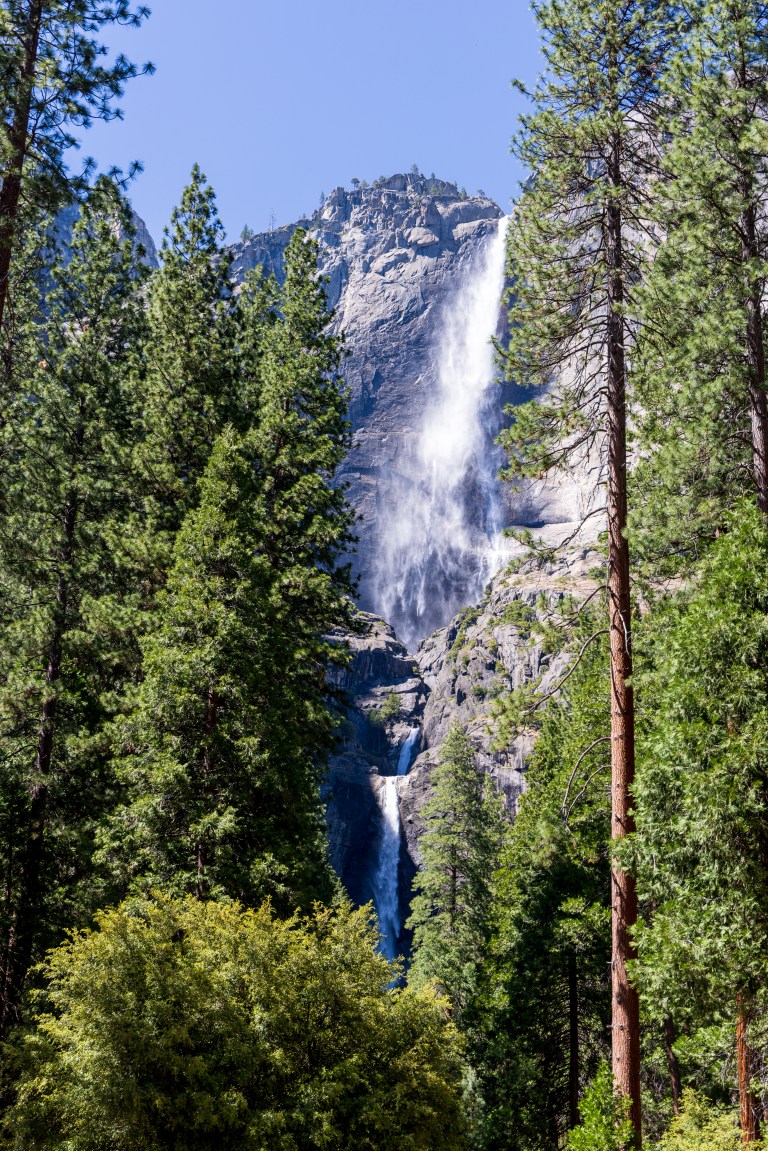
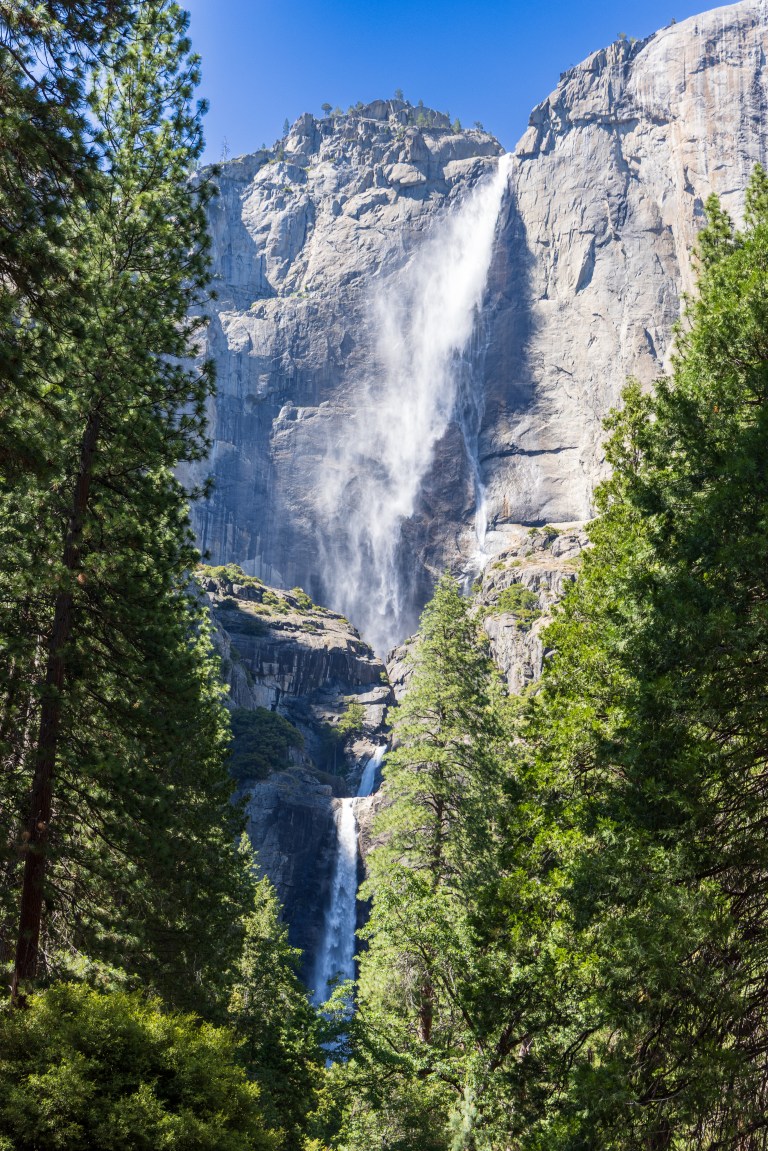
Upper Yosemite Falls Trail
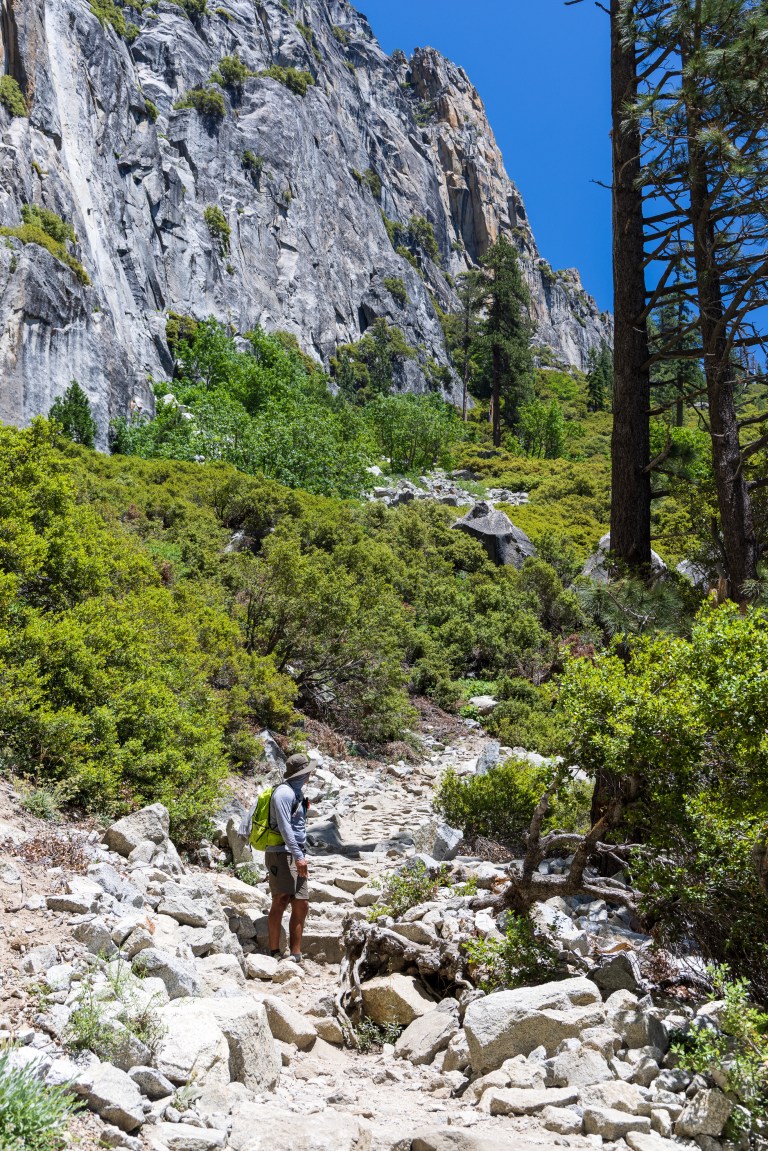
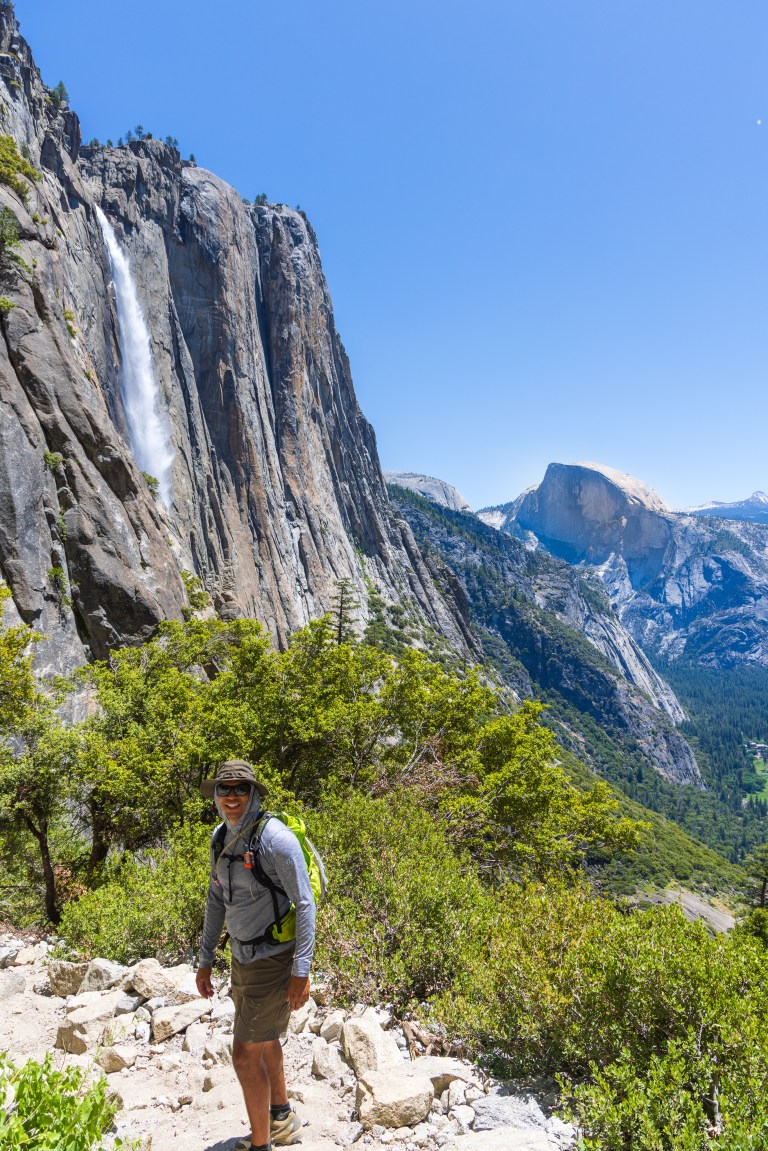
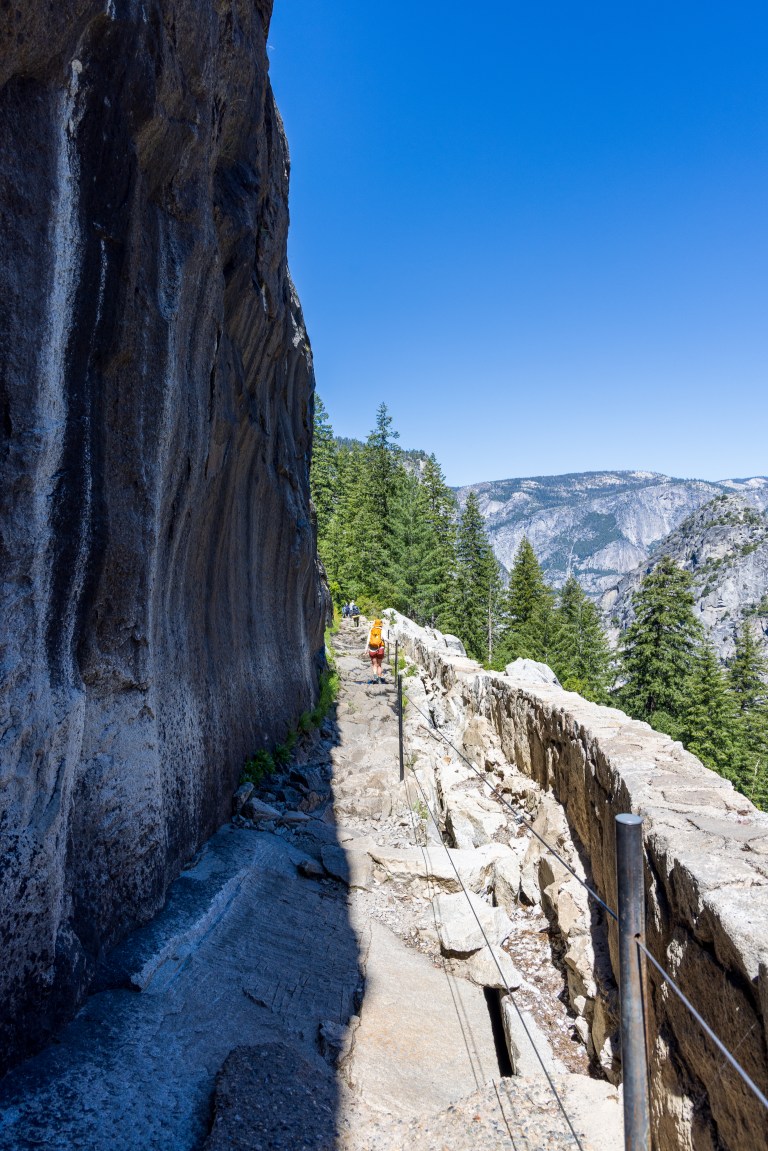
This hike kicked our butts and made us re-evaluate our total plan for the park! It was a somewhat rude awakening to how steep and unforgiving the trails are up the granite cliffs that make Yosemite Valley. The views of the waterfall and the valley are incredible, but be prepared for a very challenging hike. The switchbacks feel unrelenting at times and there is a lot of sun exposure. This trail traverses hard and jagged granite boulders with a lot of dust and sand. We highly suggest stable and protective footwear. It’s important to have lots of sun protection, at least 3L of water, and snacks for energy.
Quick Stats
Length:
7.67 miles recorded
Route Type:
Out and back
Elevation Gain:
3,087 ft recorded
Vaulted Toilets:
Yes
Dog Friendly:
NO
Fee:
Yes (Park Entrance)
Difficulty:
Hard
Water:
At parking lot and at trailhead


Panorama Trail
Must Do Hike
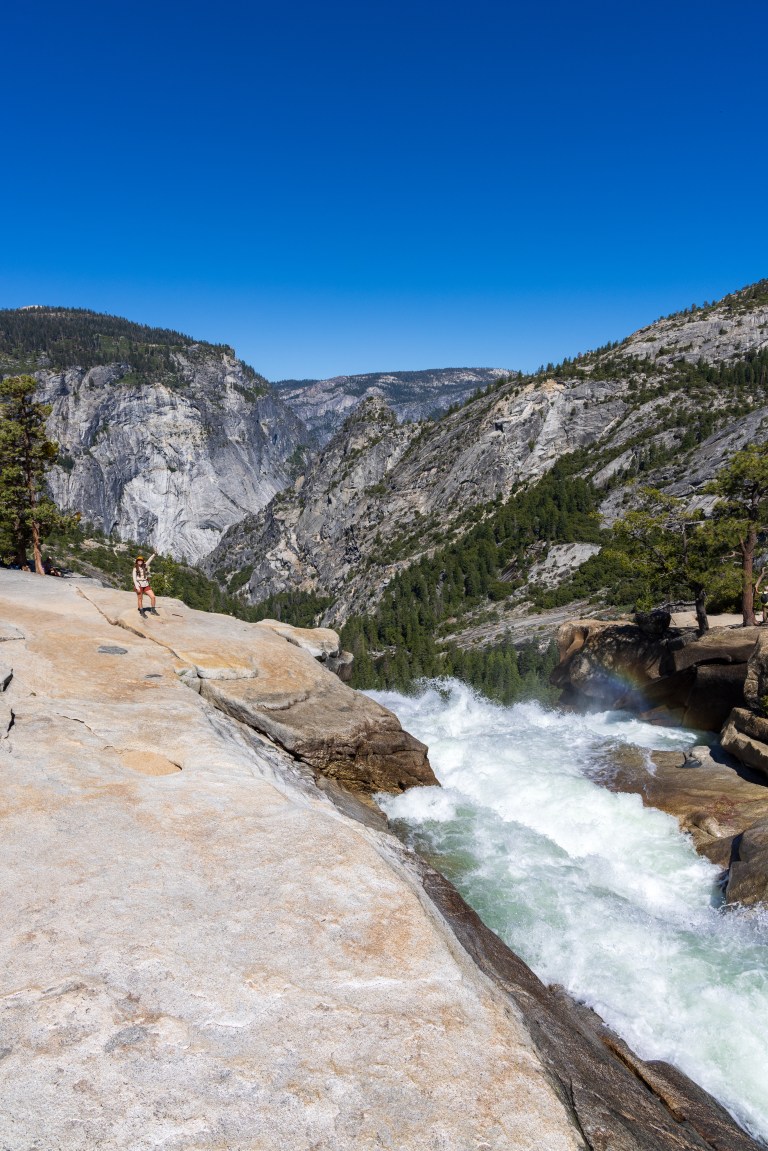
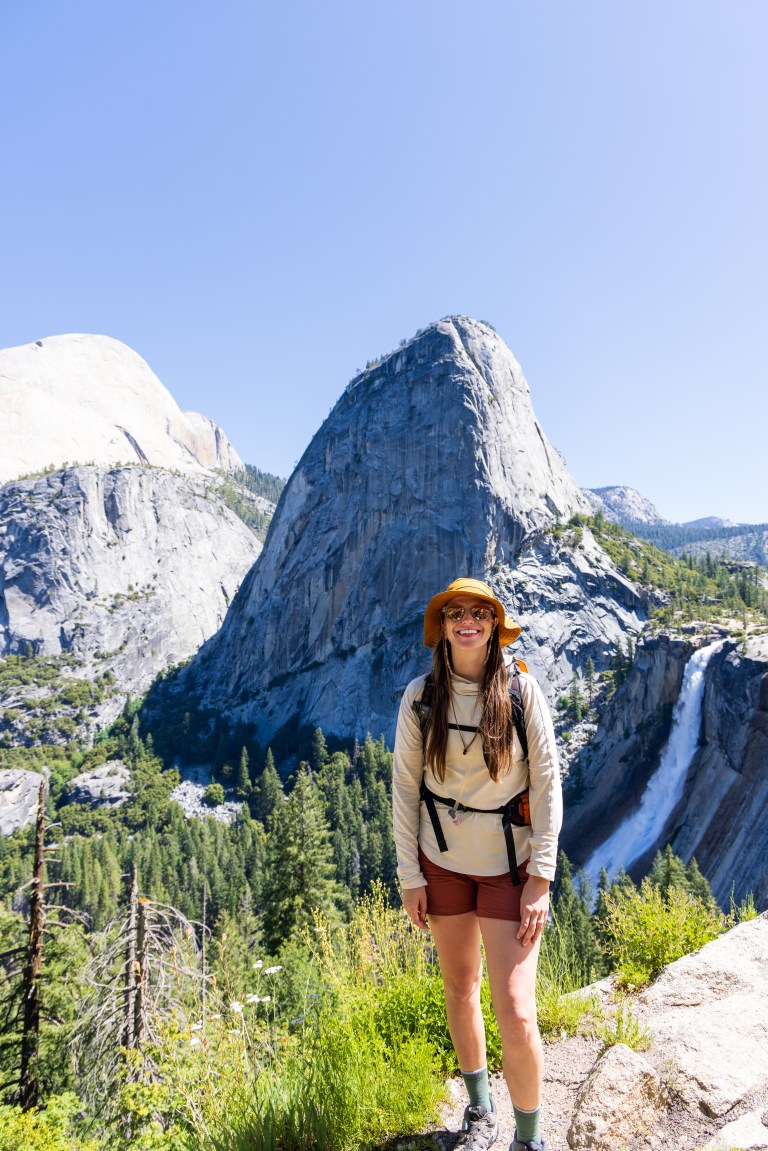
This trail was gorgeous! Originally, we had planned to hike this trail as part of a longer trail from Four Mile trailhead to Mist trailhead. After feeling very sore from Upper Yosemite Falls we decided to just hike this to the viewpoint out and back. And we’re really happy with our decision. We loved this trail and enjoyed getting there early in the morning to experience much of the trail without a lot of other hikers. We felt the best views were from Glacier Point to Panorama Point, which is why we turned around there.
If you have time for only one hike and don’t want to go into Yosemite Valley, we highly recommend this hike. If you have two days in the park, we highly suggest adding this to your itinerary along with Mist and John Muir Trail.
Quick Stats
Length:
7 miles recorded
Route Type:
Out and back
Elevation Gain:
1,687ft recorded
Vaulted Toilets:
Yes
Dog Friendly:
NO
Fee:
Yes (Park Entrance)
Difficulty:
Hard
Water:
At trailhead


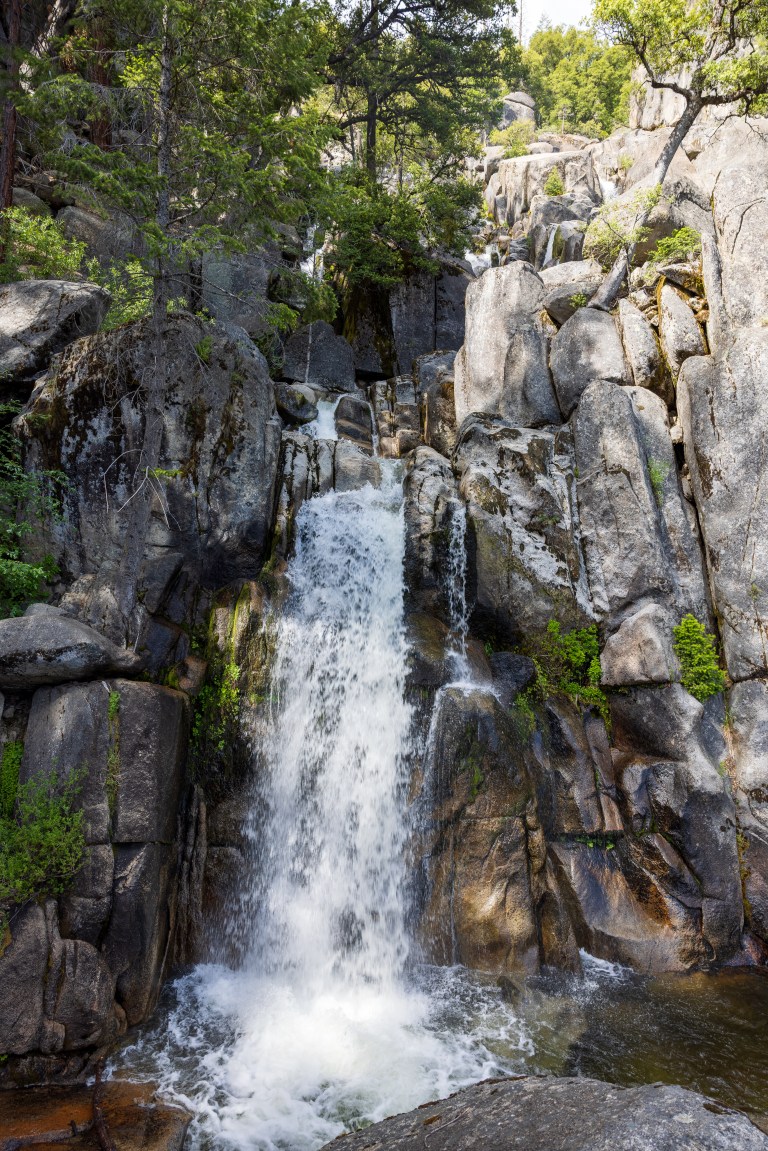
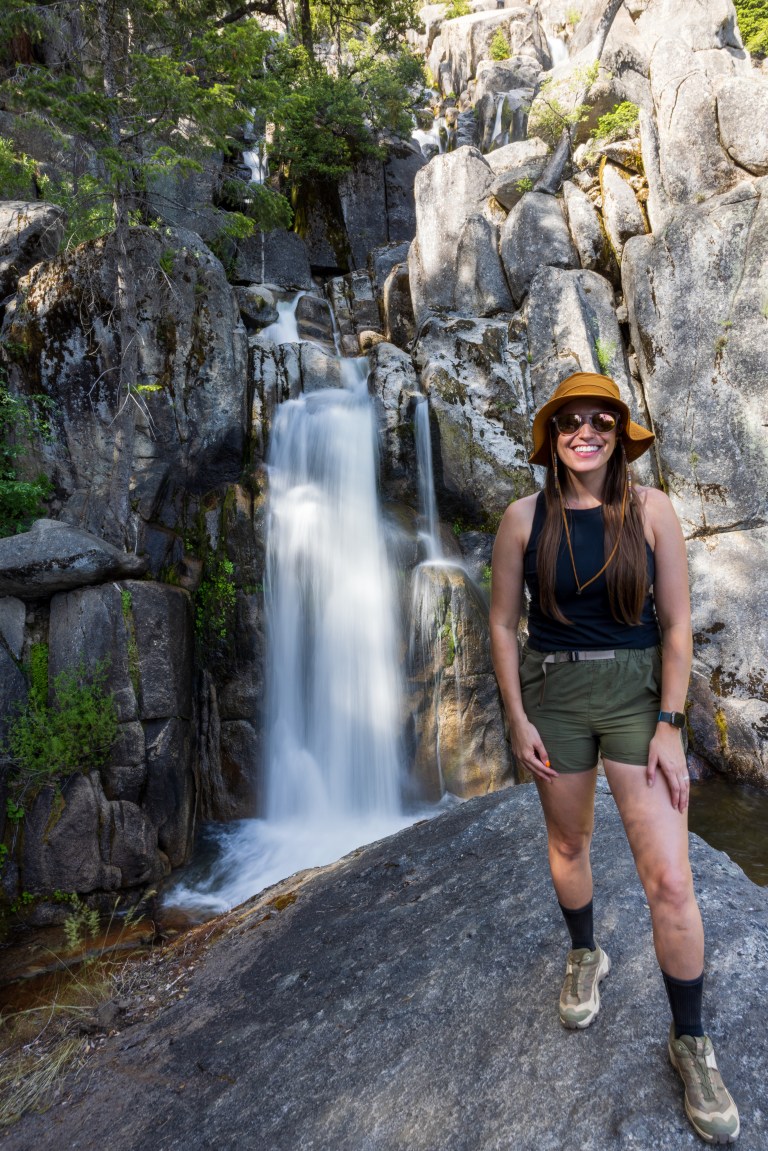
Hetch Hetchy
This is a hike we wish we did. Unfortunately based on timing and other things we wanted to do that day, we did not make the hike. We did have a great view from the dam. Visiting Hetch Hetchy in Yosemite was a late add to our itinerary. It was very pretty at the reservoir! Had we planned better and arrived earlier, we probably would have hiked to Wapama Falls.
Quick Stats: Wapama Falls Trail
Length:
4.7 miles
Route Type:
Out and back
Elevation Gain:
1,092 ft
Vaulted Toilets:
Yes
Dog Friendly:
NO
Fee:
Yes (Park Entrance)
Difficulty:
Moderate
Water:
At parking by restroom


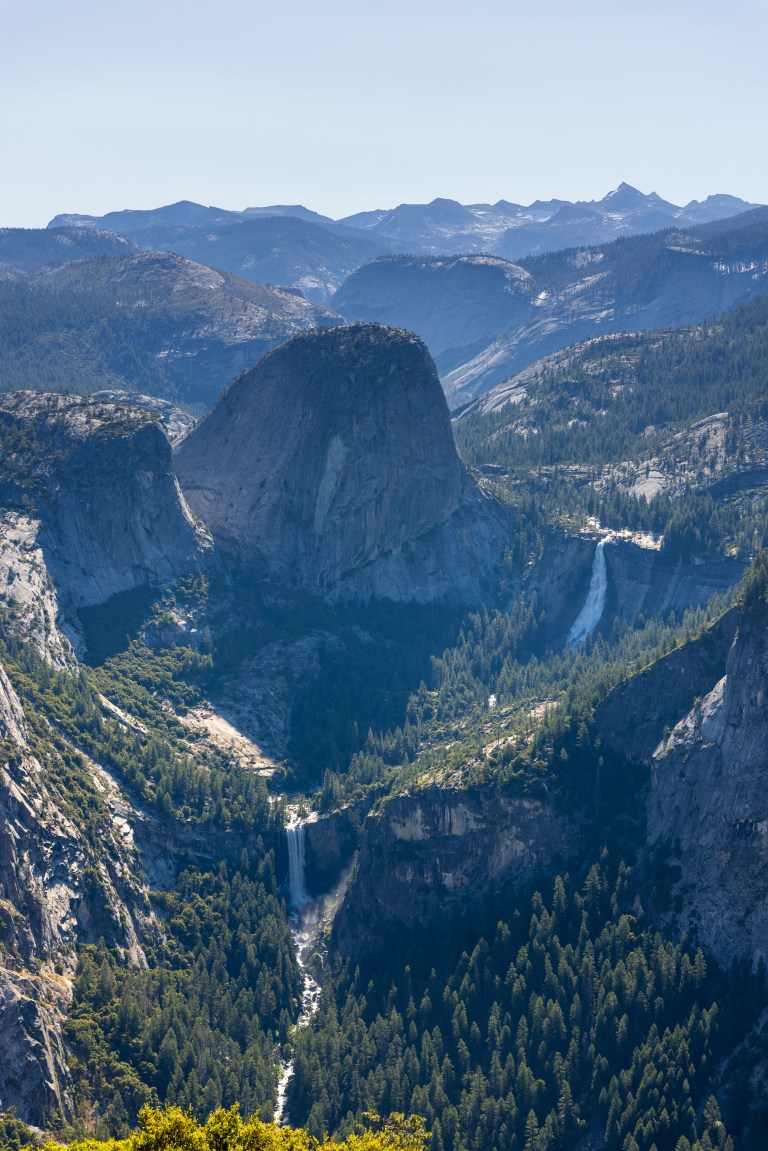
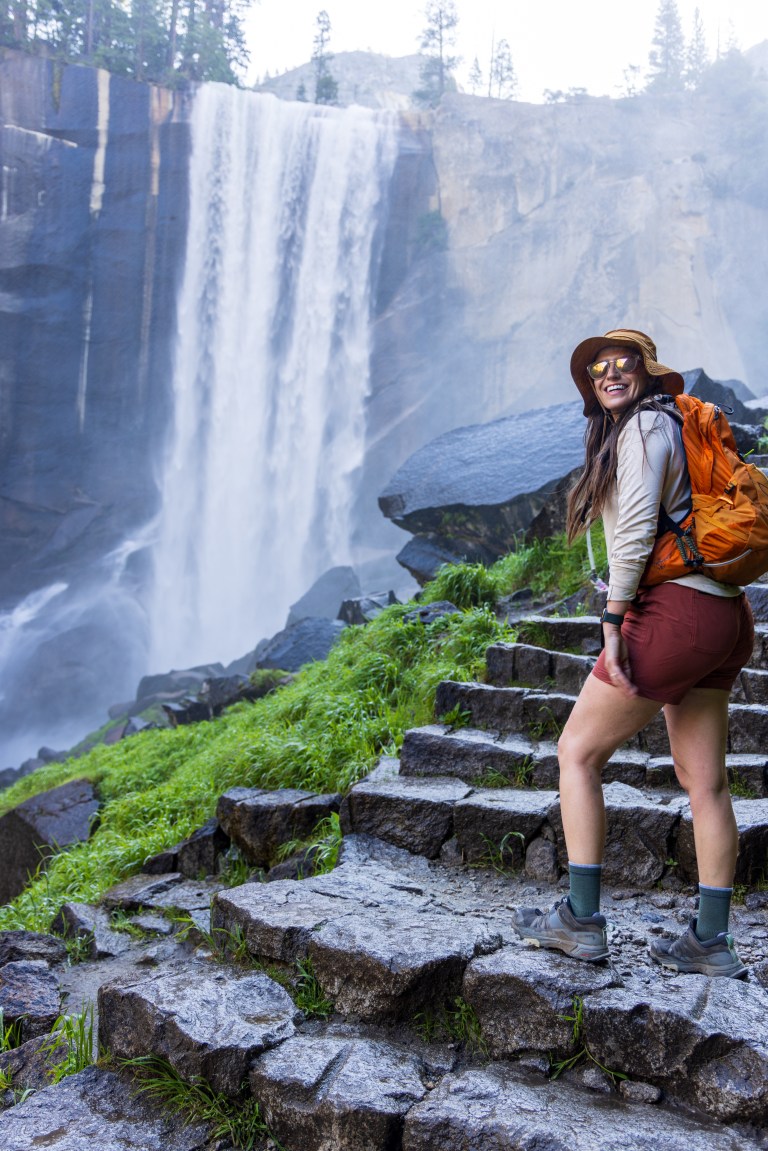
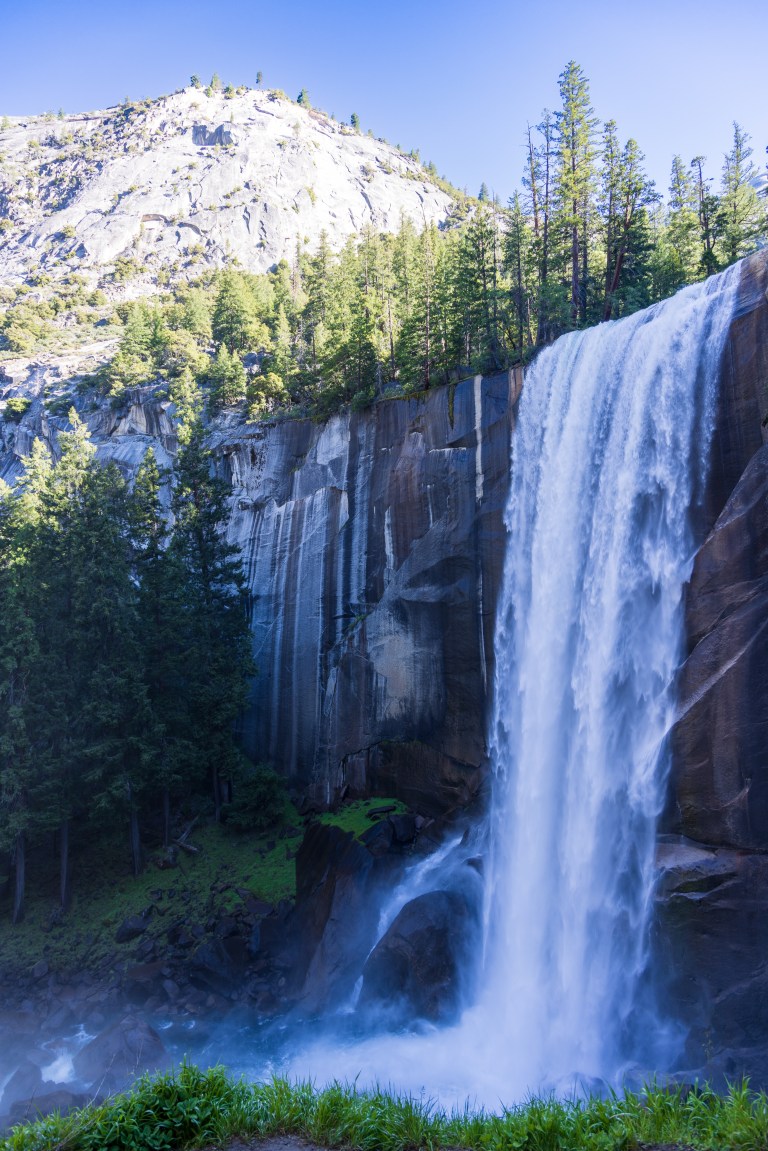
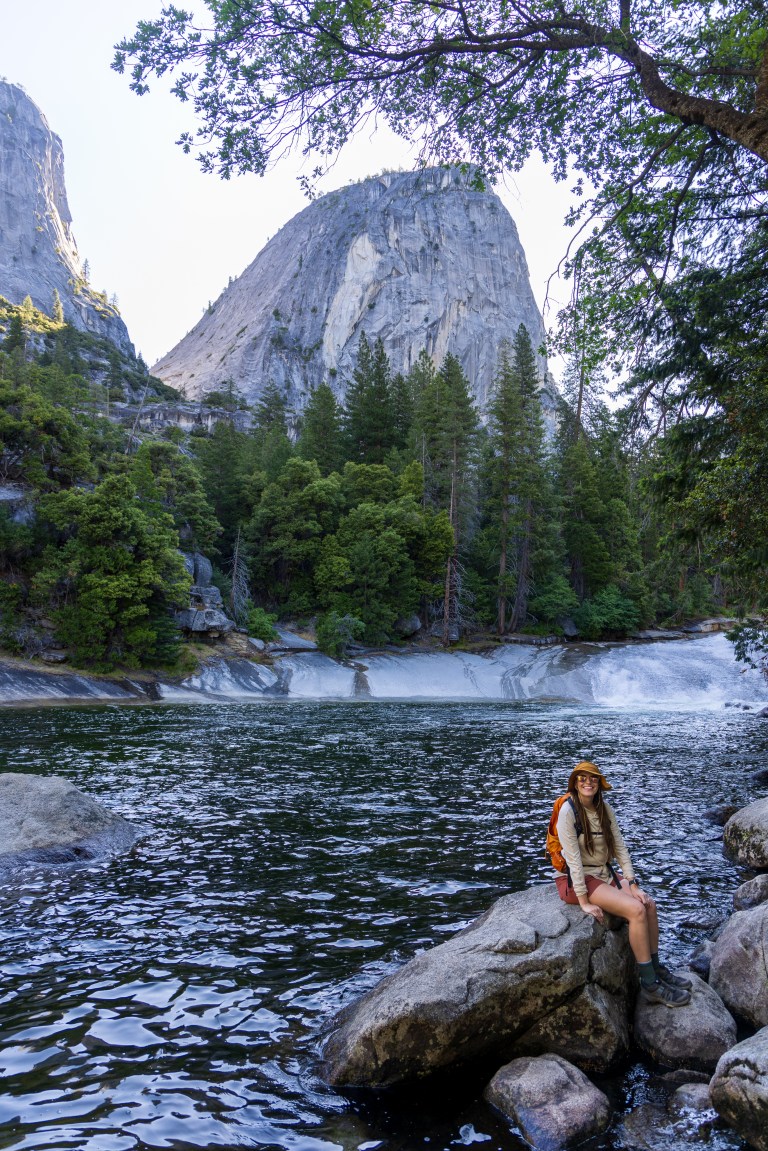
Vernal and Nevada Falls via Mist Trail
Must Do Hike
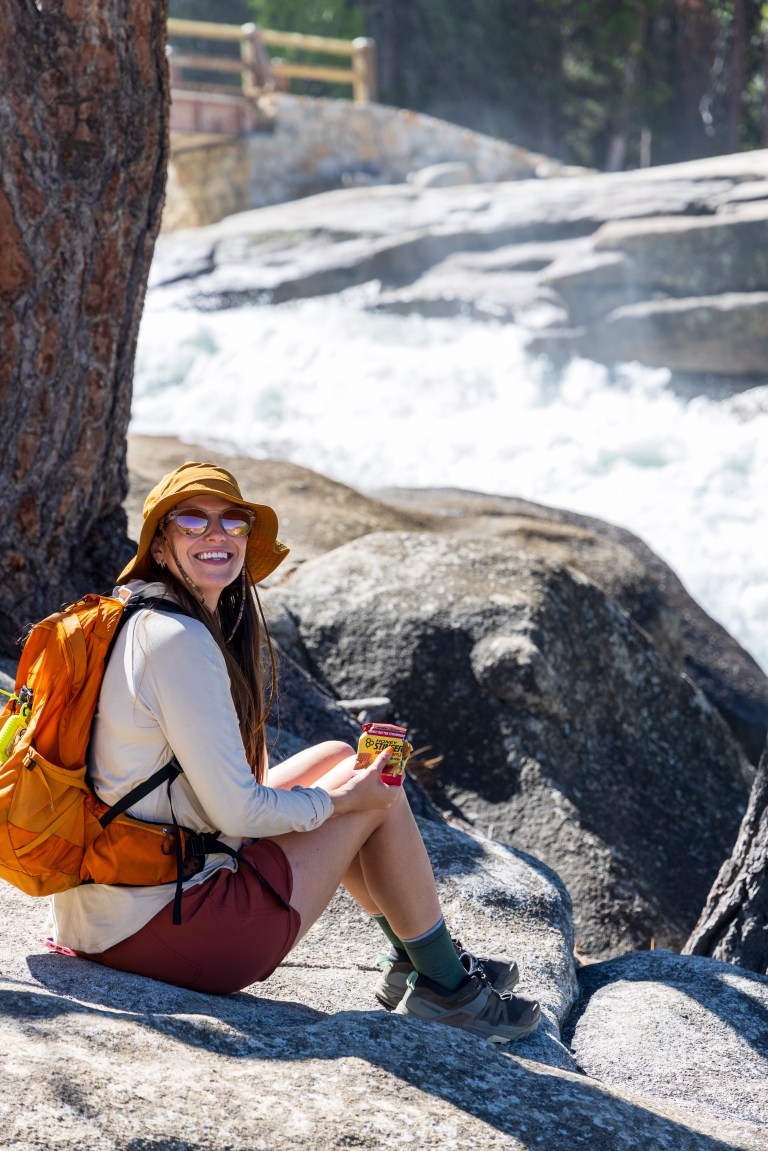
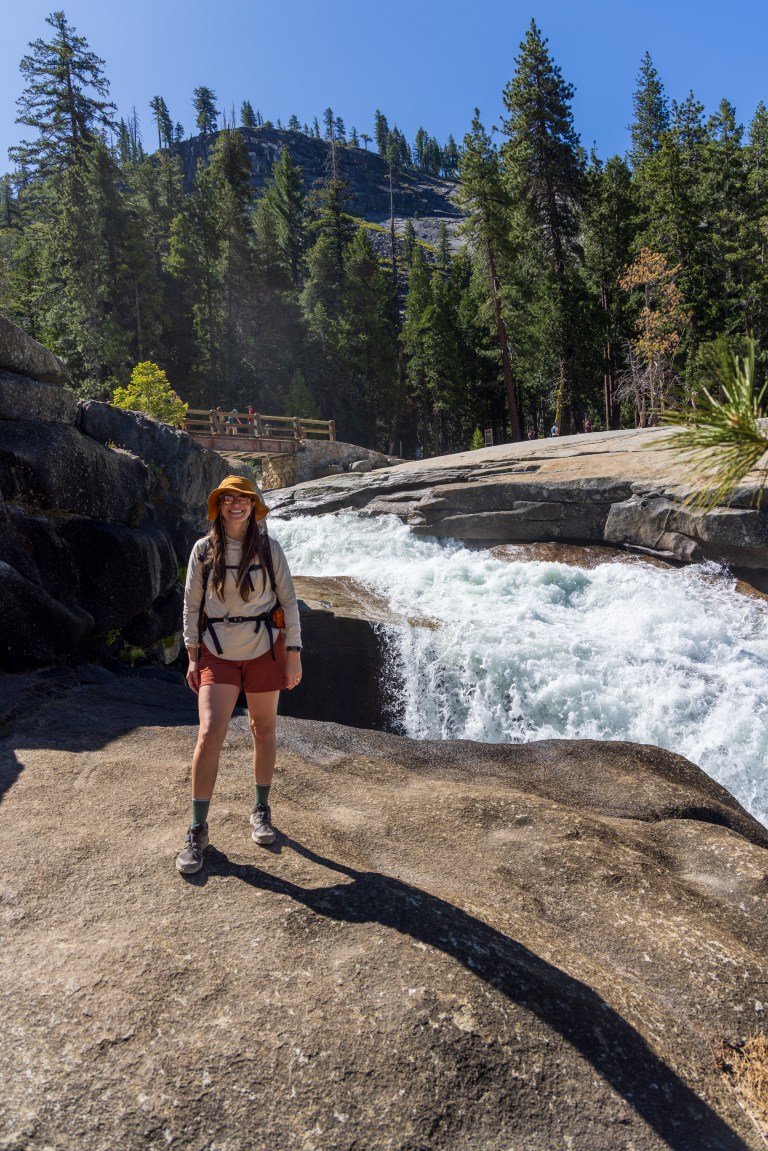
The Mist trail is the most popular hike in the Yosemite National Park, but for good reason. This was arguably our favorite hike until we got back to the trailhead later in the day. This trail can get extremely crowded at the lower sections. We suggest starting early in the morning. If you have Half Dome permits, this is the start of the trail to Half Dome. Taking the John Muir trail down is highly recommend and provides some great photo spots with Liberty Dome and Nevada Falls. This trail is steep. Please make sure you have enough water and good footwear. The mist trail can get quite slippery under certain conditions.
If you only have time for one hike in Yosemite, this is the hike to do! Parking can fill up quick so we suggest having a plan or use the shuttle. We hiked from our campsite at Upper Pines Campground for a total of 7.9 miles round trip.
Quick Stats
Length:
6.4 miles
Route Type:
Out and back
Elevation Gain:
2,185 ft recorded
Vaulted Toilets:
Yes
Dog Friendly:
NO
Fee:
Yes (Park Entrance)
Difficulty:
Hard
Water:
Last water at Footbridge


Lower Yosemite Falls Trail
This is a very easy trail, most of it paved. Due to the easy access and great views of the falls, this trail gets crowded easily. Although there are signs saying not to get in the water or climb the boulders at the base of the waterfall, many people sill did so.
Quick Stats
Length:
1.2 miles
Route Type:
Loop
Elevation Gain:
59 ft recorded
Vaulted Toilets:
Yes
Dog Friendly:
Yes, on leash
Fee:
Yes (Park Entrance)
Difficulty:
Easy
Water:
Yes


Other Trails to Consider
We didn’t have time to do everything, but it just gives us another reason to return to Yosemite. These are some of the other trails on our list to do.
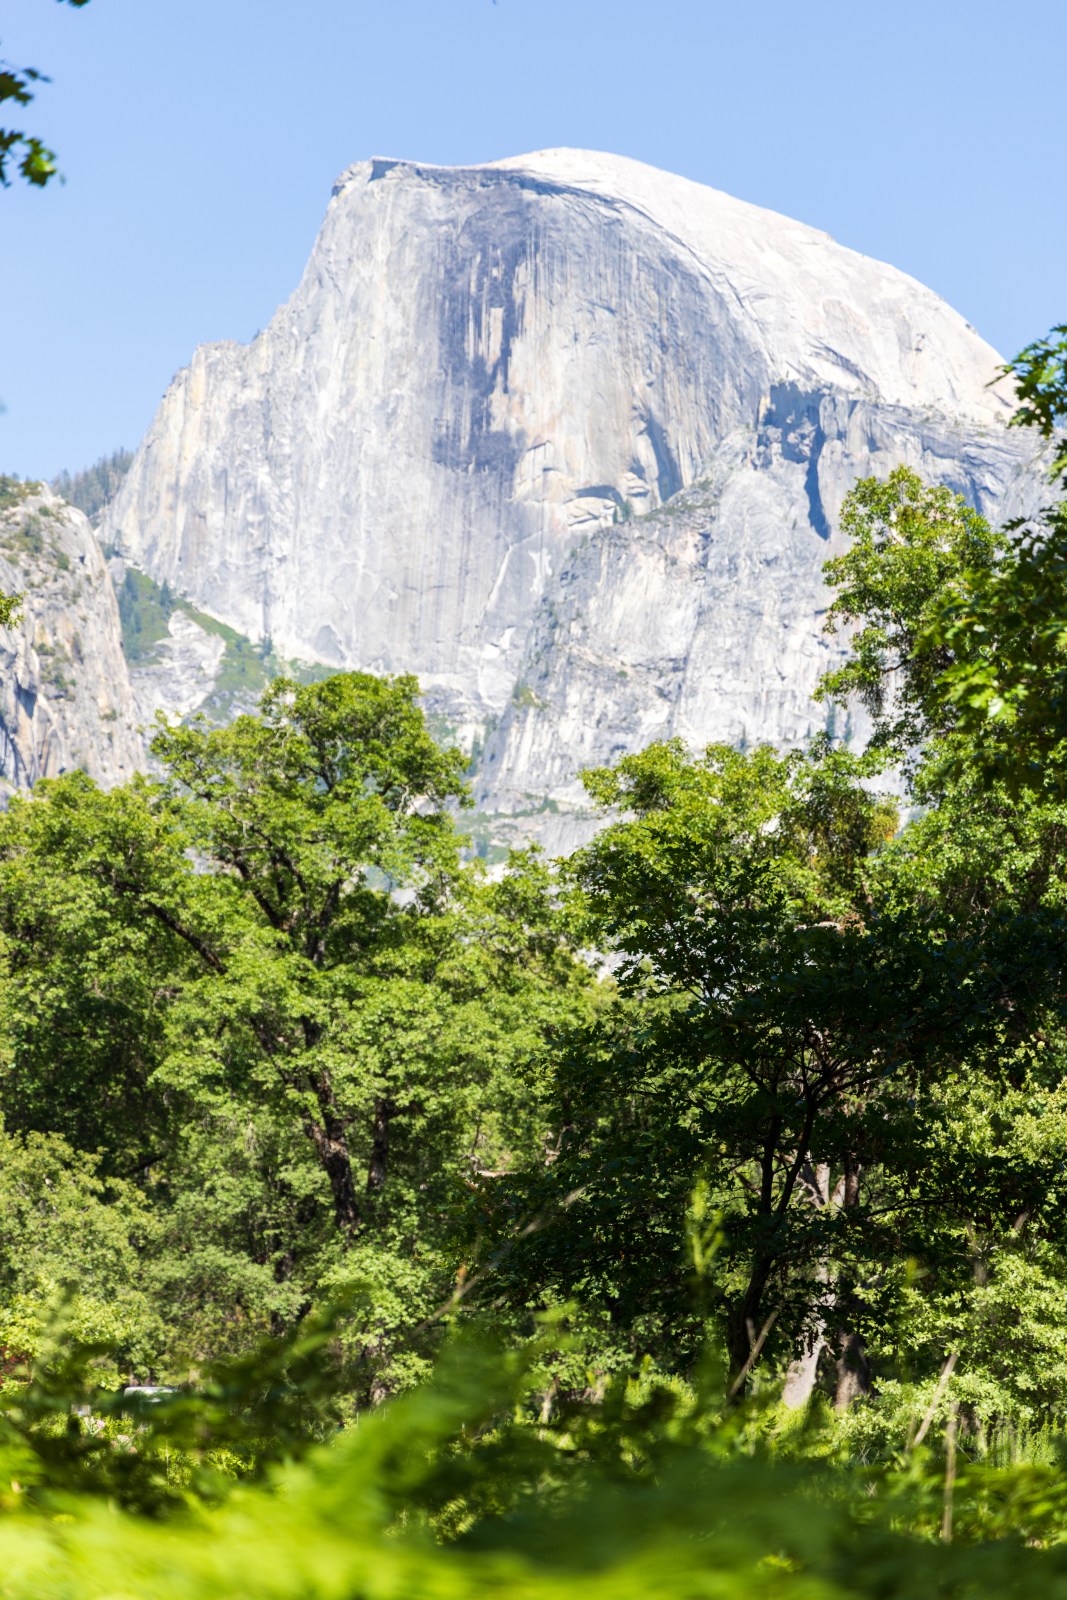
Why We Didn't Do Half Dome
First, there is no guarantee we would have secured permits the night before. We totally missed the 3 month prior window in March. Second, we didn’t try for permits. Our original plan was to try for permits and if we didn’t get them then we’d do the 13+ mile trail from Four Mile Trail to Mist Trail. However, after researching and thinking more, we realized we wanted more views of waterfalls and the valley versus the view from the top of Half Dome. With it being our first time at the park, we wanted to see more of the park instead of spending the full day doing half dome. We knew the 14 mile trail would take all day.
Lastly, and maybe most influential was the way we felt after doing Upper Yosemite Falls Trail. Our soreness was overwhelming at the time and we weren’t sure if we were physically up for the hike. Over the years and through others mistakes, we’ve learned it’s best not to push ourselves beyond our limits in wilderness, remote, or naturally dangerous areas.
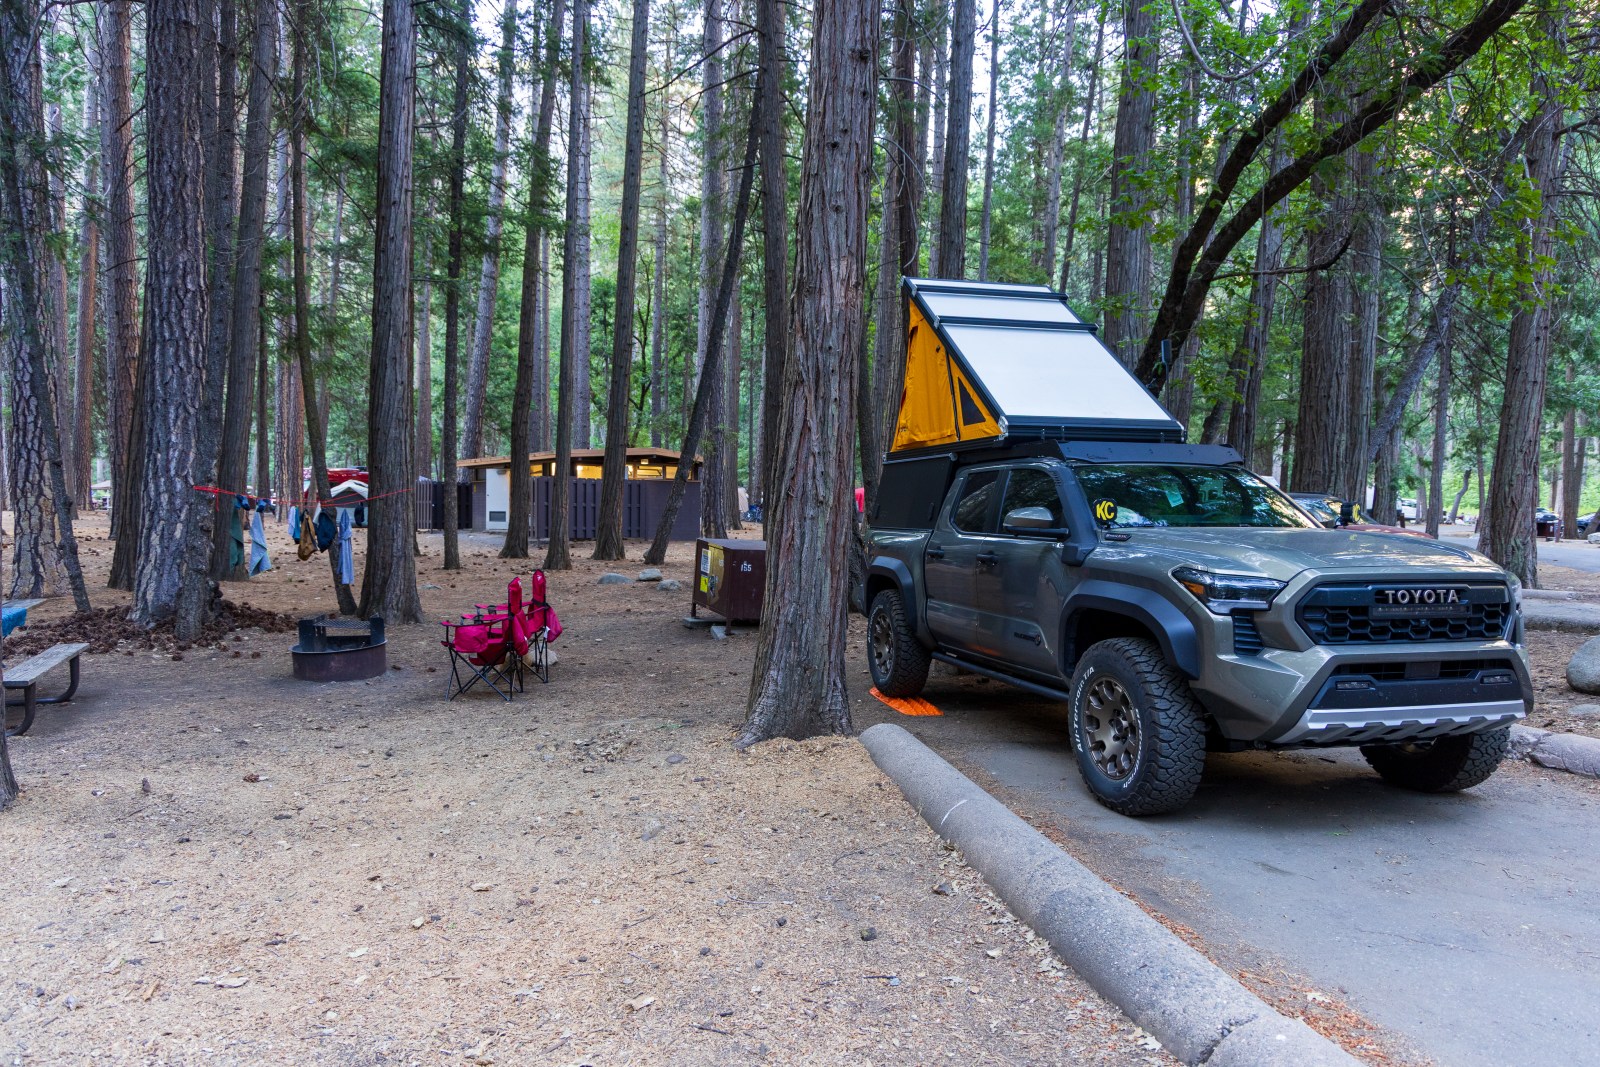
Lessons Learned Camping in Yosemite National Park
When we started planning our visit, we knew we wanted to camp in the park. Our decision was influenced by the fact that it’s cheaper to camp than stay in a lodge and being at a campground gives you the advantage of being closer to trailheads and locations compared to anyone driving into the park. By staying inside the park we were able to cut out a lot of extra travel time each day. Additionally, during seasonal timed entry camping permits get you access to the park and you do not have to also get timed entry permits.
We read that campsites in Yosemite Valley sell out very fast, and we can confirm that is correct. It’s mind boggling how fast the sites go. We did not get a site in Yosemite Valley at first and it wasn’t until the day before we got to the park that we secured a multi-night campsite at Upper Pines Campground.
Camping in Yosemite Valley was extremely convenient for what we wanted to do and the showers at Curry Village were not far away. However, we would be doing a disservice by not being transparent about what we didn’t like. In the summer the campgrounds are packed full and loud. Sites are close to each other with minimal privacy. Additionally, we didn’t see much rule enforcement from rangers or volunteers and many people had fires outside of allowed time and many violate the generator rules too. Lastly, cell phone service was very weak.
Tips and Advice for Getting Yosemite Valley Campsites
Based off our experience:
Research ahead of time! Campsites release at specific dates, months in advance and they go extremely quick. We had a list of sites we wanted that were compatible with our roof top tent set up. (some sites don’t allow RTT camping because they’re too small or they’re walk in sites that you park far from).
Unfortunately, during the panic of not getting the sites we wanted we just took one at Wawona in Yosemite without reading, and it did not fit us. The campground ranger was a hero and helped us out because it was just one night. We were prepared to camp outside the park that night.
Use multiple devices when trying to get a campsite in Yosemite Valley during peak season. We each have our own recreation.gov account and we should have been on separate computers and phones, but only did our phones
Set up notifications from recreation.gov!!! You can set alerts for specific dates or windows of dates in case someone cancels at a campground that you’re interested in. This is how we got 3 nights at Upper Pines Campground in Yosemite Valley.
- TIP: when you get a notification, immediately hit add to cart. From there you have 15 minutes to make a decision if you get the campsite before others. You can even modify the dates before checking out. This is how we got one night at North Pines campground before landing our longer stay at Upper Pines Campground
- You have to be fast on the notification!
- More sites tend to open up from cancellations the closer to your desired date. We had a lot of cancellation notifications the 2 to 1 days before our stays.

Photography Spots in Yosemite
Additional Information
If you’re interested in the gear we’re using and wearing check out our favorite gear recommendations that we’ve tested and used, including on our trip to Yosemite.
For more insights on how we plan trips and what to consider check out our blog post about the Top 6 Things you should consider.
New to camping? Check out our Beginner’s Guide to Camping & Gear.


