The Grand Canyon Hermit
Hi there! If you’re here, then you’re probably well aware of the Grand Canyon, it’s majestic geological beauty, and of course it’s vast size. We won’t elaborate on the incredible geological story of the canyon and the power of water and wind erosion. However, there is no better way to truly understand the pure beauty, size, and magnificence of the Grand Canyon than to go below the rim. And in our opinion, the best perspective is at the Colorado River, still carving its way through.
We’ve hiked rim to rim in one day and you can learn all about that here. But for our second time below the rim, we wanted to do a different trail and we wanted to spend the night. We had heard of Hermit Trail all the way to the west end of Grand Canyon Village on the south rim, but we had never left Hermit’s rest before. We tried researching what to expect and found some helpful resources but had to piece together using different blogs or videos. Our goal is for this post to be a comprehensive and detailed post on what to expect on Hermit Trail and at Hermit Creek Campground (BM7) in Grand Canyon National Park. We hiked down Hermit Trail on March 28th and returned on March 30th.
But Where is the Hermit?
Hermit trail got it’s name from an old resident of the Grand Canyon that lived alone. Louis D. Boucher, the “hermit” of Hermit Creek basin, lived in this area for 20 years. Boucher built the Boucher Trail (west of the Hermit Trail) and seasonal residences at Dripping Springs and near Boucher Creek. Though socially active in the South Rim community, residents labeled Boucher a hermit because he lived alone. – NPS
Table of Contents
Some of the links below may contain affiliate links where we get a very small commission at absolutely no extra cost to you. Thank you for supporting our work!
Planning for Grand Canyon Backcountry
Hiking in the Grand Canyon backcountry wilderness is inherently dangerous and should always be approached with caution, preparation, and understanding. Whether you’re below the rim or away from the main villages, resources can be scarce and help can be limited. The top of the south rim is about 6,500 feet above sea level and the Colorado River is 5,280 vertical feet (1 mile) below. Therefore, trails from the rim to river are long distance wise with a mile of elevation loss or gain depending on the direction.
Due to the difficulty of the trail’s conditions, the lack of reliable water, and the overall steepness of trail, It is highly recommend to not attempt rim to river in one day on Hermit Trail.
To camp below the rim of the Grand Canyon, a backcountry permit is required. If no one in your group has backpack camped before, we do not suggest this being your first trail to ever do so on. Additionally, if no one in your group is an extensive desert hiker, then we cannot stress enough how important research and training is.
While planning for any camping trip, you should always consider the weather conditions along with food and water supply. In the Grand Canyon on Hermit Trail where there is no cell phone service, water faucets, or food stores, it’s even more critical. If you just want to see what gear we brought, check out our gear post here.
Leave No Trace
The Grand Canyon is one of our favorite places to visit! Below the rim feels so far away from the rest of the developed world. Although humans have made their presence felt, it still feels very much wild, free, and natural. It’s absolutely critical that we, and future visitors, continue to emphasize practicing the Leave No Trace Principles when visiting. Let’s all work together to keep the Grand Canyon clean, special, and thriving ecosystem. Pack it in and pack it out!
Permits
Grand Canyon National Park uses a permit system through recreation.gov to manage overnight camping in the backcountry. They explain the process in good detail here. An early access lottery is used as well as general access. We secured our March permits using the early access lottery. We entered the lottery between October 16 and November 1 and were notified on November 2 that we won an early access spot. On November 4th we were allowed to select the group size, campground(s) and dates we wanted as long as they were still available.
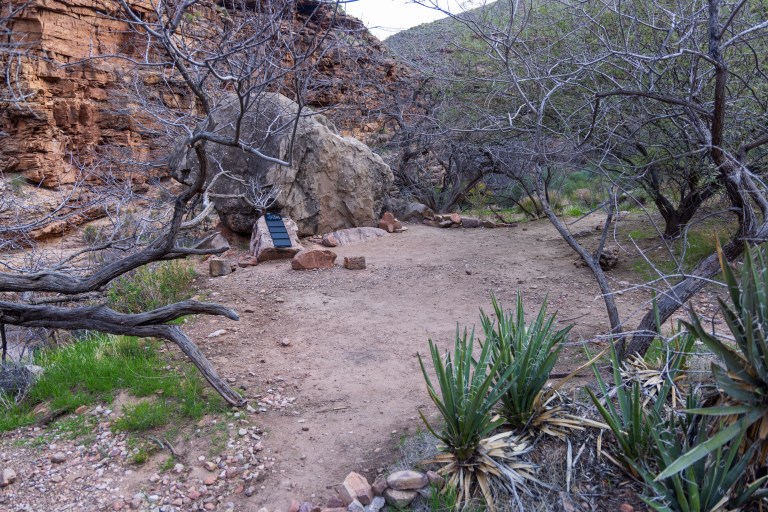
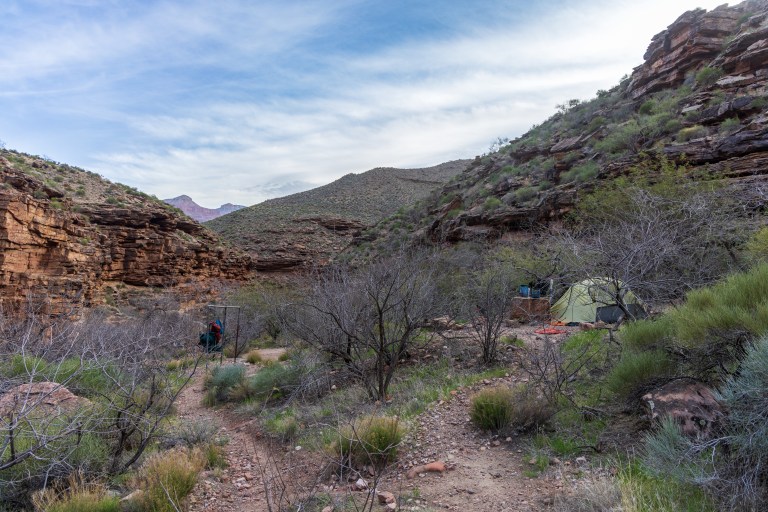
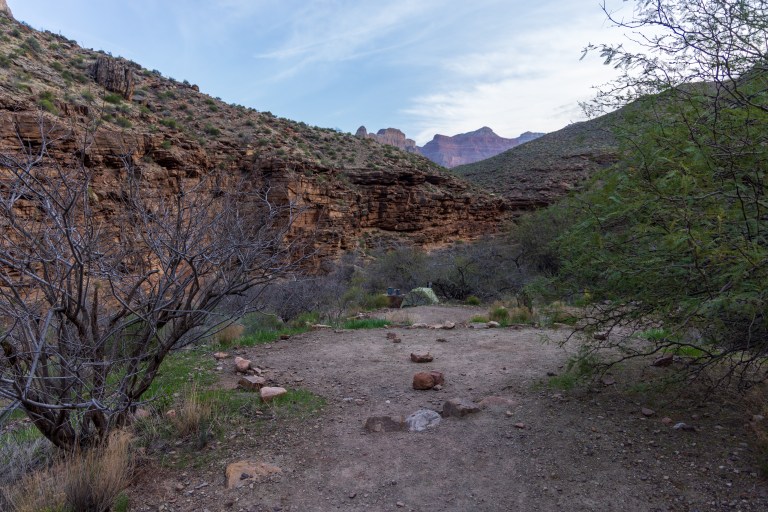
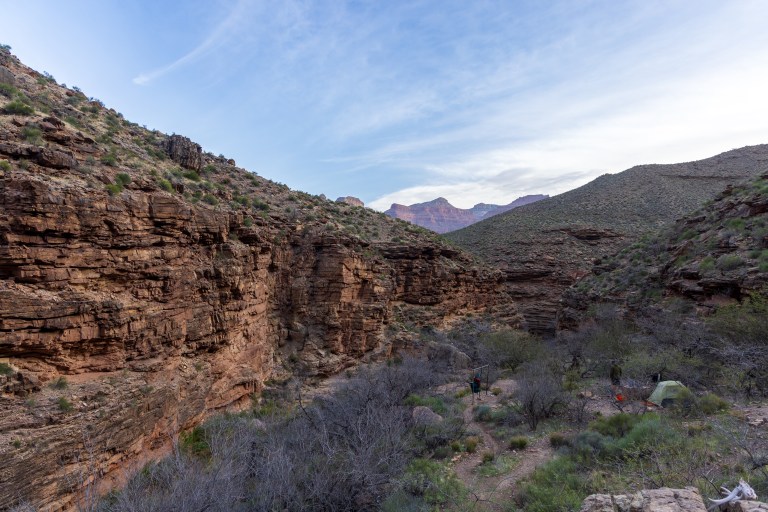
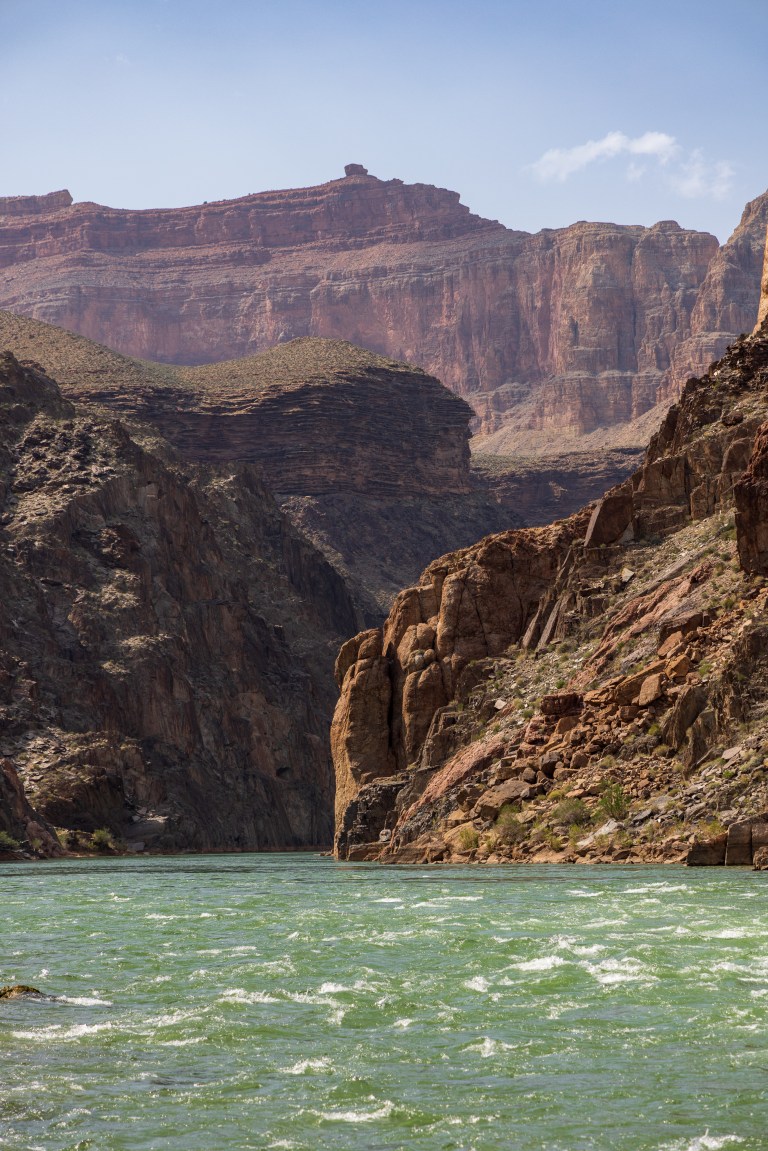
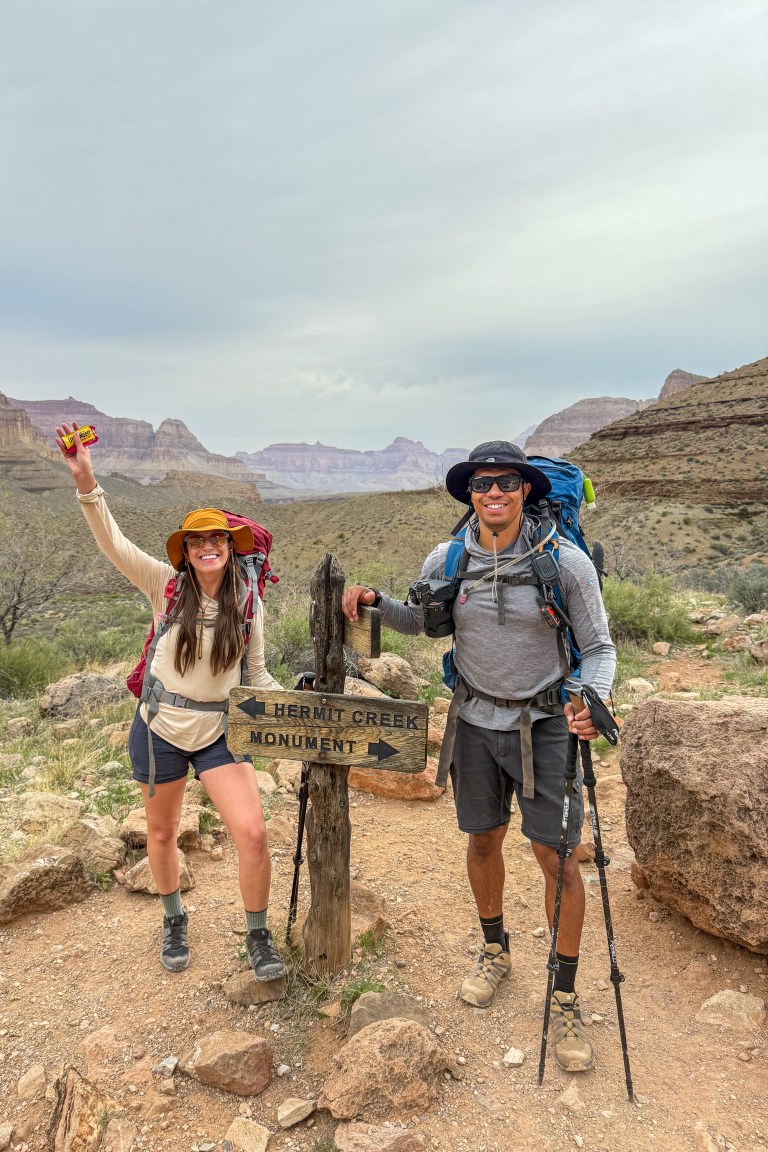
We originally thought we wanted to camp at Hermit Rapids on the beach. However, we learned that through recreation.gov you cannot have your first night or your last night at Hermit Rapids camp. We later learned that you can call the Grand Canyon Backcountry Information Office to request to start or end at the rapids, however you may have to prove you’re experience in the Grand Canyon and or with backpacking. We’re actually very happy we didn’t camp there. It was loud and very exposed. We ended up picking two nights at Hermit Creek Campground and it was perfect for us.
Our Crew
We (Owen & Lauren) have backpack camped before and done rim to rim, but we had not backpacked in the Grand Canyon. Owen has done Havasupai Falls. In our group was Owen’s cousin (Gunnar) who had never backpacked before and had never hiked below the rim, and his cousin’s boyfriend (Pat) who has backpacked before but had never been to the Grand Canyon before.
Experience Required
The Grand Canyon National Park says on their website that Hermit Trail is for experienced desert hikers only, and we would have to agree. The trail is rated as extremely difficult or double black diamond depending on mapping platform you’re using. To be prepared, you should have experience hiking steep and rugged trails, scrambling over rocks, hiking long distances in exposed conditions, and have experience carrying a lot of water or going long distances without refilling water.
Trail Conditions, Weather, Water, and Food
Hermit trail is not regularly maintained. New rock slides are not moved, the trail just goes through them. Before your trip, we highly encourage calling the Grand Canyon Backcountry Information Office to get any updates on trail conditions, especially if it has been snowing or raining a lot in the weeks or days prior.
Weather
It’s extremely important to know the weather forecast for your trip to ensure you have the right gear and apparel. However, it’s challenging to find an exact forecast. The top of the Grand Canyon in and along the rim has a drastic temperature difference from the bottom of the Grand Canyon and the Colorado river. A general rule of thumb we learned was that for about every 1,000 feet in elevation drop from the rim, the temperature increases by 5° F. This is not an exact science, but more of a general observation that can be used in estimating temperature.
We ended using the NOAA National Weather Service forecast for Phantom Ranch as a base. Phantom Ranch is at the bottom of the Grand Canyon and about 1,000 feet lower than Hermit Creek Campground with more sun and wind exposure. For our trip, the forecast was calling for windy days with strong gust at times. On the NWS website, you can select an exact location using the map feature seen in the screenshot below – it’s much easier on the desktop.
Actual Weather
There was some uncertainty going into our trip about how much the wind would impact us. Above the rim it was breezy the morning we started, adding some extra windchill. We were hoping the position of the Hermit Creek campground within the canyon would provide a natural shield from the wind. Generally, the the more open spaces within the canyon, like a the river, are windier. Luckily, we were protected from the wind and gusts would come through, but nothing consistent. Based on the Phantom Ranch forecast we were expecting highs in low to mid 70s and lows in the upper 40s to low 50s. We brought a digital thermometer to get an accurate reading of the temps at camp. We had a spot against the canyon wall with a ledge overhanging us. It helped provide more wind protection, extra shade, and retained some warmth.
Water
All creek and spring fed water below the rim of the Grand Canyon should be filtered. Along Hermit trail there are some seasonal springs that are very inconsistent. We do not suggest relying on these potential springs for water. At about 2.5 miles from the top is Santa Maria spring and rest house. The spring water here drips into a trough. In our opinion, the water didn’t look appealing because it’s mostly sitting, but during our trip the trough was full. However, with a proper water filter, it’s probably fine to drink. If we were in need of water, we’d drink from it.
Once at Hermit Creek Campground, there are multiple spots to get to the creek for water collection. The creek is perennial and will always be available. During our trip the water was excellent! Hermit Creek was cool but not cold and very clear with a great taste. We used the UltraPress from Grayl for quick drinking water. The bottles were a great addition and we’re very happy we brought them.
Additionally, we brought the Peak Gravity Water Filter System from LifeStraw to collect 3 liters at once. To help keep as much purified water at our camp as possible, we brought a HydraPak Seeker 2L Collapsable Water Container. We’d fill the 2L container with the LifeStraw Peak Gravity system to store and then fill again from the creek. On our way out, we weren’t sure how much water we’d drink and aired on the side of caution and preparation so we brought the 2L of water in addition to the 3L reservoirs in our hiking packs.
Food
For this trip we brought freeze dried meals from Mountain House. We planned out each meal and brought an extra meal just in case. We used our JetBoils for heating up water. Additionally, we brought snacks for the hikes in and out as well as snacks to enjoy at camp. We’re big fans of Clif Bars, Honey Stinger waffles, Honey Stinger energy gummies, and Honey Stinger energy gels.
It’s very important to keep your food protected at the Grand Canyon. In the backcountry mice, squirrels, and birds will try to get into your food if not protected. We brought RatSacks, one large one for all our food and a small one for trash. The sacks are made out of a wire mesh designed to keep animals out. They’re lightweight and rolled up well to fit in our hiking bags.
Hike Hermit Trail to Hermit Creek
"It's Brutal Out Here"
Starting from the parking lot you can’t see your final destination. The trail initially has has a southern direction before it starts to wrap around and into Hermit Creek gorge. Within the first 2.5 miles, the trail loses 2,000 vertical feet. The switchbacks that begin immediately from the start feel relentless. There is no time to settle in, you’re immediately descending quickly.
Side Note: Hermit Trail was originally owned and operated by the Santa Fe Railroad. They built a luxury trail down to the luxury camp they established by Hermit Creek. The trail was paved stone by stone and there was even a tramway from the rim. Much more can be read on the Grand Canyon’s website. It’s super fascinating and it’s been nearly 100 years since the camp was last operated by the railroad.
Today, the paved stone has mostly eroded creating a very uneven stairs like feeling. There are large steps down that we definitely relied on our hiking poles to get us through balanced, and with less pressure on our knees and quads. This trail is tough on ankles and with heavy packs on, our calves were feeling fatigued too.
After the switchbacks there is a junction for Waldron Trail and basin followed shortly by a junction for Dripping Springs Trail. The signs are well marked; stay right to stay on Hermit Trail. Now the trail is heading north towards the Colorado River and Hermit Creek Campground. In this section of trail the elevation loss isn’t as drastic. At the 2.5 mile mark you’ll find the Santa Maria Spring and rest house. Scattered throughout the trail are large rock slides that have permanently altered the trail. In most cases the trail continues through the boulders with some light scrambling required. Again, hiking poles were very helpful for keeping our balance through the rocky sections with our heavy packs on our back.


Cathedral Stairs
By the time you reach the Cathedral Stairs, you’re about 5 miles into the hike with almost 3 more miles until the Hermit Creek campground. These switchbacks aren’t fun. Again the the rocks and human-made trail steps are large putting a lot of pressure on the quads, knees, and ankles as you step down. At this point we were fatigued, but in the distance we could see the toilets of the campground. We had some motivation and as much as we wanted to stop and take our packs off, we didn’t because we knew we shouldn’t stop.


Tonto Trail
At the end of the never ending switch backs is the junction with Tonto Trail. You’ll see a sign here pointing towards Monument Creek and another pointing towards Hermit Creek. Tonto Trail is an inter-canyon trail that heads east-west along the southern portion of the Grand Canyon. Take the trail west. From here it’s about 1.2 miles to the campground. It felt like way longer, hope was on the horizon but the early morning start, sun, and exhaustion were starting to get to us. We made it to camp just before 1pm after 5 hours and 30 minutes of hiking.


Hermit Creek Campground
Campground Details
Hermit Creek Campground has 5 campsites that can handle about 2 – 3 tents depending on size. There is one large group campsite closer to the toilets and it’s marked with a sign. In the middle of the campground is a pole structure for hanging bags out of reach of mice and squirrels. Right at the Tonto Trail west entrance to the campground is the composting toilet. There are two separate single toilet rooms. There is no toilet paper, remember to bring your own and only use toilet paper. The bathrooms were very clean but did not smell great.


Day One
On our first day we got to the campground and immediately started looking for a spot that we liked best. Since all the sites are first-come, first-serve we didn’t want to wait to establish our spot. Another group was passing through on Tonto Trail and posted up on the higher campsite under the overhang. We originally thought they were camping there but soon learned they were stopping through for water and to cool off. They let us set up a tent to mark our spot. After we had that established we started making our lunch! We filled our water from the creek and it felt extremely refreshing to have cool drinking water.
Later that afternoon after we had moved into our campsite and rested our bodies, we decided to explore up creek. From the campground you can follow the creek for a bit. There is no real trail but we didn’t find it too difficult to navigate. The scenery was beautiful and quite peaceful. It was just what we needed after a long and exhausting day of hiking.


Day Two
On the second day we slept in a little and took the morning slow. The day before was a long and strenuous day so it felt nice not to be rushed. After breakfast we set out to the Hermit Rapids of the Colorado River. We were told some route finding would be necessary, but if you just follow the canyon and creek, you’ll get to the rapids.
The canyon leading to the river was absolutely stunning! Behind every corner our jaws dropped and our camera shutters clicked. It was about 1.5 miles to the rapids. We were able to follow the trail most of the way. There are multiple creek crossings and some bushwacking is required. We used the rock cairns to help find our way. Overall, we didn’t find it too difficult. And, we got back much faster once we knew where we were going.


Hermit Rapids
As we got closer to the river we could hear the rapids. And finally, once there it was so loud and quite incredible. We spent the afternoon hanging out along the boulder strewn beach taking photos and soaking up the views. The feelings we had were kind of indescribable. In each direction the views were outstanding with the layers of distance canyon walls creating what felt like a movie set. The water was clear outside of the rapids and it was ironic how calm the river was before and after the rapids; like nothing ever happened. We brought our jetboil and some Mountain House meals for lunch.
Fun fact: The Hermit Rapids are created by the river narrowing due to the canyon walls, not an underwater boulder field like most rapids


Day Three
This was our departure day! Based on the weather forecast before our trip and the forecast we could get on our Garmin inReach Mini, we knew the morning would be cloudy. With that in mind, we wanted to take advantage of the cloud cover while we were lower in the canyon. This time, we knew the temperatures would actually get lower as we gained elevation out of the canyon. Additionally, we knew the clouds would wear off by afternoon. The night before we prepacked what we could and filled our waters.
After breakfast and packing everything up we started our hike out at 7:22 AM. On the way out we didn’t stop too much for photos. We wanted to keep our momentum and made great time. As expected, the last 2.5 miles to the top were the most brutal and really tested us mentally and physically. But, we made it, and after doing this trip we said we’d 100% do it again and stay even longer!


Our Gear List
To see everything we brought on the trip with links to the gear, check out our Grand Canyon Backpacking Gear list. For video content from our trip, check out our reels on Instagram.


